home
introduction
build
sva tests
links
latest updates
December 4
- Finishing off the gear shift -
Oh dear, we commence the 8th month of the build, and 140hrs completed. 20hrs per month doesn't quite match up with my original 'best possible' 60hrs per month...
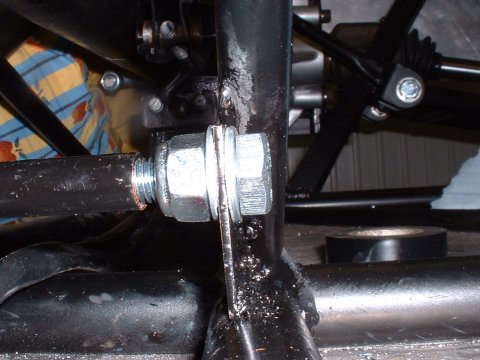
Well, I solved the friction problem by chopping 1 cm off each end of the T. With locknuts to hold the bolts firmly in the plates, I was then able to do them up to put just enough tension into the T to stop it being slack, whilst keeping it free enough to rotate on the threads.
I'm sure that's as clear as mud - here's a picture...
The rest of the day was spent making a(nother) bracket - this one is the stop for the cable itself. Once more, the serendipity fairy visited, and left me a convenent place to bolt the bracket to - the bracket that holds the centre bearing.
Unfortunately, luck ran out there a bit. Without having any easy way to measure the cable pull required to change gear, I chose to just guess, and mounted the cable 1/2 way between the pivot and the top of the tunnel, giving a leverage ratio of 3:1 at the point where the gear knob will be. My motivating concern was that I didn't want to have so much throw on the lever that it would hit some of the sticky out bits on the prop.
However, my guess turned out to be way too conservative - the throw on the lever was nice, being in total about 3" from front to back, but the action was very heavy, the lever was noticeably bending with the effort, and the throw at the tunnel top was only 55mm of a safe 90mm.
(For the good of future generations, the cable pull required to effect a gear change is about 13mm)
So, I unbolted the cable stop bracket, rotated it down a little so that the cable would arrive at the lever a bit lower, and drilled more holes that I didn't want to to secure it.
Then I decided to sleeve the bottom part of the gear shift lever, for 2 reasons. 1 - to add some stiffness, and 2 - to reinforce the 6mm hole that I'd drilled in it previously to attach the cable to.
Of course, the 5/8" x 16 gauge tubing I had to hand wouldn't quite fit over the the 1/2" tubing of the gear stick, so I had to open it up along its length with an angle grinder. During this process I discovered that red hot sparks of steel will set fire to clothing if you make enough of them and stand directly in their path.
After I'd put myself out, I bashed the sleeve over the gear shift lever and welded it in place.
A few more holes later, and Eureka! - a working gear change. The action has an acceptable weight, the lever doesn't hit the prop at either end of its travel, it doesn't seem to flex, and the throw at my hand is now about 5.5"

December 5
- Fitting the throttle cable and pedal -
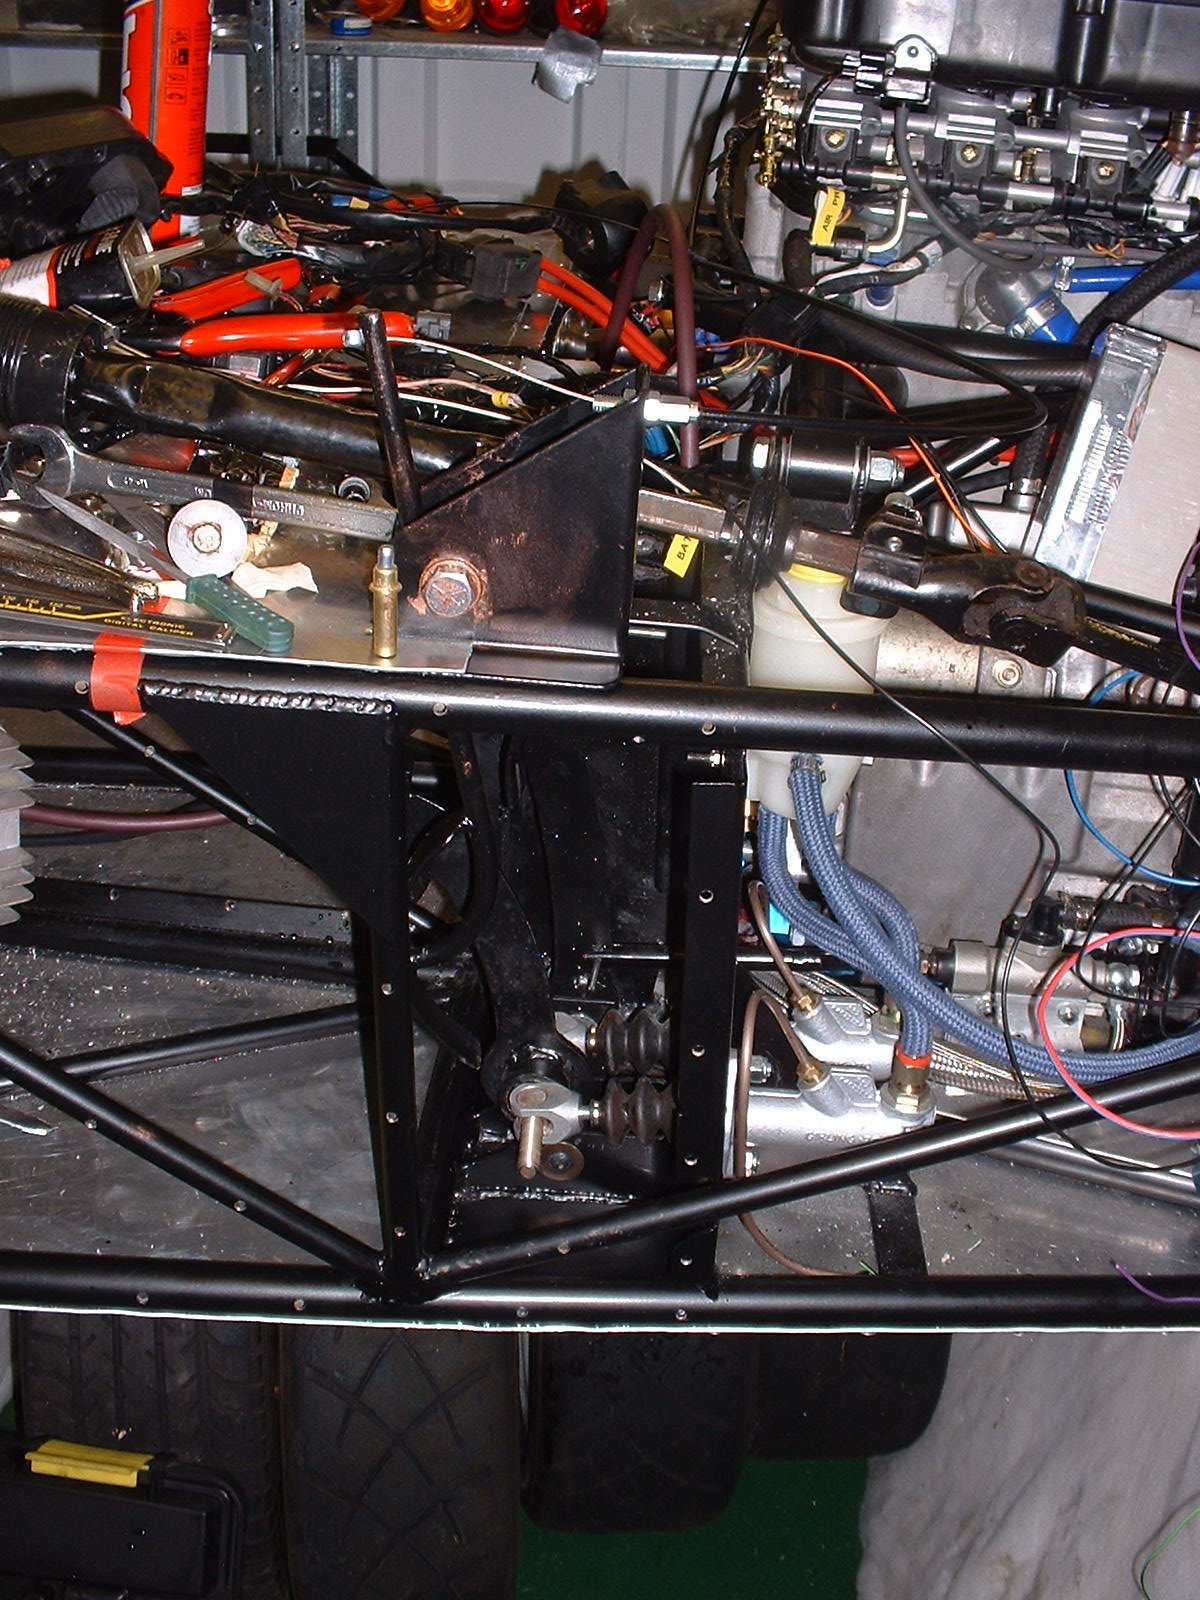
Today's job was to get the throttle cable and pedal fitted. I've putting this off for some time; the throttle pedal has to end up in the right place so that I can heel and toe, but it's also got to have enough travel on it to fully actuate the throttle on the engine. I had visions of rivnuts in round tubes, and slots and all sorts of complications.
So, In the end I just decided to rivet it in a resonable looking place - if it doesn't work out I'll drill out the rivets, and try again.
As for the cable - I was surprised by just how little cable the pedal can pull, and I ended up having to mount it pretty near the top of the stalk (for want of a better word).
It took three goes to get a good smooth cable action. The first effort used some tubes bent through 90° off the original bike throttle cable. This gave a good short route, but the cable was binding inside the tube. In the next effort, I discarded the tubes, and used a longer cable run - but it was a still a bit stiff. I squirted GT85 ( a teflon containing aerosol lubricant) down the cable. and that made it worse!
So I threw the cables away, which were pretty unsophisticated ones I'd bought from Vehicle Wiring Products, and returned to my roots - I fitted a mountain bike teflon lined brake cable instead. The inner now runs as smooth as silk... I guess those Shimano boys really know their stuff.
- Making a bit more room for my feet -
Having fitted the throttle pedal, it was now clear that there wasn't enough clearance between it and the brake pedal. So I heated up the brake pedal with a blow torch and bent it over by a bit. I know it looks a bit wonky, but now they're spaced so that I can press either pedal independantly, or both together if I choose - which is much better than having to always press both at once 
December 6-7
- Getting ready for the first run -
Not much to report for the beginning part of the week - I spent a few hours tightening things, greasing things, tidying things, putting diff oil in, brake fluid in, that sort of thing.
- a BIT flexible -
A bit of a fly in the ointment - now that there is fluid in the system, it's become obvious that the bracket/plate arrangement I'd made to support the clutch master cylinder is hopelessly flexible - you push the pedal, and the whole master cylinder moves, rather than just the bit in the middle. On top of that, there is a vertical offset between where the connecting rod is connected to the pedal and where it connects to the master cylinder. If the master cylinder is clamped own down to stop the mounting plate flexing, the rod takes the next easiest course of action, which is to try and increase the vertical offset. Vertical forces, and equal and opposite reactions and all that. Back to the drawing board...
December 8
- Leaky bits -
Silly stupid brakes. I left them pressurized overnight (via a complicated set of clamps and levers) and was greeted this evening by lots of little leaks. Most were trivial (the 1/8th NPT fittings on the front brakes weeping a bit as I was afraid to overtighten them; one of the rear brake hoses also weeping a bit because I'd not fitted the end properly) and these were easily fixed, and the reason after all that I'd done the pressure test.
The stupid leaking banjos though filled me with the sinking feeling of doom - when I'd filed off the top of the calipers to allow the banjos to fit, I'd obviously not got the surface flat enough, as fluid was dripping out of both sides. Not a lot mind, as there was still pressure in the system, but enough to need fixing...
- a BIT flexible -
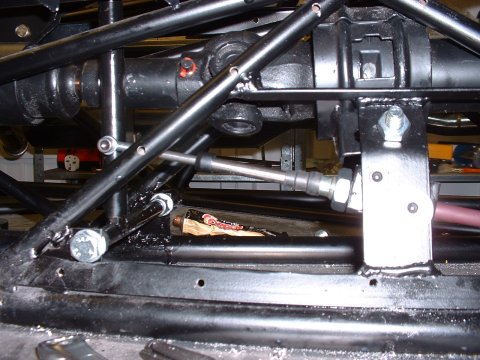
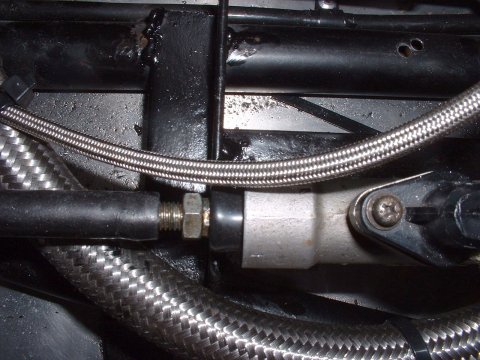
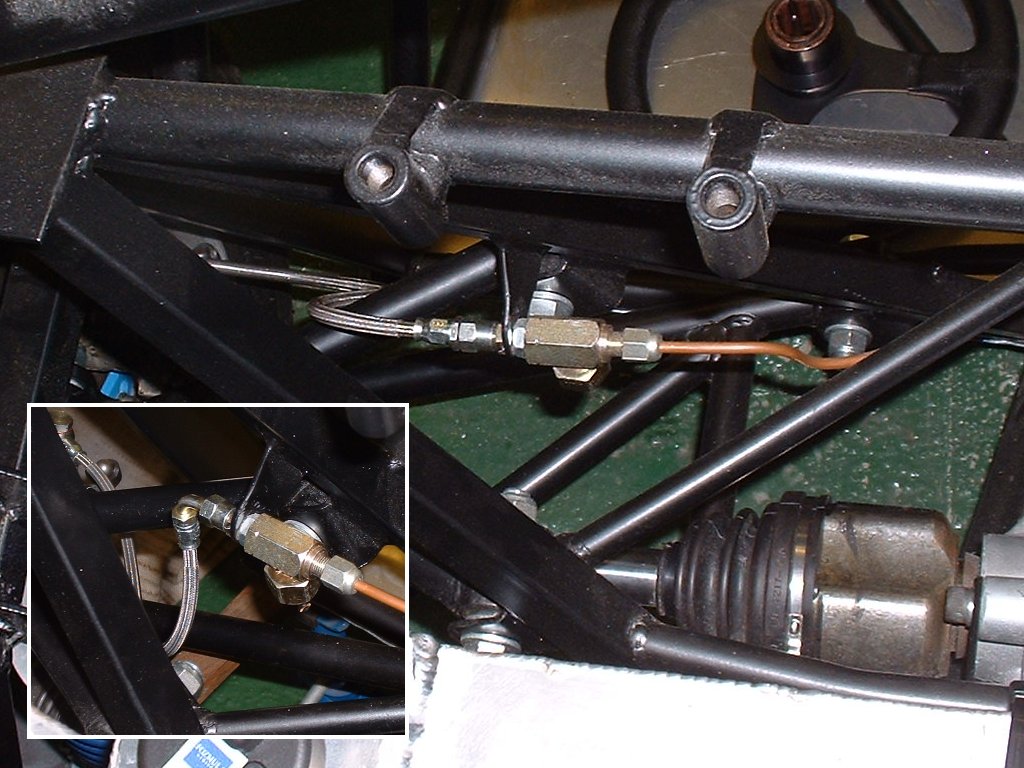
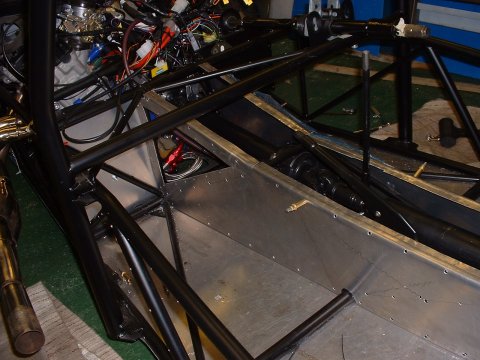
OK - no messing about. I welded up some 3/4" steel angle into a T shape, and welded it onto the chassis, as a bracket for the clutch master cylinder. That's not going anywhere. It's lower too, to minimise the vertical offset.
As for the connecting rod - no messing about trying to use the bike original fittings. I took all those off and welded a nut onto the end of the connecting rod, which now just screws onto the end of the threaded actuator rod that goes into the master cylinder. Now there's no way that vertical forces can play their evil game.
With a bit of imagination, you can see the T and the connecting rod/threaded actuator in this picture
A quick run of the engine, and I find that I can, in fact, use the clutch to change gear. Yay!
December 10
- Leaky bits -
Well, in the end it didn't take that long to fix the brakes. I taped some emery (Emery?) paper to a 1" scrap of aluminium tube, and rubbed until I'd got the caliper surface flat. The N/S caliper still has a bit of an imperfection in it, but it's right on the edge of where the banjo sits, so it might be OK.
December 11
- Leaky bits -
Yay! O/S caliper seems fine - the N/S has a very slight seep, so I guess that imperfection does count. It's not enough to stop a test run of the car over the weekend, but I'll need to address it later.
- Batten down the hatches -
The final major job before a quick spin round the block is to get the electrics all fixed down and out of the way of any rotating bits! For some reason this took ages! All went OK, except that the CB Tech dash started misbehaving itself - despite early success, it's fan control line went haywire, so that the (radiator) fan is permanently on, and it started to do some other weird stuff too. I must have given it a voltage spike or something - I'll get Mark to fix it!
- I'll be needing that... -
Hardly worthy of mention, except that it took an hour: I bolted the propshaft into place at both ends - getting the reverse gear in place was a very very fiddley job.
December 12
- First test run -
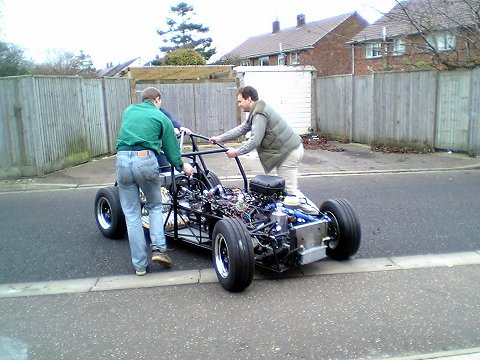
Well, the day has arrived for the maiden voyage. Cam7ers Ambrose, DH2 and William came over, along with Ambrose's brother, Dick. Between them they helped me lower the car to the floor, push it out of the garage, and then they stood back to watch me drive it off.
The pictures are courtesy of Ambrose
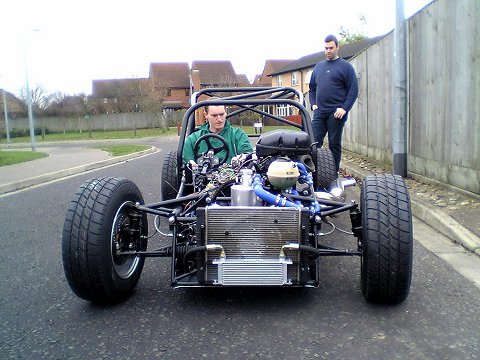
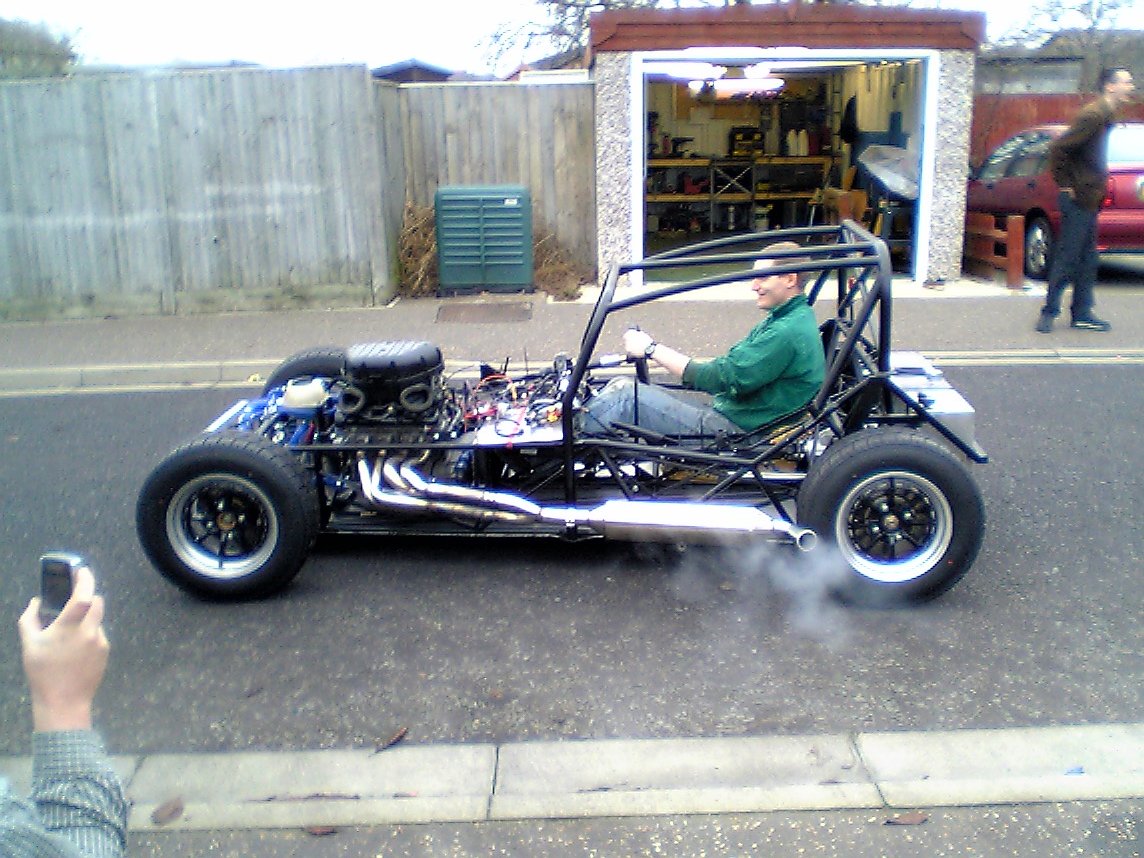
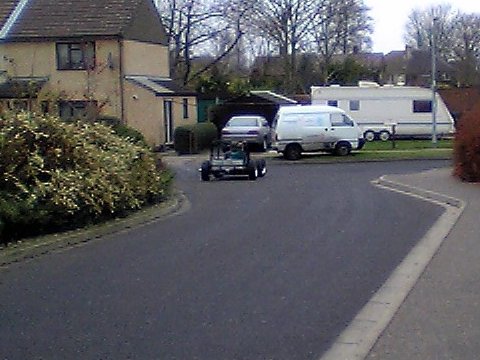
It was observed by those same, seemingly kind people that had helped me get the car on the ground, that (and I shall paraphrase here, for the benefit of the potential sensitivities of the reader) that I couldn't drive the car for toffee - the clutch was a little short on travel, and I stalled it once or twice trying to get moving. In the end, the only way I managed to get it moving was by putting enough revs on the engine to overwhelm the tyres. (The picture that captures the moment of this decision is #3, which if you click on it shows a bigger version in which you can just make out some sort of crazy smile on my face ) Which was great until the end of the road, where there is a T-junction (#4), and there was no way the same trick would work without me spinning round in a circle.
Eventually, I managed to slip the clutch enough to drive off, and drive off I did - all round the block, and then again, and then all round the other block, and then - another junction. Lots more stalling, and I finally made it back the garage. The wall of which I managed to bash with the exhaust.
There is low res video of all this, taken by Ambrose, but it's in an obscure format, and mostly just shows me stalling, so I shan't be posting it...
So - what went wrong? Well, the clutch was unusable. There was a small coolant leak. The rear N/S brake was binding (which probably didn't help the stalling fiasco) and the N/S rear damper was much too stiff compared to the O/S, despite both being on the same level of adjustment
- After the first test run -
To investigate the stiff damper, I followed Mr DH2's advice and swapped the N/S and O/S units, to see if it was the damper or something else causing the difficulty. Mystery of mysteries, both sides were now the same. Problem fixed - next
Well no wonder I couldn't control the clutch. Full travel on the master cylinder is ~13mm. When I actually ran the engine with the car on axle stands, I found that all its useful work was over in the first 5mm of travel - so my pedal ratio was out by a factor of nearly 3! To get a usable clutch, I'll need to drop the connecting rod down to as low as I can. Which is what Ian originally said - I just didn't believe him until now...
Now, to look at that rubbing brake. It turns out that the ouside edge of the disc is rubbing on the inside edge of the caliper. Although I'd drilled the mounting holes as close to where they needed to be as I could, this put them very, very close to the original holes for the Sierra calipers in the adpator plate, this tuens out to have not been quite close enough - there's about 0.75mm between them, and there needs to be 0.25mm. I can't drill to that accuracy, so I have 4 choices:
- Enlarge the hole sideways
- Get a new undrilled adaptor plate from Ian
- File down the inside edge of the caliper
- File down the outside edge of the disc
December 18
- Fixing the brakes -
IanG suggested that I phone Classic Conversions about the adaptor plates; they told me that they only make them up every 3 months, so I'd have to wait before I could hold of an undrilled one. So, I decided today that I'd have to grind down the disc to fit. This turned out to be pretty easy in the end - car up on axle stands, engine running, first gear engaged and the angle grinder doing its thing.
Whilst I was in the area, I filed, sanded and polished the N/S caliper body to stop the banjo leaking, but I couldn't test it as I don't have any DOT4 brake fluid left.
- Fixing the travel on the clutch -
After an abortive attempt to modify the existing rod to allow me to drop its pivot point, I made up another rod, and dropped the pivot point down to 2mm above the main pedal pivot. This is just about as low as it's possible to get, and the master cylinder travel is now 7mm. It's impossible to tell if that's good enough without another test run.
December 19
- More fettling -
Quiet day today - bled the brakes and gave them a sustained pressure test. No leaks - yay! Then I found the coolant leak, and tightened up the offending clip (it seems that you can keep doing these things up forever, as I've already tightened every one, cold and hot, to a perfectly reasonable degree already...
Finally, I spent a little while making up a trial bracket to mount the speedo sensor on, and checking that it can read the little magnets I want to use. I'm a bit confused by the readings though. I used a Yellow Box that I bought second hand off a BEC'er, Graeme Stevens (Thanks, Graeme!), to test the speedo. Its 100Hz test signal gives a speed of 45mph. I calculated that in first gear (2.687:1) with the 3.21:1 diff, with the 185/70R13 tyres (1.851m circumference), and not forgetting the 1.553:1 primary reducer gear, if I used 3 magnets on the prop, the speedo would overread by 4% - which I'll be easily able to dial out (so to speak) with the Yellow Box
However, using magnets, the speedo gave a reading of 13.5mph at 4000rpm in 1st when calculation indicates that I should be seeing 21mph. This isn't even a sensible ratio, so I'm a bit stumped. Perhaps one of the magnets is in the other sense (North to South) than the others, and it's confusing the speedo sensor. Or it's not even seeing one of the magnets at all - that would give the correct ratio.
Well, I'm glad I wrote this up - I thank you, cardboard audience, for your help.
December 20
- More fettling -
Good news on the magnets - one of them was in the opposite sense to the others, so I inverted it. Now the speedo reads 21mph at 4000rpm in 1st - phew. Hope it wasn't a one-off, as I've Araldited them in place...
December 29
- Pedal box cover -
Spent a couple of hours making up the cover for the front part of the pedal box, where it's not covered by the under-scuttle panel. I can't remember why I chose not to make the under-scuttle panel bit enough to cover the pedals, but I'm glad I didn't - it's quite a complicated fit. The new panel's not quite right though, so I'll use it as a template to make a better one tomorrow.

- Wiring in the Yellow Box -
This was a nice simple job - the instructions with the Yellow box are crystal clear.
- Re-routing the rear hoses -
I noticed a few days ago, now that the car is on the ground and the suspension is no longer on full droop, that the rear brake hoses would rub on the upper wishbones, so I replaced the chassis end of the hoses with a 90° fitting to route the hoses down through the wishbones instead of over them
December 30
- Connecting up the electric reverse -
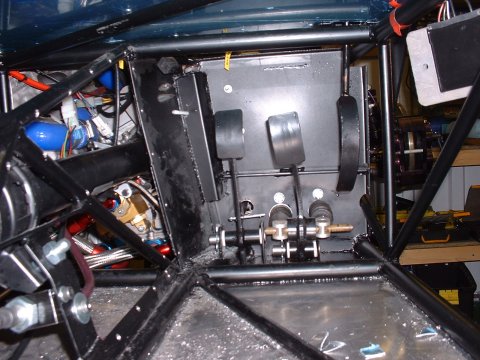
A little while ago I drilled a hole in the pedal box so that I could screw an M6 threaded rod into slide mechanism of the electric reverse. Now was the time to do something with it. A couple of hours, 2 rod-end bearings, some more studding and a bit of welding later, I ended up with this.
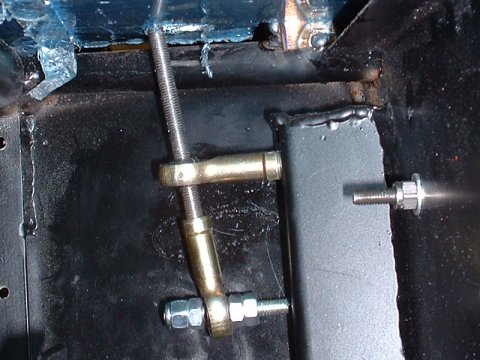
The verticalish bit of studding has a tab welded into the end of it, and through this is the inner of a standard locking choke cable. The outer of the cable reacts against a turret that I welded in for just that purpose. I've also put a standard bicycle gear adjusting ferrule on the outer to allow me dial out any slack that builds up as the cable stretches over time.
The slide mechanism itself is a bit rubbish, and binds as it moves, and the built in spring isn't powerful enough to overcome the friction. I tried lubricating the slide with some graphite, but it didn't help much, so I'm going to have to fit a helper spring to pull the slider back into place.
December 31
- Panel fettling -
I've spent so much time reaching through the passenger footwell to get at the rear end of the engine and all the stuff there, that I figured I should put an access panel in the tunnel - if I don't I'm sure to wish that I had.
So I did... The panel that fills the hole has a joggled edge, and will sit flush with the rest of the panel. I'm going to rivet it in - rivets are easy enough to drill out should I need to get access to the engine.
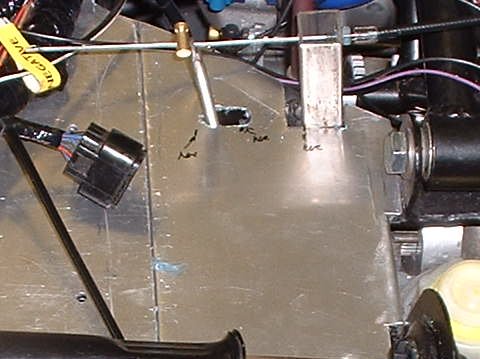
- Stop! -
Another little job out of the way - I spent ages trying to figure out the best way to implement a throttle pedal stop, so as not to strain the throttle mechanism on the engine should I for any reason find my right foot attempting to plant itself on the floor... In the end, I found the easiest solution was to put in an old bicycle brake cable running parallel with the throttle cable, with a brass stop on the end. I've incorporated yet another cable adjustment screw so that it'll be easy to change where the stop comes into play.

This page last updated on: Thursday, Aug 24 2006
Component
january 04
february 04
march 04
april 04
may 04
june 04
july 04
august 04
september 04
october 04
november 04
december 04
january 05
february 05
march 05
april 05
may 05
june 05
july 05
august 05
november 05
december 05
january 06
march 06
april 06
august 06