home
introduction
build
sva tests
links
latest updates
September 29
- Lumiweld! -
Earlier in the week I ordered a Lumiweld kit from Frost - it's an aluminium brazing kit, and I wanted to try it to make up the 2 T-pieces I need in the cooling system - a 32-8-32mm one where the thermostat bypass comes into the bottom hose, and a 32-16-32mm where the coolant expansion tank feeds into the same hose. The instructions for the kit are fairly involved, but after a practice run it all fell in place, so I got on with brazing up the 2 T-pieces. Let's hope the joins are strong enough - they seem to be airtight, but it's impossible to know at this point whether or not they'll be subject to any vibration loads when the car is actually running, which may be enough to cause them to fall apart.
October 6
- Less welding woe -
Having ground all the useless weld metal off the turrets and chassis, I had another go at the cooling tank turrets today - success! One of them took a couple of goes, but I think that's because I wasn't aiming the wire right, and so not enough heat was making into the chassis tube. Anyway, they're done now - they're not pretty welds, but they're strong.
- Fitting the tank -
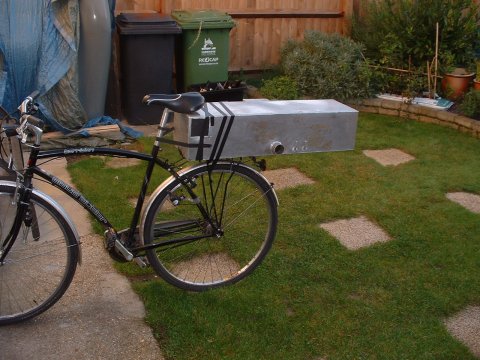
Next job was to fix the dry sump tank in place. A bit of fettling to get the base plate to clear the suspension bolts, and then I mounted it 4 exhaust bobbins. The final thing I did was to drill a 2" hole in the floor of the car directly under the tankto give easy access to the drain plug.
October 7
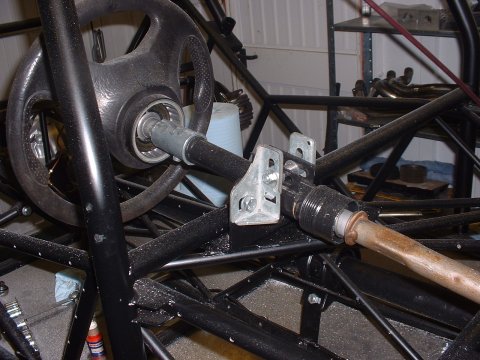
- Fitting the clutch adpator kit -
This was a pretty easy job - the adaptor kit just screws in place. I also made up a little extension out of some 1/2" x 1/2" aluminium bar to provide a third mounting point - one end attaches to the back of the adaptor plate, and the other end to a convenient threaded lug on the crankcase just beside the alternator housing. I ended up making this extension a little shorter than the natural distance, in order to pull the whole assembly away from the reverse's ring gear on the prop shaft - with the prop only lightly bolted in place, rotating it by hand caused the ring gear to rub on one of the adaptor legs.
Then, the slave cylinder (the black object in the centre of the following picture) attaches by three bolts to the apadtor plate. The only complication was that the top of the slave cylinder needs a bit of filing to allow it to clear the top adpator plate bolt.
If I were to do this again, I'd get JB7 make up the adaptor plate to include a lug for the third mounting point to the crankcase - it'd make it easier to fit.
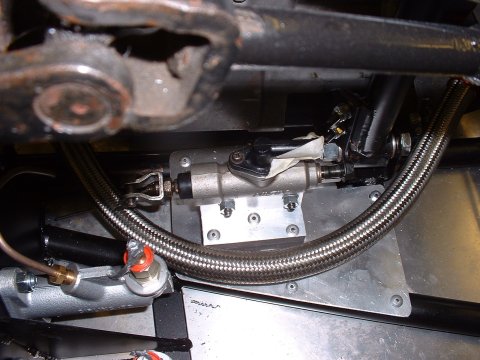
- Steering rack in place. Again -
With the new mounts, I was able to get the steering rack bolted in. Oddly, the old nearside mounts fitted better than the new ones, so I kept them. Other than that, another easy job completed.
I dry fitted the other parts of the column, and everything looked good. For a while I thought that Ian had made the lower extension too short, but then I found you can just make the top bit longer by pulling on it, so that sorted that little problem out.
- Fettling the front panels -
With the steering rack in place, it was clear that the front panels needed a bit of fettling to allow clearance for the rack gaitors. So fettle them I did.
October 8
- Fettling the front panels -
Last night I did myself a little dependency chart, to help me figure out the best thing to do next - this turned out to be to finish off the engine bay panels.
It takes a surprising amount of time to fit Dzus fasteners (4 hours total to cut the 2 panels to size and fit 8 fasteners), and I'm grateful to Steve for advising me to practice on a bit of scrap first, as it definitely requires a couple of 'oh, right, yes, now I see how that works' moments.
October 9
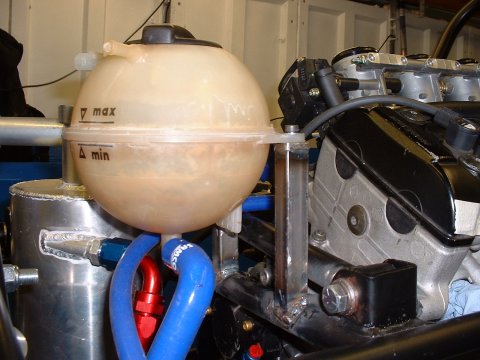
- Fitting a drain point -
Inspired by the hole in the floor to allow me to drain the oil tank, I thought it would be a good idea to do something similar for the coolant system - especially as I remember this being a really time consuming job on the 21, which had no way to drain the system apart from pulling off a radiator hose.
So, in the space behind the radiator, in the lower hose, I fitted a hose adaptor. You'd normally screw a temperature sensor into one of these (and I have another one for exactly that purpose on the high pressure side of the pump), but I'm just going to fit a blanking plug into it.
And here's me wondering where all my money is going!
October 12
- Fitting the clutch master cylinder -
Spent a couple of hours today making up mounts for the clutch master cylinder, which is actually a Honda Blackbird rear brake slave cylinder. This would have been marginally easier to do with the engine out, but it wasn't much of a struggle.
- Gradually starting to assemble the steering -
Angle-grinding all the excess bits off the upper bit of the steering column turned out not to be as much fun as I had thought - it's (I think) cast zinc, so no sparky goodness - I just got peppered by lots of little bits of flying zinc. I realised that at some point in the long term I'm going to need a steering wheel - in the short term too, in order to set the column central. I remembered that Tim has a couple of Sierra ones lying around, so I called him and he brought me one around - what a nice man 
- I HAVE DRIVESHAFTS! -
A package arrived at work today. I mean, really, a Package. I could scarce believe mine eyes. Driveshafts. The 6.5 month wait seemed as nothing as I tore off the wrapping, and beheld them with my eyes.
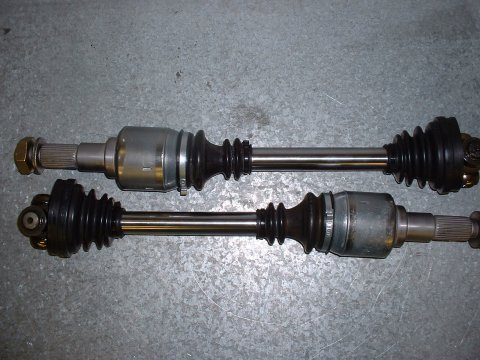
Fitting driveshafts has caused problems for numerous fellow car builders, with difficulties seeming to focus on the difficulty of getting the retaining circlips at the diff end to compress enough to seat whilst fruitlessly leaning on/hammering/cursing at the sprung end of the shaft. However, mine was dead easy, no doubt because my shafts weren't completely assembled (I'd not sent the Freelander bits off to Classic Conversions) - consequently I was able to just smack in the difficult end with a soft hammer, and then slide the rest of the driveshaft in afterwards. Piece of cake.
Hubs were similarly easy - I pulled the old ones off the driveshafts that DH2 and I had got from the scrappy, and tightened them into the bearing carrier on the car with the 41mm hub nuts. For reference, the offside nut is a conventional thread, the nearside is a left hand, or backwards, thread.
I then spent a fruitless hour trying to figure out why the diff wasn't working properly - twisting the prop only rotated the offside shaft. Locking the prop by putting the engine into 1st gear, and rotating either shaft caused the other one to rotate, but only reluctantly.
Alex, my otherwise useless housemate, said it was probably just because the diff was new - with a bit of wear it'd be fine. Tim said much the same thing during his visit to drop off the steering wheel. You live and learn...
October 13
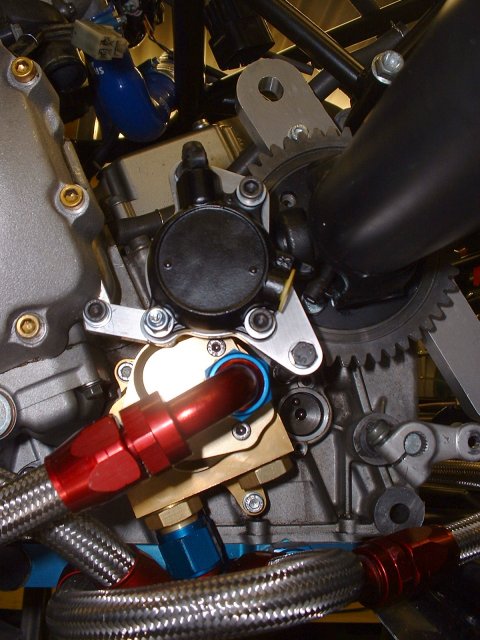
- Exhausting work -
Tim asked, very diplomatically, last night how exactly I was going to fit the exhaust pipes and the #1 coolant bypass in the same physical space. I said I'd think of something. 'Something' turns out to be moving the #1 bypass by about 12" to the right...
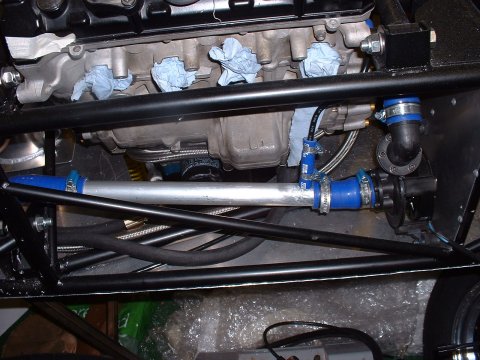
I tried doing the lumiwelding properly this time - I tinned the surface, abraded it back, and then tried to build up a fillet underneath the tinned layer. Unfortunately gravity took over, and a very large quantity of molten lumiweld flowed under the skin, and formed a sort of saggy bulging blister some considerable distance from the place I wanted it. I have taken this as a sign to not bother doing it properly in the future.
- Setting up the steering column -
The next thing was to get the upper part of the steering column set up in the right place. Now, until I actually drive this car (should that day come to pass), then I don't actually know where 'the right place' is. So, for now I've set it up using one of the original Sierra brackets and a bunch of bolts. It flexes a bit when you twiddle the gigantanormous Sierra wheel that Tim dropped off last night, so I'll need to make up something better, in time.
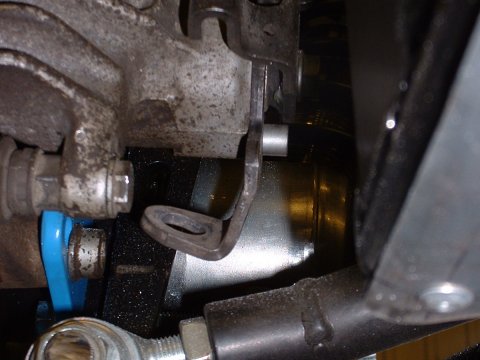
- Fitting the Audi calipers -
Now that the driveshafts are on the car, it's possible to see now well the rear calipers fit. And it turns out, better than I thought. By removing, heating, bending and reattaching the bracket to which the handbrake cable attaches, it's possible to route the cable away from the suspension arm, which means that I can use the calipers the right way up. In the picture below, the bracket in the middle is normally straight - actually, this is slightly over-bent.
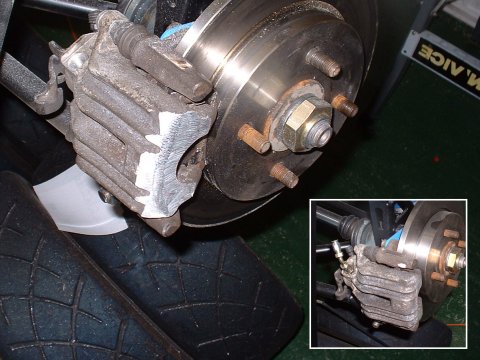
Trying to fit a wheel to the rear revealed that the outer suspension bolt in the lower wishbone is too long to fit inside the rim. I shortened it with the help of Mr A. Grinder, but it was still too long. Replacing the nylocs with normal nuts and shortening the bolt again fixed the problem. Must remember to studlock the nuts on.
With the wheel just clearing the lower wishbone, the next obstacle to an easy fit revealed itself as the claw part of the caliper. After a considerable amount of angle grinding (around 7 or 8 mm) there was eventually enough clearance to get the wheel on. The contact point is the tops of the bolts holding the rims together; rotating the wheel in place causes them to score a mark on the caliper, so I just kept grinding until the scoring stopped appearing. I guess that once the car is on the ground and moving, and everything is flexing around there'll be more contact - we'll see.
The wheel weight also was catching a bit - I'll make sure that they get attached further out on future occasions.
October 14
- Fitting the Audi calipers -
Yesterday was the offside, today was the nearside. No complications, but just as time consuming.
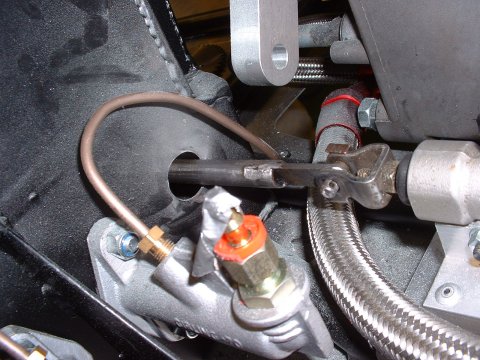
After that I made up the rear flexible hoses, and found that with the simple fittings I'd bought (a 45° M12x1.0 to -3) it wasn't easy to route the hose in such a way that it would both keep clear of the suspension arms, and be long enough to allow the brake pads to be changed (which is most easily done by undoing one of the claw retaining bolts and swinging the claw around). Even more importantly they only cleared the wheel rim by a few microtinyamounts. So I ordered some banjos from Think Automotive.
- Making the clutch rod -
Clutch rod, in this context, being the rod that joins the clutch pedal to the master cylinder. I called Ian for an indication as to how far down the pedal to mount the rod, and he said 'as low as possible gives a nice pedal feel - grind down the clevis pin if you can to get the rod as low as possible'.
The longer the clutch pedal travel (within reason!) the better the control. Full travel on the pedal is only about 4" in the Phoenix, so I decided that I'd set the rod wherever was necessary for full pedal travel to give full piston travel in the master cylinder. Possibly in a race car where hill starts aren't so much of a problem, then you would want shorter pedal travel for snappier gear shifts, which I guess is what Ian was getting at. Just to save myself having to do it later, I drilled plenty of holes to allow me change my mind later
The rod itself I made from a bit of steel round bar I had lying around, which I slotted at one end for the pedal, and welded a strip into the other end to fit into the bracket on the master cylinder.
Drilling the hole in the pedal box was entertaining - I got it slightly in the wrong place and spent many many 10's of regretful minutes filing it bigger.
October 15
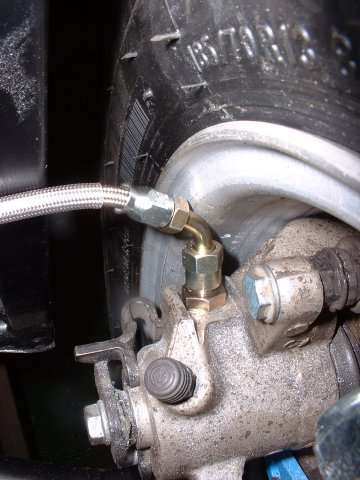
- Banzai! Banjos! -
The banjo fittings came today - and they were too big to fit. Mr Audi must use some special ones. However, after giving them a bit of attention from the grinding wheel, and hacking some more bits off the calipers (the picture shows a hacksaw, but I soon came to my senses and got the angle grinder out...) they fitted bootiful like.
October 24
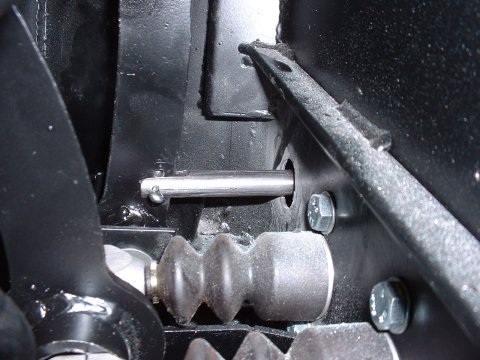
- Welding on handbrake mounts -
I welded on some mounts for the handbrake this afternoon, which was time consuming, but uneventful. On a Fury, the handbrake more normally lives on the steeper forward chassis tube in the prop tunnel, but I felt that put the lever a bit far away when the driver is trussed up in a harness, so I've mounted it nearer the back of the car.
- Joining the dots -
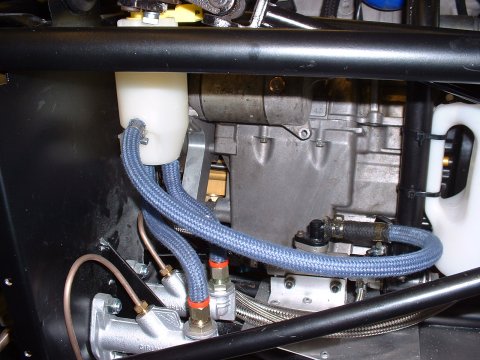
Another little job out of the way was making up the hose joining the clutch master cylinder to the slave.
October 26
- Fitting the tank -
I tried fitting the fual tank today, but something's not quite right.
October 28
- Brake Reservoir fitted -
Fitting the brake reservoir took a little longer than I thought - the clutch hose (which I'm running off a spare outlet on the reservoir rather than using a seperate clutch reservoir) is a lot larger than the brake hose, so for want of a better idea I slid one inside the other and clamped them up using the original bike clamps. It's only a gravity feed, so it shouldn't leak. If it does, I guess I'll just block off the outlet and use the original bike reservoir instead.
This page last updated on: Thursday, Aug 24 2006
Component
january 04
february 04
march 04
april 04
may 04
june 04
july 04
august 04
september 04
october 04
november 04
december 04
january 05
february 05
march 05
april 05
may 05
june 05
july 05
august 05
november 05
december 05
january 06
march 06
april 06
august 06