home
introduction
build
sva tests
links
latest updates
January 1
- Brmm brmm -
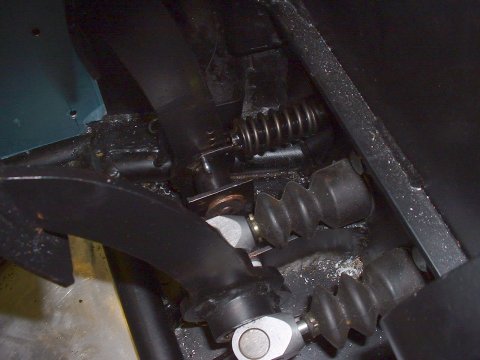
I took another little drive today, just up and down the road, to test that the clutch was better. I still stalled a couple of times, but when I concentrated properly, then I could pull off. Then, as if by magic, DH2 appeared. He had a go, and pulled off without a problem, several times - so it's obviously just a matter of practice. He did comment that the clutch, whilst controllable, was very light, and lacked feel in comparison with his Megablade. Strangely, although his car uses the same master cylinder as mine, it has a different slave - despite the fact that he has a Blackbird engine he isn't using the Blackbird clutch slave, which I am. Maybe that's why his is better than mine... We discussed fitting a spring, and I resolved to pop into Mackays the next day to try and find a short, stiff spring to try.
Over lunch, it occured to me that I had a bunch of valve springs off my old Caterham engine - and by the application of further magic from somewhere, they turned out to be a perfect length, diameter and stiffness. The only change I had to make to the existing arrangements was to weld a 1/2" inch washer onto the clutch push rod for the spring to react against.
The clutch now has a good weight to it, and matches the feel of the throttle pedal (which I've also stuck a return spring on, as that felt too light to me as well.)
- Making a hole for the exhaust -
Oops - I forgot to put a hole in the engine panel on the exhaust side for the exhaust to poke through. With the help of a cardboard template, that was soon sorted.
January 2
- Fitting the tunnel panels -
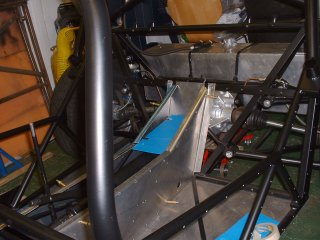
Well, things must be getting serious - I spent today working on the tunnel panels. I'd cut the side panels to shape quite some time ago, but now the time has come to trim them to the exact size they need to be, and bend the tops over so that I can fit a top panel. The picture also shows the work in progress to make the back end of the tunnel into some useful storage space. I guess you might call it a glove box, as I'll probably keep gloves in there at some point...
January 3
- More on the glove box -
The whole day, and this is all I got done...
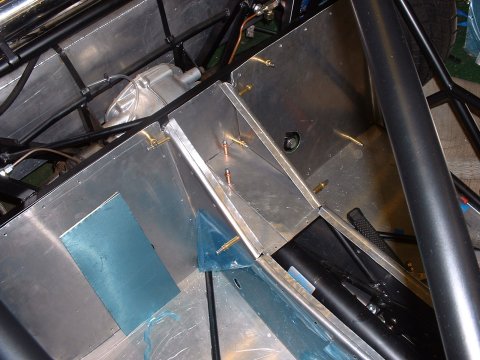
The little blue rectangle is the lid for the glove box - I haven't figured out a way to attach it yet so that it sits flush and doesn't rattle.
January 8
- And a front glove box too, Sir? -
Spent a couple hours today trying to figure out a way to neatly panel the top of the tunnel at the front end. There's a diagonal chassis tube that's in exactly the wrong place for a flat panel, and not matter what I tried, I couldn't figure out a way to get a panel in there in such a way as to completely close off the engine bay, and yet still be removable for access to the back of the engine.
In the end, I realised that I would have to drop the front end of the panel down a bit, and put a return at the very forward edge to bring it up to the chassis rail. This chain of thought lead me to GloveBox2(TM).
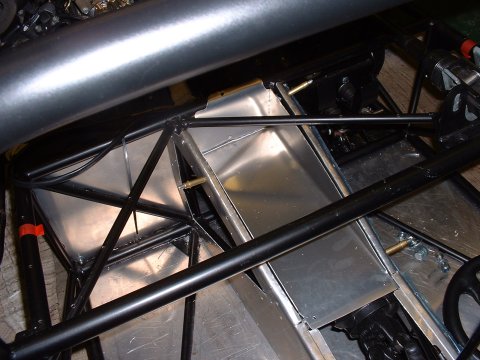
It won't have a lid, but will be covered by the under scuttle panel, so will be a useful little cubby hole for things to get lost in.
January 9
- GloveBox1 gets a lid -
With the careful addition of some B&Q kitchen cabinet magents, and a hinge, I finished off the primary glove box. I just need to figure out some sort of way of opening it. After SVA, I would think...
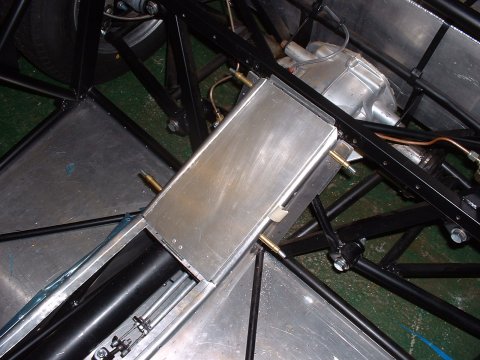
Don't be surprised if it appears with a double hinge in some future picture - the single one is a bit loose.
January 22
Work has been very busy, so I've not been in the garage much.
- Main tunnel gets a lid -
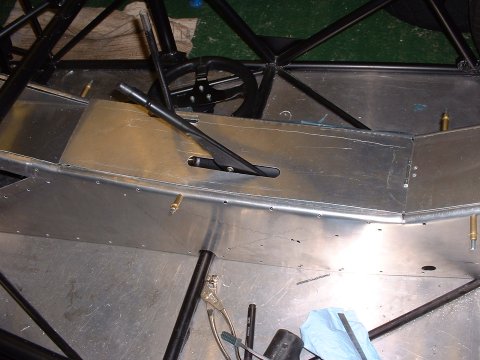
Just a couple of hours today, but I managed to get the main tunnel cover cut and finished. To my considerable surprise, it easily and neatly threads over the gear stick and handbrake without any difficulty at all. Just needs drilling for rivets now.
January 28
- Attaching the panels -
Today, I really wanted to get the panels attached, so that I could then start bolting the bodywork on tomorrow. First I spent a little time polishing off the jobs that are easier without the panels in the way: drilling holes to locate the magnets for the glovebox lid; a clutch foot rest; and fitting the removable clutch pedal pin.
Then on the panels. This was pretty straight forward, except that once you start riveting the panels down, then some of the remaining holes move out of alignment slightly, which means that those holes need to be drilled out to slightly widen them. Some of the holes (those on the far side of the car from my little dehumidifier) had also rusted a bit, which reduced their diameter - they had to be redrilled as well.
January 29
- Attaching the panels -
Yesterday I managed to get all the panels on that require bonding. This morning I finished off the panelling by attaching the under-scuttle panel and the very front panels. The engine bay panels Dzused nicely into place, but I had to drill some holes in them to accomodate the new rivets in the underlying panels.
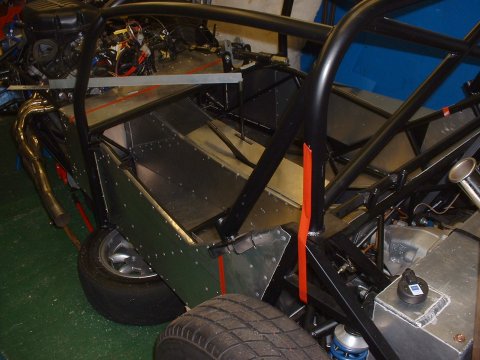
Then I started to think about the sidepods, and hit a bit of a snag. My super duper removable panels would be behind the sidepods (yes I should have seen this coming, but nobody told me. Why I even write this stuff up beats me if you're all going to just sit there saying nothing...) Not only that, but the sidepods really need to attach to something solid, not a flimsy panel only held on at its corners. And ON TOP OF THAT, back on the main side panel of the car, the rivets along the bottom edge are all in the way of the 1.5" right angle aluminium that I'm going to be using to support the sidepods. If only I'd known 9 MONTHS AGO to make the floor stick out by 1.5" then I'd have had a built in pod support. Now I'm going to either have to drill holes in the angles to clear the rivets, or drill all the rivets out and fix the angle on using the drilled out holes.
You, the reader, have been tested - and found wanting. Try harder.
I gave up in a huff at this point.
January 30
- Inventing the egg -
Woke up this morning and had apparently figured out in my sleep that drilling out the rivets, whilst the neatest solution, would leave me with 20some rivets rattling up and down my tubes, so I'd have to go with Plan A - drill holes in the angle to accommodate the rivets.
4 hours later, I had both sidepods trial mounted, in an apparently realistic place - by which I mean:
- The back of the pod, which lines up with the front of the wheel arch on the rear tub is set at 1' from the centre of the rear wheel.
- The rear wheel arch, at the point where it meets the sidepod, is 2' across
- Therefore, the rear wheel should be symmetrical in the arch once the rear tub is on
The hardest part of the operation was drilling the holes on the sidepods to clear the roll cage. On the passenger side I ended up being 1/4" out; cleverly, I compensated for this when I did the driver's side, but still ended up being 1/4" out. *shrug*
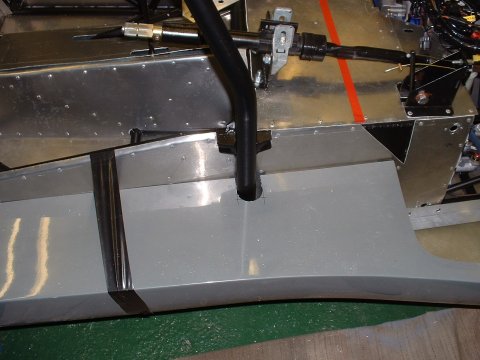
An area of mild concern is that it's not clear to me that the exhaust is actually going to fit inside its pod; still, I'm sure it must do. Surely.
I can't do anything more on the pods until I get hold of some rivnuts, and a rivnut setting tool. I'll see if Cam7 can lend me.
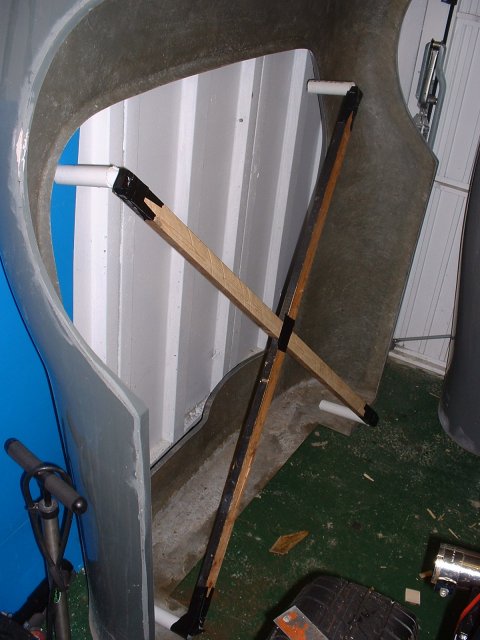
Now, on to consider the rear tub. I can't lower the rear tub onto the pods, over the cage, until it's got holes in it to accomodate the cage. Unfortunately I can't put holes in the right place until I've lowered the rear tub over the cage. I believe this situation is analogous to the chicken/egg problem. So, in some attempt to address this, I made up a little frame that duplicates the spacing of the bottom of the roll cage where it will exit through the bodywork - this should give me a good chance of getting the holes in the right place. In essence, I am creating a primitive version of the chicken, in the hope that it will make an egg for me. Or it may be the egg that I am making. That would be easier. Not so many moving parts to worry about.
This page last updated on: Thursday, Aug 24 2006
Component
january 04
february 04
march 04
april 04
may 04
june 04
july 04
august 04
september 04
october 04
november 04
december 04
january 05
february 05
march 05
april 05
may 05
june 05
july 05
august 05
november 05
december 05
january 06
march 06
april 06
august 06
