home
introduction
build
sva tests
links
latest updates
March 1
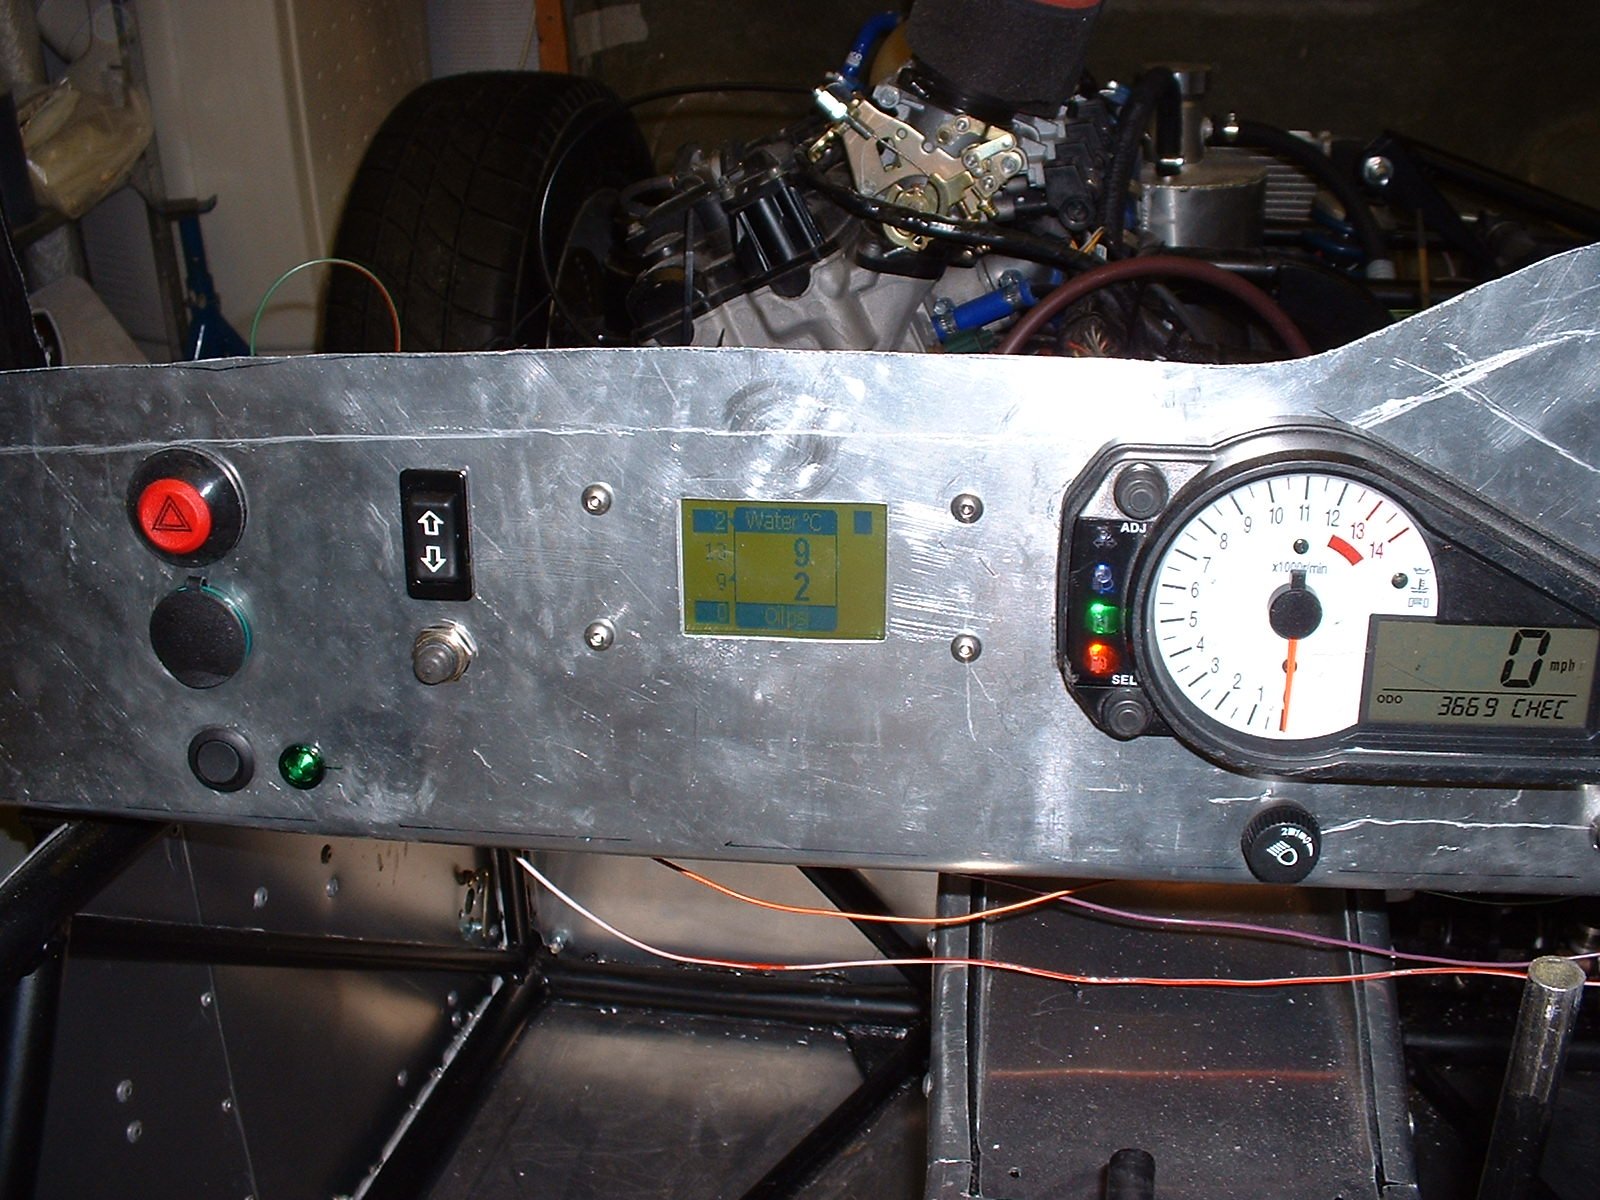
- Making the dash -
A bit more work on the dash this evening, marking out and making the rough cuts for the bike clocks and CB Tech dash to fit into/behind. I've decided to mount the bike clocks by splitting the case into its 2 halves and sandwiching the dash panel in between them, which is very neat and hides the cut edge of the panel. Unfortunately, about 1/2 of the clocks unit is outside the region excluded from the SVA man's "dangerous roughness" checks, so I'm going to have to think of something else for the SVA test itself.
As for the CB Tech dash - it's still the prototype unit, so it's quite large and unsuitable for public display. So, I cut a hole through which its display can be viewed, and taped the unit on behind the hole. At some near future time I'll fix it more permanently in place.
March 2
- Oh woe is me -
Well, I returned to the exhaust this evening, with a view to taking it over to Tim's for welding. I'd had an idea which was to put a double kink in the pipe leading up to the silencer, as a way of maximising the exhaust's parallelness to the side of the car. But the more I looked at the situation, the more I came to realise that it was never going to be satisfactory. Tim came round to have a look (I must have sounded pretty despondent on the phone) and agreed that it was plainly rubbish. I decided to quit the garage and made a note to phone Ian the next day for some sort of resolution.
March 3
- New exhaust -
I sent Ian an email telling him where he could see a picture of the exhaust problem, and he agreed that it was pretty hopeless. On the phone he started to suggest options like slackening the 4-2 section and the 2-1 section. When I told him that that wasn't possible because the whole assembly was welded up in to a single piece, he was quite taken aback. After a bit more discussion, he suggested sending me the exahust of his GSX-R 1000 car from last year, to see if that fitted better. Worth a go, I thought!
- Making the dash -
Another hour on the dash this morning saw all the holes completed, and the switches and bits and bobs in place.
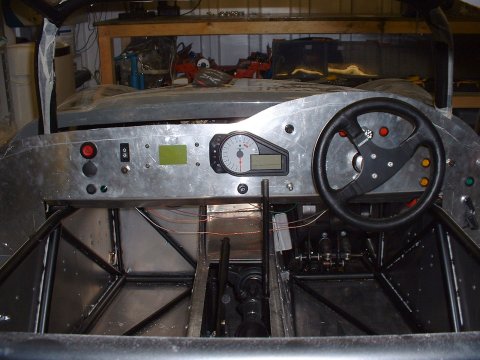
According to my notes, it took the entirety of the rest of the day to wire up all the switches with the same wires that they'd been using before I'd mounted the switches into the dash. That can't be right, but there we have it. That's what the notes say.
March 4
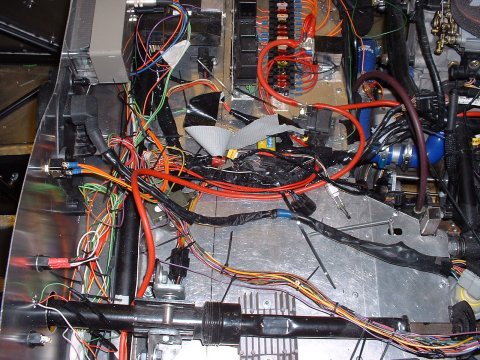
- Relays -
Most of today was spent wiring up the relays both the input and output sides. I spent a goodly amount of time using little cable ties to try and bring some semblence of order to the loom.
- New exhaust arrives -
Ian's exhaust arrived today, and it is a much better fit. Not quite perfect, but close enough to not matter. Yay!
March 5
- More wiring -
Again, not much idea what I did today except that it was something to do with wiring.
- Rear mountings -
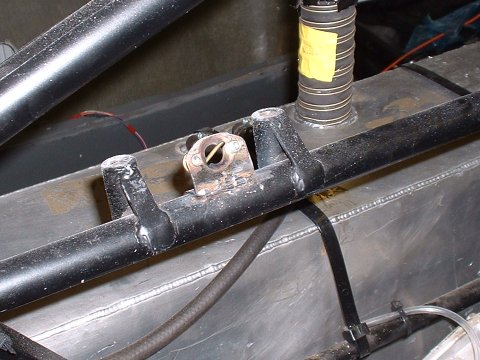
I got bored of wiring, so I made up some mounts for the rear section of the exhaust. Conventionally in se7en type vehicles, the silencer is attached to a bracket on the chassis of the car using a rubber bobbin. The Phoenix, of course, has to be a bit different. It's got 2 mounting points on the silencer, the lower of which could probably receive the traditional treatment, but there's no bracket down there, and I'm not about to weld one on. I can't just use rubber bobbins direct into the side panels of the car, as the silencer is a good 3" away from the panels, and a bobbin is only 1" long...
So instead, I made up some extra long bobbins using some valve springs (taken from the VHPD engine parts bag on my shelves) welded onto some penny washers and M8 bolts. Tim did a similar thing with his exhaust - I can't remember whether it worked or not 
March 6
- Dash supports -
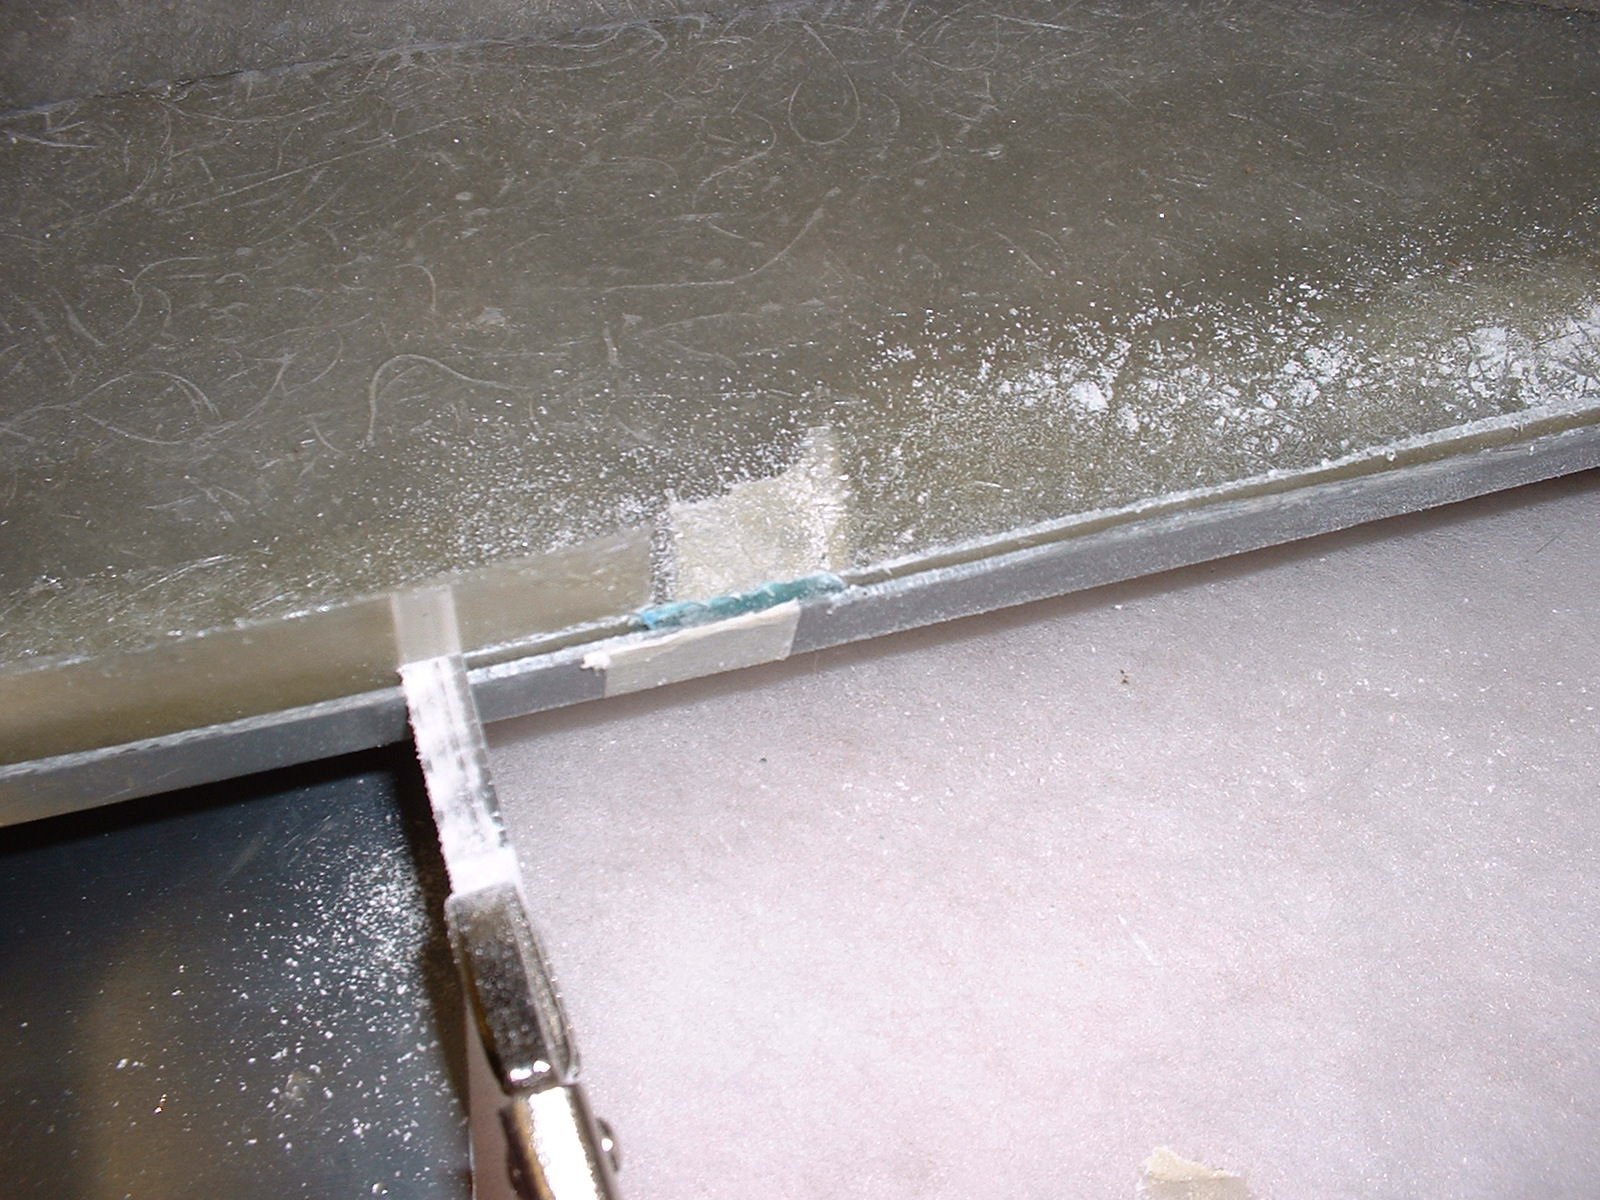
To support the dashboard along its top edge, I've decided to force the edge up against the lip that runs around the edge of the rear tub. However, that only stops it moving forwards - it needs some support from behind as well. To that end, I spent the early part of this morning bonding a long GFRP tab onto the inside surface of the tub, just behind the lip, using a piece of scrap aluminium as a former.
By some extraordinary stroke of luck, it worked!
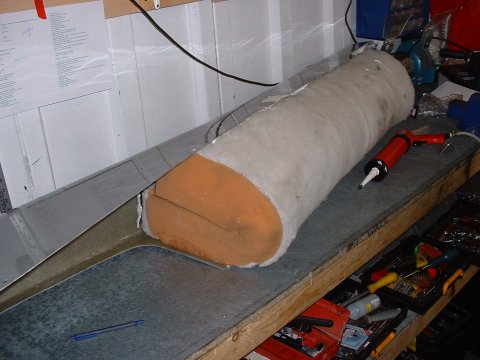
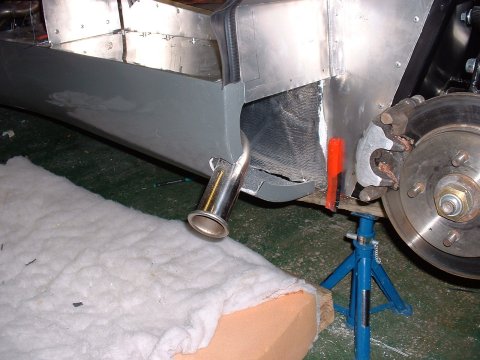
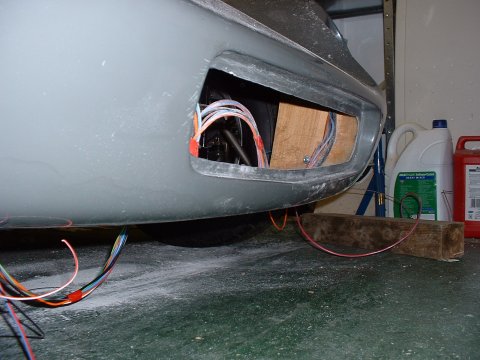
- Sidepod insulation -
The sidepod which contains the exhaust needs insulating to protect the GFRP against the heat. It's also courteous to protect your passenger's leg as well by insulating the side panel alongside the silencer I'd bought some aluminised glass cloth for this, and it was a simple job to cut it to size and bond it on using silicone. In order to make sure the insulation in the pod got properly stuck, I stuffed a big piece of foam cushion in there to force it hard against the sides.
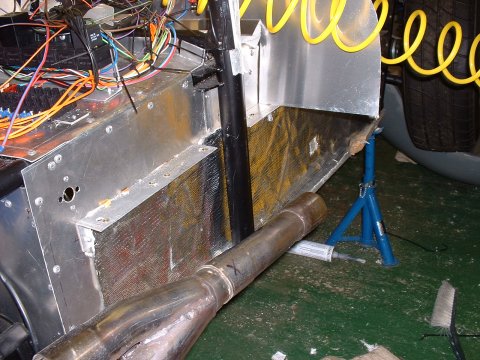
The next thing that needs doing is to drill a socking great hole in the sidepod for the tail-pipe of the exhaust to poke through. After measuring up, I realised I was going to need a bigger holesaw - 3". Unfortunately, I wasn't in the mood to cycle into town to get one. Fortunately, I remembered that Dan Bromilow had loaned his collection of holesaws to Tim earlier in the week. I rang Tim on his mobile, but unfortunately, he didn't think that a 3" one wasn't in the collection. Fortinately, he was very close to Mackay's and didn't mind popping in there for me to buy one, and then dropping it off with me on the way back home. Super!
One 3" hole later, and the sidepod was on.
With the exhaust complete, now seemed like a good time to put in all the sidepod bolts, securing them to the rails. Simple job, or so I thought. As it turned out, once all the bolts were in place, the pods flexed up and in enough that the rear tub no longer sat completely flush with them at its front edge. So I had to spend an hour fiddling about to get the sidepods into proper alignment.
There are now rather more holes than I would like - but I'm sure that I will either fill them, or completely forget that they're there...
March 7
- Securing the rear tub -
I've decided to secure the rear tub in 3 locations - a bolt and washers at the front lower edge (through the lower lip into the sdiepod); a bolt and washers in a similar manner at the rear lower edge; and along the top edge where the bodywork rests on the seat belt mounting holes.
The front and lower bolts will ensure that the tub is restrained sideways as well as up and down, which is important because otherwise there'd be nothing to stop the tub splaying inwards (or outwards)
The top edge proved to be much trickier than I'd thought. My original plan was to weld on some Dzus fastener tabs, and mount the catches onto the tub itself.
However, there turned out to be insufficient room. So I formulated Plan B - by making big washers to go under the seat belt eye bolts, I could use the eye-bolts to hold the tub down firmly.
March 8
- Securing the rear tub -
Having secured the rear tub yesterday, I set about "de-drooping" it today - the very rear of the tub has quite a significant overhang beyond the back of the car, and droops under its own weight.
Normally, the Phoenix uses this frame : that attaches to the chassis, and the bodywork bolts into in the flat region where the number plate goes. However, I've obviously got the bodywork a little higher than normal, as the frame doesn't quite reach.
Rather than fabricate a new frame, or undertake significant bodgery, I chose a simpler option - I welded some tabs onto the rearmost part of the chassis, and dropped some links down to the lowest edge of the bodywork. This works well in that it lifts the bodywork up, but it's a little flexible if you lean hard downwards on the bodywork - so it's good enough for now, but I'll need to do a proper frame later (to protect the bodywork against idle scallywags who will no doubt try and sit on the back of the car...)
- Bonnet catches -
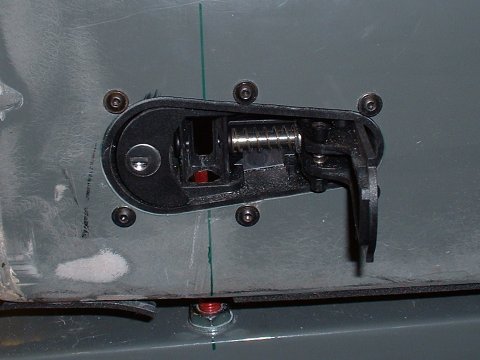
My attention shifts to the front - I recently bought some bonnet catches made by 'Aerocatch'. They're pretty new on the market, and are the first type of bonnet pin catches that are SVA friendly - they've got a cover that's flush with the bodywork, so there's no significant "dangerous roughness"
March 9
- Bonnet locating pins -
Now that the rear part of the bonnet is firmly secured, it's become obvious that some locating pins are needed at the front, just behind the wheel arches - the bonnet is quite flexible, and it doesn't naturally sit flush with the sidepods.
My first attempt at these locating pins is a simple caphead bolt, but I'm not completely happy with them - they're not tall enough to automatically force the bonnet into place - you have to grab each edge and force it over. A better version is to follow...
- Fitting the lights -
With the rear bodywork attached, now is an opportune time to start fitting the lights. Nothing too difficult here, except when I got to the headlights. I'd bought some 7" Golf Mk2 units, but when I came to figure out a way to fit them, it turned out to be impossible. There's just enough room to fit the lamp unit itself, but there's nowhere left afterwards to bolt the backplate to - the backplate being the part that actually stops the lights falling out and allows the beam angle to be adjusted...
After much despondancy and gloom, I decided to order some alternative 7" units from Vehicle Wiring Products, and get on with something else.
Which turned out to be more loom tidying and binding.
March 10
- More loom work -
Dull dull dull. Did the front and rear loom connectors today - these will allow me to split the loom if I need to remove the bonnet and/or rear tub. During this activity I realised that I'd forgotten to run the sidelight cables out to the front of the car, which wouldn't normally consitute much of anything; but yesterday I'd spent a good long while tidily wrapping the bit of the loom that these cable should have been in. This caused me to have a bit of a strop.
- Fixing down -
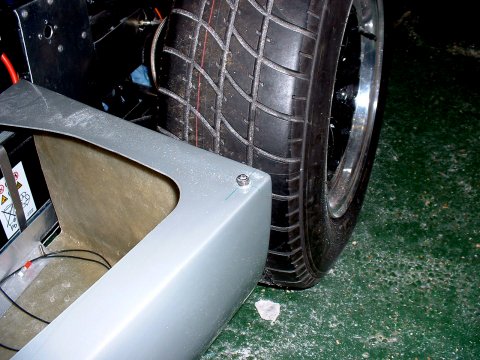
In a strop enhancing move of idiocy, I riveted the lower edge of the dash down onto the sidepods. I'll have to drill the rivets out of course - what's the point having removable sidepods if they're attached to an immovable object? Duh.
March 12
- MORE loom work -
I had NO idea I'd have to spend so much time doing wiring work. Today, I made all the earths (which to date had been temporary 'wrap-it-round-the-earthing-post') permanent. DH2 brought me round some resistors to solder onto the tails of my LED warning cluster, so I soldered them in. And I soldered in the big resistor that you get with the battery isolator switch.
Then, in a hugely successful mood boosting move, I put some more petrol in the tank, and fired the engine up again. Ostensibly this was to check that the CB tech dash was all functioning correctly, but it also enabled me to enjoy the rumbly rumbleness of the GSXR1000 engine. I was also able to verify that the fan switching works OK, and that the fan override system works properly.
Braaahmmmmmmm brahhhhmmmmmmm!
March 13
- MORE headlight DOOM -
I tried this morning to fit the new 7" units I'd ordered from Vehicle Wiring Products. And once again I found that they DON'T FIT. Grrrrrr. They nearly fit - so nearly do they fit that I wasted 90 minutes figuring out that they DON'T FIT.
I posted on the Syvla list to see what people normally fit to Phoenix's, and the answer that came back was '5 3/4" units'. No wonder there's no room for 7" ones. Sigh.
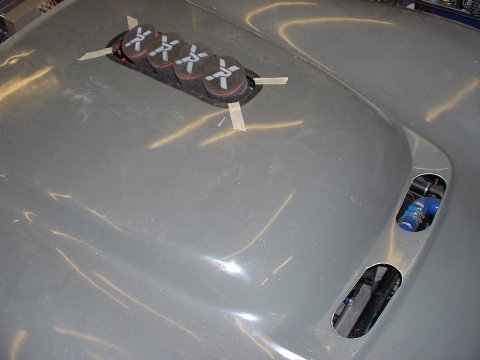
- BIG HOLES -
I spent the majority of today making big holes in the bonnet. One for the radiator grill, one for the bonnet grill, and one for the air filters.
March 14
- Fitting the mudguards -
I permanently attached the rear mudgards today, along with the rubber trim that will hopefully stop (too much) water coming up onto the top of the sidepods.

March 15
- At last : headlight un-doom -
Today some 5 3/4" headlights arrived from Vehicle Wiring Products. And they fit! Woo! Yay! Put all the toys back in the pram. It took about 2h to fit them, but 1h30 of this of course was the first one. Practice makes perfect and all that.
And on another upbeat note, Vehicle Wiring Products are happy to refund the money for the 7" units - they're really very nice people.
One point of note is that I've fitted the headlights dead centre of the space they sit in. This means that I can't fit the nice light covers that you can get for Phoenix's, as the top edge of the light interferes with the cover. If you're fitting covers, then mount the lights as low as you can.
March 17
- Gosh, isn't the Phoenix teeny tiny -
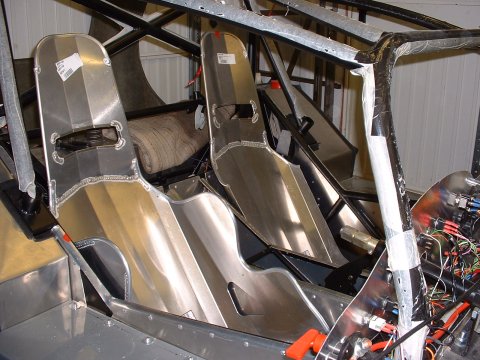
My Kirkey High Back Kart seats arrived today. They are the 14" version, meaning that if your hips are wider than 14" you ain't getting in my car. I'm not a bloater, and I only just fit - when the padded covers are on, I can't actually get out of them without an effort.
And of course, they don't fit! I was expecting this, but I wasn't quite expecting the amount butchery I was going to have to do to get them to in. The driver's side needed almost an hour of careful angle grinding before I could get it to fit, but it looks unscathed. The passenger side took another 1.5 hours on top of that, and as you can see in the picture below, looks a little more like it's had a bit of work done to it...
March 19
- seat mounts -
I spent about half of today making blocks for the seats to sit on (otherwise they'd have to balance on a single diagonal chassis tube), drilling holes and finishing off the edges left by the angle grinder attack of the last couple of evenings.
- boot panel -
The afternoon was spent making up the panel to blank off the boot space behind the seats and above the fuel tank. My ultimate plan is to open this area up for storage, but for the SVA it's easier just to blank it off.

March 20
- Seats are too low -
Actually, the seats aren't too low, but the holes for the seat belt shoulder straps are. Actually, they're not, but they are in the view of the SVA man, by about 20mm. I've thought about several options, but the easiest, and the one that requires the least amount of butchery, is to rotate the seat forwards so that the shoulder strap holes move forwards and upwards. This unfortunately raises my eyeline to coincide exactly with the front bar of the rollcage, so the drive to and from the SVA test is going to result in a major crick in my neck. A triumph for the SVA system, I say 
Next little job is to make some stiffeners for the seat mounting bolts to botl through underneath the car. They're not required for SVA (as the floor pan is metallic), but I think they're a got idea.
- Fuel filler mods -
Next, a previously unexpected modification to the fuel filler. In order to make the rear body work easier to get on and off, I'm going to remove the step where I have to do up and undo the 6 fiddly M4 bolts and nylocs that hold the fuel filler cap on. To this end, I've made up a plate which bolts underneath the filler cap, upon which the bodywork will rest.
- All lights are go! -
DH2 was feeling a bit bored this afternoon, and came round to offer a hand. I indulged his passion for wiring by getting him to finish off the headlight wiring - thanks Dave!
If I'm not mistaken, that's the last of the wiring for the electric items done. Yay!
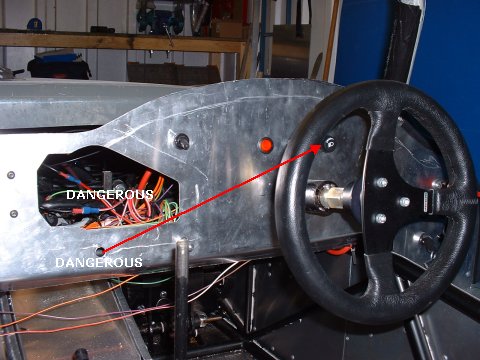
Whilst he did that, I had an unenthusiastic attempt to solve my bike clocks 'dangerous roughness' issue by removing them and trying to think of ways to mount them in a 'non-dangerous' manner. I moved the dangerously rough headlight switch to a less dangerous location as well.
March 22
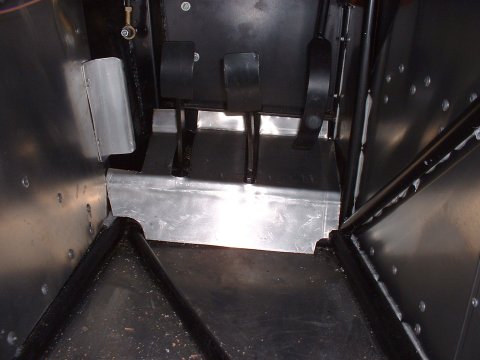
- SVA Cover -
Tonight I made a cover for my pedals so that I can convince the SVA man that my brake bias adjuster can't be fiddled with. It's not exactly a quality piece of work, but I'm not exactly going to be using it for very long
I'll need rivet it on place once I've had an MOT and been able to set the bias bar to a sensible place.
March 23
- Stopping the wibble wobble -
Spent this evenign making up some little aluminium angle based tabs to rivet into the tube that runs along near the bottom of the dash, so that I can rivet the dash into them later on.
I took a picture - it didn't come out very well. Soz.
March 24
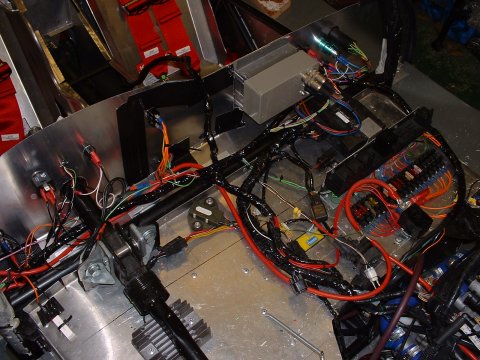
- More loom binding -
Whilst the dash is off, it's a good time to bind up all the wires that run along the back of the dashboard. As usual, this takes far longer than I thought, but it is a very theraeutic activity...
March 25
- More loom binding and earths -
Finished! - including the section inside the bonnet and the rear tub
Also, remembered to attach the earth for the brake reservoir warning light to earth. Seems to work, as the light is on continuously, which correctly indicates that the brake reservoir is empty of fluid. Must remember to put some more fluid in it sometime. Also put a nut on the front earths, which Mr DH2 had left kinda dangling. Which he did tell me about. Which I did forget no later than 30s after he told me.
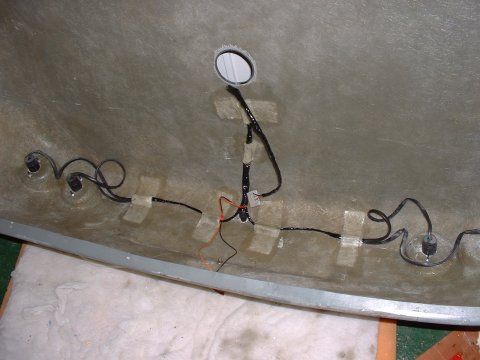
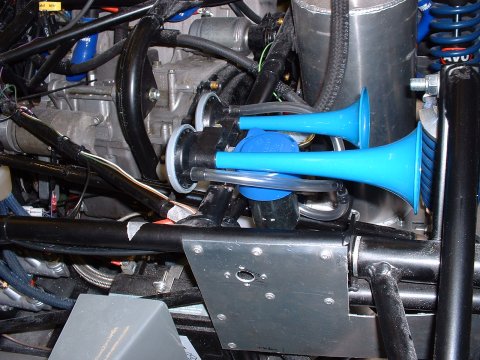
- I give myself the horn -
In a bit of a panic, I realised that having bound the loom, I've never actually checked that I've wired up the connection to the horn correctly. I attach a bulb across the wires, and press the button with baited breath. It reassuringly honks in the only way that a light can. Phew.
About an hour later, I've made up and welded on yet another 'turret' - this one to mount the horn compressor and trumpets on, and tested the hole schbang - a satisfyingly loud twin 'BLAAAAAAAAHHHHHHHH' this time, and nothing falls off.
(Note to self - must remember to paint the turret sometime)
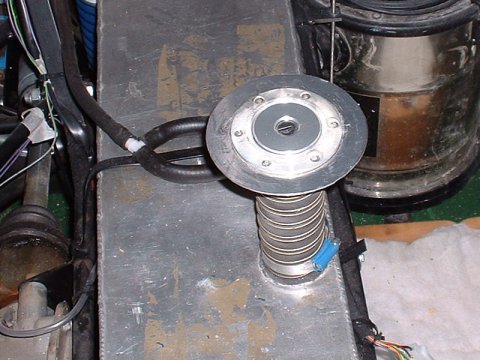
Here's a picture that fails completely to show the turret, so you'll have to take my word for it that it's quite a complicated shape.
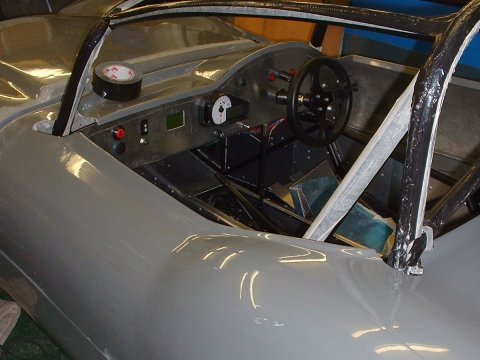
- No more wibble wobble -
Finished! - the dash is quite firm now - I hope there's still enough flex in it to allow it to slot into the gap at the top, underneath the tub. I've also learned from my previous lesson, and I've used button heads to attach the dash to the sidepods instead of rivets.
Whilst I was 'in the area', I made a blanking plate for the hole where the clocks will have should have won't be. My current plan is to just bolt the clocks on somewhere (anywhere!) behind the wheel, in such a place that I (actually Mr SVA man) can see the speedo and telltales. I can't try this out though until I've got the seats mounted properly, so that I can see what I can see.
March 26
- G e t . . . I N ! -
Oh what a miserable day. I've got a sore back from all the bending over yesterday binding the loom (therapeutic, pah!), and I can hardly move. But today's task is to fit the seats and seat belts, which involves a lot of heaving and hoisting of seats that are remarkably reluctant to come in and out of the car, and jumping in and out of said seats to check that the belts are correctly adjusted.
In the end i get so fed up with the driver's seat's reticence to ACTUALLY FIT IN THE DRIVER'S SIDE, that I twat it repeatedly with a 4lb club hammer until it fits.
It fits beautifully now. I'm much happier.
Ultimately though, the seats win the battle. Not only are the bolts I've bought not long enough to go throught the wooden mounting blocks, but even if you pretend that they are, and fit the nice expensive padded covers, and sit in either seat, it's impossible to fit in. So the covers are history (Although I may be able to convince my Mum to modify them to be just cushions.) There's absolutely no chance of flogging the on eBay either, as having spoken to all 3 Kirkey distrubutors in the UK to get hold of these seats, I'm pretty sure I'm the only person in the entire country to have them.
My advice, by the way, to anyone else fitting seats to a Phoenix, is just to get some standard GFRP ones and to cut the sides off - it'll be easier, I promise.
So, an extra (another extra) task has crept on to the 'list-of-things-to-do-that-continously-changes-but-never-actually-gets-shorter', which is to somehow cover the 'dangerously rough' edges of the seats so that they're not so dangerously rough.
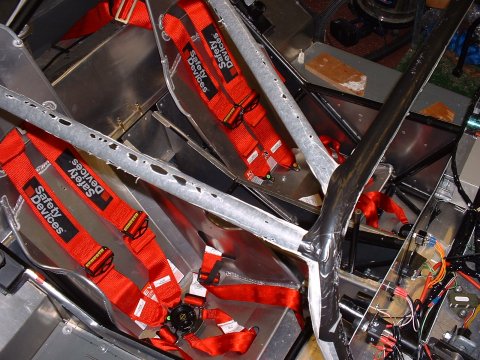
The seat belts go in mostly OK, but I've got to figure out some clever thing for the crotch straps, as the route they're supposed to take from mounting point to buckle currently goes straight through the wooden seat mounting blocks...
To try and cheer myself up, I go and read the post from Marc Birtles on the BEC list that describes this site as a 'top job'. Thanks, Marc - but it's a just a thin veneer on a story of continuing doom and pain where seats come to life and make themselves into a different shape than they were before, and where bolts that used to be long enough aren't anymore and (etc etc)
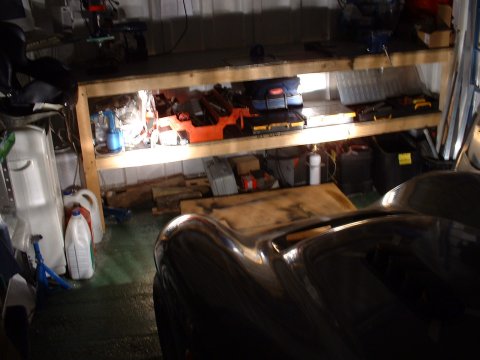
Still - here's a picture for y'all that makes it look like everything is in much better shape than it is...
March 29
- Little tasks -
Had a day of little tasks today. These were:
- *fixing the chassis loom down with little strips of glass fibre (in the places where it needs to run inside the bodywork itself)
- cut the radiator and bonnet grills
- *mounted the IATS and IAPS (these would normally sit on/in the airbox
- *fitted the glovebox magnets
- fixed the leaky brake reservoir tube
- made a bracket to support the fuel hose at rear
- Replaced the sticky out bolts on the steering wheel with countersunk ones
- *Made a foam filled fabric pad for the center of the steering wheel (for the SVA)
This page last updated on: Thursday, Aug 24 2006
Component
january 04
february 04
march 04
april 04
may 04
june 04
july 04
august 04
september 04
october 04
november 04
december 04
january 05
february 05
march 05
april 05
may 05
june 05
july 05
august 05
november 05
december 05
january 06
march 06
april 06
august 06