home
introduction
build
sva tests
links
latest updates
Choosing the Bodywork
- February 10 -
The bodywork, whilst only available in one style (unlike the Fury for which there seems to be a huge range of options), can be made in different weights. A very lightweight body woul keep the mass down for racing, and tends to bend under impact rather than shatter, but probably wouldn't be up to the rigours of day to day use. A heavyweight body would be much stiffer, but would add 25 kg - a significant proportion of the car's mass. I asked Ian to go for somewhere in between.
Collection time
- April 30 -
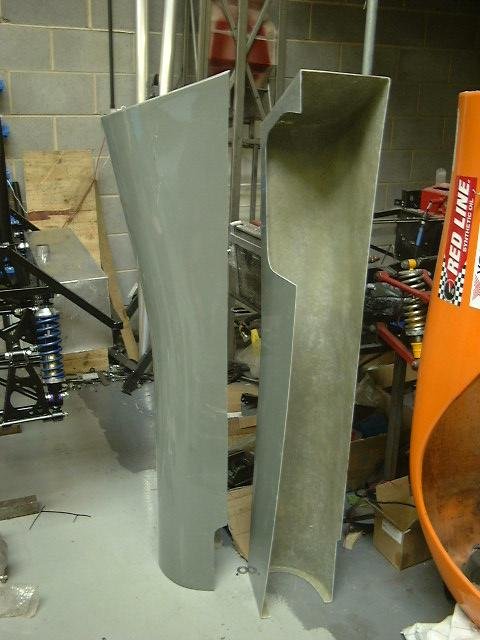
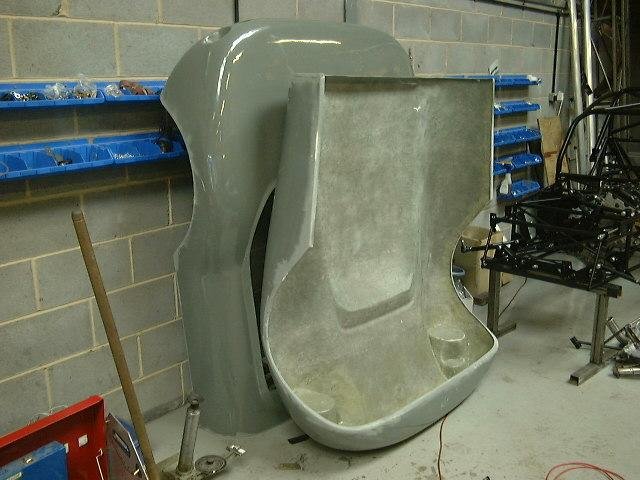
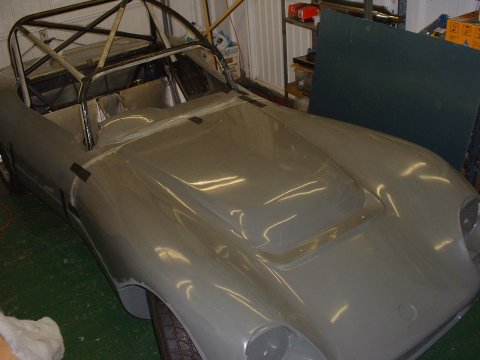
The bodywork seems OK - it's got a few voids around the edges, but Ian had warned me that the moulds were a bit rubbish. The GFRP also seems a bit thin in places, but I can always reinforce it later on, if needed. It's certainly quite light - the rear tub weighs significantly less than the bonnet alone of the 21.
 |
 |
|
| Sidepods | Bonnet and tub |
Some inspiration
- May 26 -
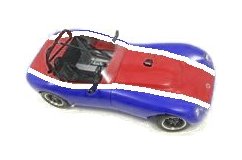
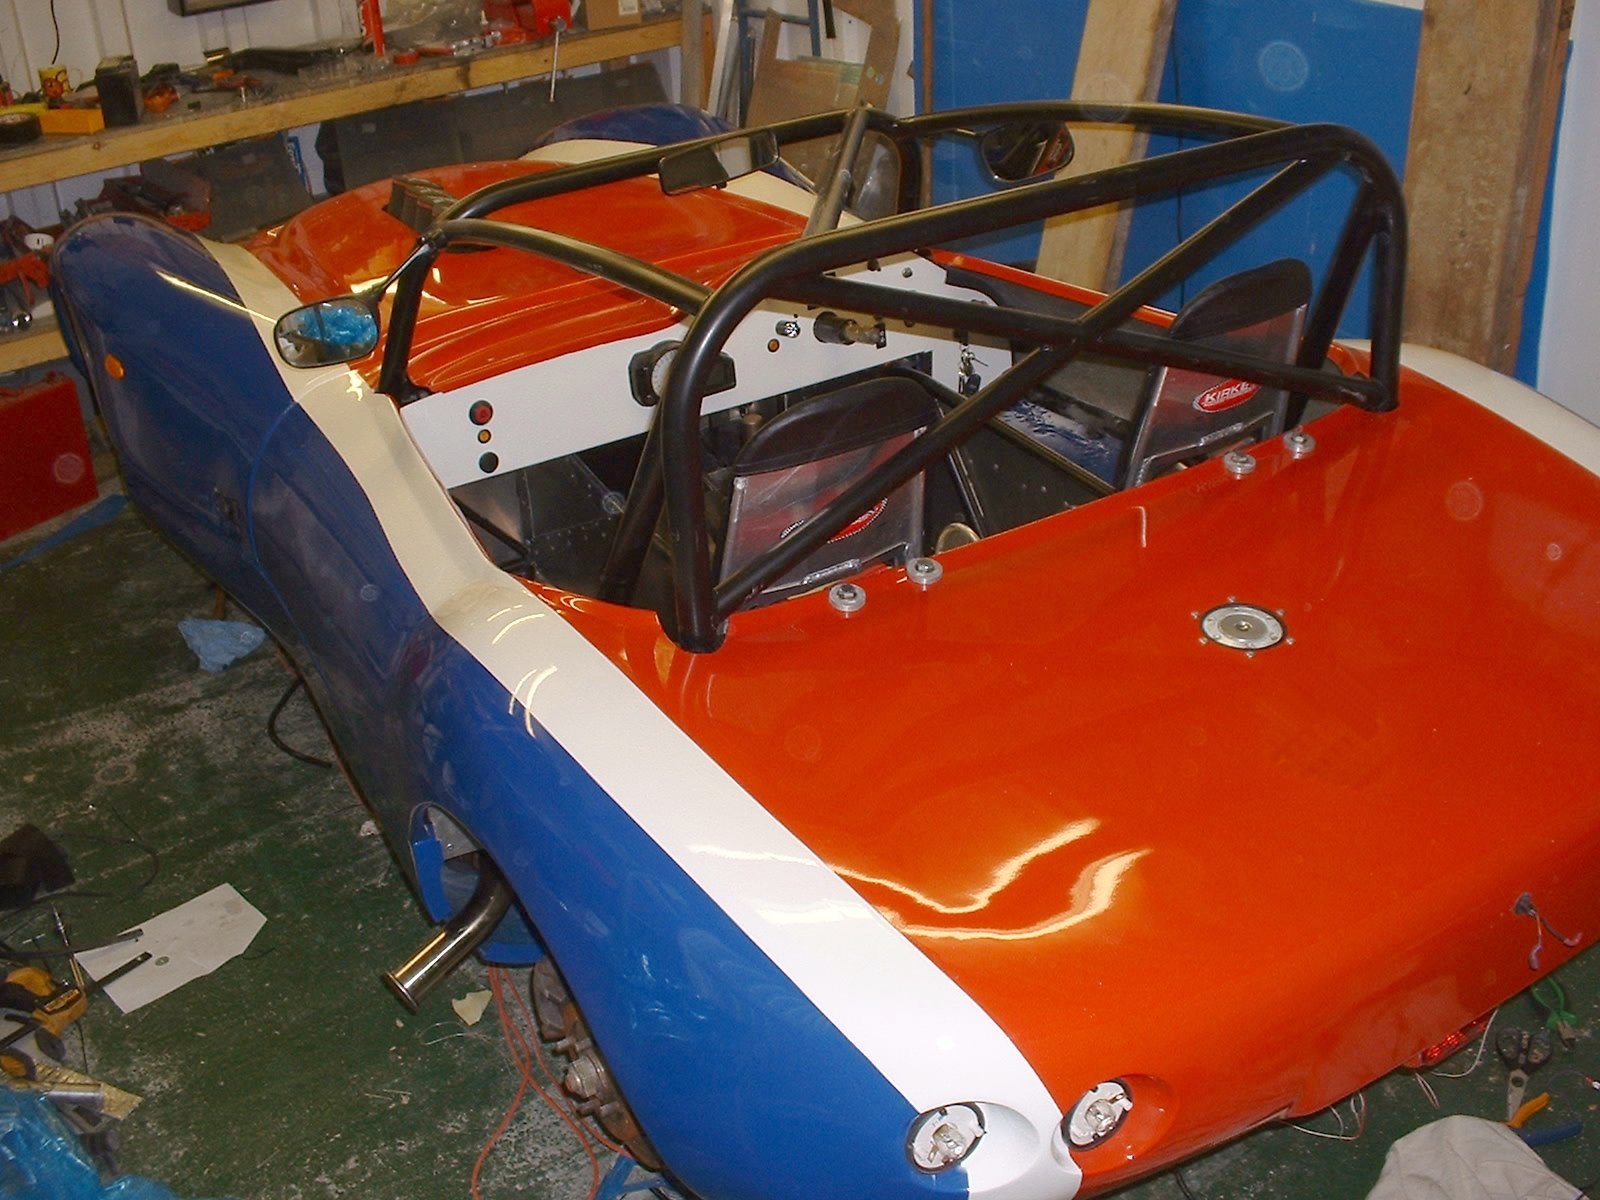
During the Butcher in the Borders tour, during a conversation about something or other, Richard pointed out that the hero's battleship in Battle of the Planets was called the Phoenix. In need of a colour scheme, and a fan of the series, I decided there and then that I may as well get my Phoenix painted up in the same colours as the BotP one.

The BotP Phoenix has a habit of transmuting into a fireball, making it invincible. I'm hoping to avoid that with mine, as I'm not sure that the invincibilty part will hold true.
Inventing the egg
- January 30 -
Woke up this morning and had apparently figured out in my sleep that drilling out the rivets, whilst the neatest solution, would leave me with 20some rivets rattling up and down my tubes, so I'd have to go with Plan A - drill holes in the angle to accommodate the rivets.
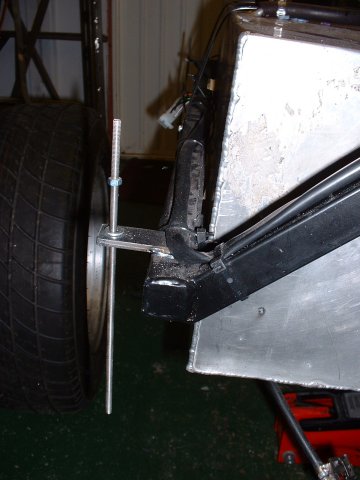
4 hours later, I had both sidepods trial mounted, in an apparently realistic place - by which I mean:
- The back of the pod, which lines up with the front of the wheel arch on the rear tub is set at 1' from the centre of the rear wheel.
- The rear wheel arch, at the point where it meets the sidepod, is 2' across
- Therefore, the rear wheel should be symmetrical in the arch once the rear tub is on
The hardest part of the operation was drilling the holes on the sidepods to clear the roll cage. On the passenger side I ended up being 1/4" out; cleverly, I compensated for this when I did the driver's side, but still ended up being 1/4" out. *shrug*
An area of mild concern is that it's not clear to me that the exhaust is actually going to fit inside its pod; still, I'm sure it must do. Surely.
I can't do anything more on the pods until I get hold of some rivnuts, and a rivnut setting tool. I'll see if Cam7 can lend me.
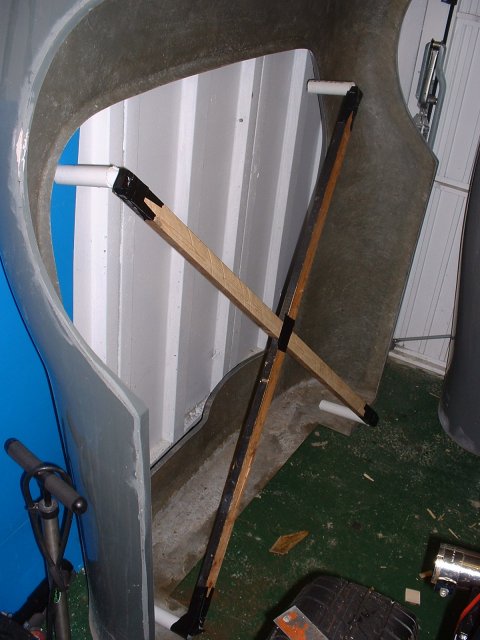
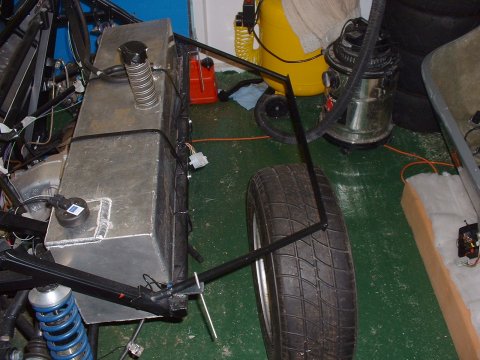
Now, on to consider the rear tub. I can't lower the rear tub onto the pods, over the cage, until it's got holes in it to accomodate the cage. Unfortunately I can't put holes in the right place until I've lowered the rear tub over the cage. I believe this situation is analogous to the chicken/egg problem. So, in some attempt to address this, I made up a little frame that duplicates the spacing of the bottom of the roll cage where it will exit through the bodywork - this should give me a good chance of getting the holes in the right place. In essence, I am creating a primitive version of the chicken, in the hope that it will make an egg for me. Or it may be the egg that I am making. That would be easier. Not so many moving parts to worry about.
- February 1 -
Went out to the garage determined to rivnut the side pods on. Did some measuring, and determined that whilst I'm sure they're OK longitudinally, I've no idea where to fix them laterally - until the rear tub is on. So, I just taped them on, and covered the cage in masking tape in preparation for lowering the bodywork over it. Maybe tomorrow...
Juggling bodywork
- February 5 -
Having marked up holes in the bodywork last night, this morning came time to cut them. My plan was this - cut the front ones so that I could slide one front corner around the cage, then rotate the bodywork to locate the other side, and then slip the bodywork down over the back of the cage.
Sounds great, doesn't it; but it didn't work in practice. After a couple of hours, and ever increasing amounts of GFRP removal, I found that the best technique for getting the bodywork on is in fact this: Lower the bodywork flat over the cage. Make the front holes wide enough to be able to slip through the cage quite near the top, and deep enough to allow the bodywork to be rotated at the back far enough for the rear part to slip down over the cage. The holes at the back should be deep enough that once the back of the bodywork is resting, the back can be lifted up and forwards over the seat belt bosses, and the front will fall (crash) into place.
So, in the end: my holes at the back are perfect; the ones at the front are much much too big - I've going to have to patch them up.
The next 3 hours were spent juggling the rear bodywork, the sidepods and the bonnet, to see where the best place for all was (with a bit of assistance from DH2. One thing I learned was that I needn't have worried about mounting the sidepods - the rear body work doesn't need them for support. I ended up just taping the pods to the rear bodywork to find the correct height for them, and this turned out to be 3/4" higher than I'd originally thought, so I'm glad I didn't fix them in place earlier in the week.
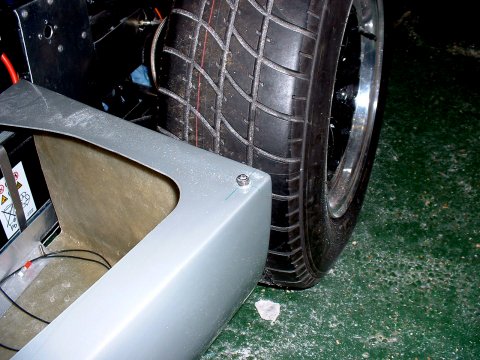
I also ended up moving them 15mm forward - if I pushed the bonnet all the way up to the rear tub, the front wheel arches didn't clear the wheels, so I had to pull it 15mm forward, hence the rear tub, hence the pods. This means unfortunately that the wheels bump into the front of th sidepods on somewhat less than full lock, so I'm going to have to undertake some butchery of the sidepods - my fault for choosing super high profile tyres...
Lazy day
- February 6 -
Lazy - and boring too. Spent a couple of hours tidying up and drilling the sidepod rails.
Pad rails finished
- February 7 -
Popped out to the garage when I got back from work and riveted and bonded the side pod rails on. Also started to drill them out for the M5 rivnuts I'm going to be using to hold the sidepods on. Got forced inside by hunger 
Sheesh - more juggling
- February 9 -
Tonights task was to bolt the sidepods on and check alignment with the rear tub. Nothing lined up, of course - every step forward you make, it changes something, and you have to re-align everything. Still -in the end, it wasn't too bad - I had to move one pod out by 7mm at the middle.
Tomorrow's job appears to be fixing the bottom of the pod in place so that the top surface of the pod is parallel with the bottom surface of the tub.
faffety faff
- February 12 -
Now that the sidepods are in the right place, I drilled the rest of the mounting holes and fixed the rivnuts in place.
Steering column needs a hole
- February 15 -
Sterling effort today - 20 minutes in the garage, in which time I cut a hole in the scuttle for the steering column to poke through. Forgot to put on a dust mask, and have breathed in more glass fibres than I'd care to think about. Also realised that firing up the jigsaw at 22h00 may not have endeared me to the neighbours.
Attaching the bonnet
- February 19 -
The early part of today was spent making brackets for bonnet hinge to attach to. There's no obvious place to attach it, but it looks lihe there should be - must be a hinge for a standard Phoenix. It took quite a long time, because there's lots of: taping the bonnet in place; offering up the hinge; removing the bonnet and putting it out of the way (not that easy in a small garage!); offering up the hinge; repeat as necessary steps.
After quite a few repeats and a bit of welding, the hinge ended up almost exactly where I wanted it (it has to be low and forwards enough to allow the bonnet to tilt forwards without hitting the ground, but high and rearwards enough to not get in the way whilst the bonnet tilts).
Next! - the hinge has to have something to attach to. The recommended approach is bond in some 1/4" plywood, so that's what I did. My first ever bit of GFRPing - looks better in the pictures than in real life...
- February 20 -
This morning, the GRFP seemed to have all set OK (good job too since I'd left the heater running all night to keep the temperature up). I cut a couple of clearance slots in the bonnet flange, and mounted it on the hinge. Very satisfying - I'd been worried about this job since almost Day 1, and it seems to have gone OK.
Dash supports
- March 6 -
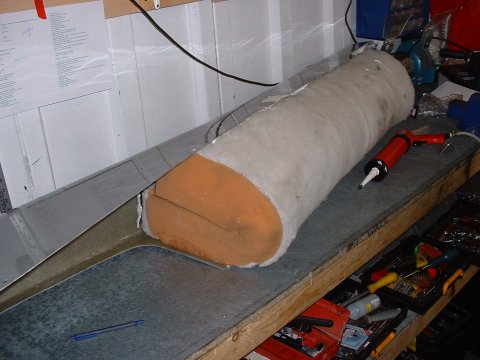
To support the dashboard along its top edge, I've decided to force the edge up against the lip that runs around the edge of the rear tub. However, that only stops it moving forwards - it needs some support from behind as well. To that end, I spent the early part of this morning bonding a long GFRP tab onto the inside surface of the tub, just behind the lip, using a piece of scrap aluminium as a former.
By some extraordinary stroke of luck, it worked!
Sidepod insulation
- March 6 -
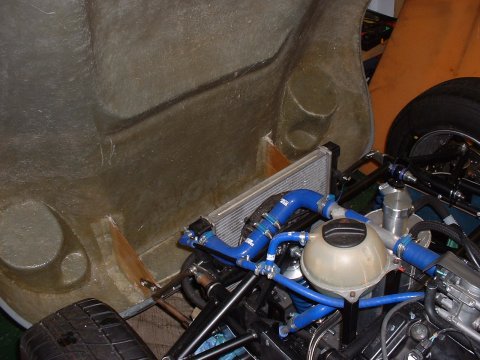
The sidepod which contains the exhaust needs insulating to protect the GFRP against the heat. It's also courteous to protect your passenger's leg as well by insulating the side panel alongside the silencer I'd bought some aluminised glass cloth for this, and it was a simple job to cut it to size and bond it on using silicone. In order to make sure the insulation in the pod got properly stuck, I stuffed a big piece of foam cushion in there to force it hard against the sides.
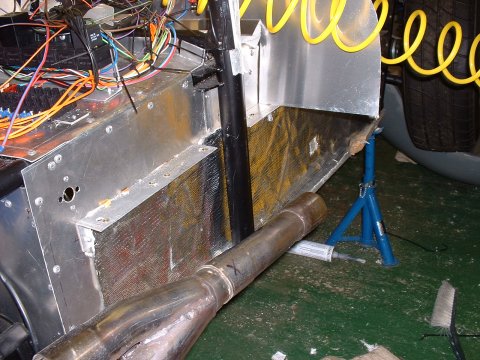
The next thing that needs doing is to drill a socking great hole in the sidepod for the tail-pipe of the exhaust to poke through. After measuring up, I realised I was going to need a bigger holesaw - 3". Unfortunately, I wasn't in the mood to cycle into town to get one. Fortunately, I remembered that Dan Bromilow had loaned his collection of holesaws to Tim earlier in the week. I rang Tim on his mobile, but unfortunately, he didn't think that a 3" one wasn't in the collection. Fortinately, he was very close to Mackay's and didn't mind popping in there for me to buy one, and then dropping it off with me on the way back home. Super!
One 3" hole later, and the sidepod was on.
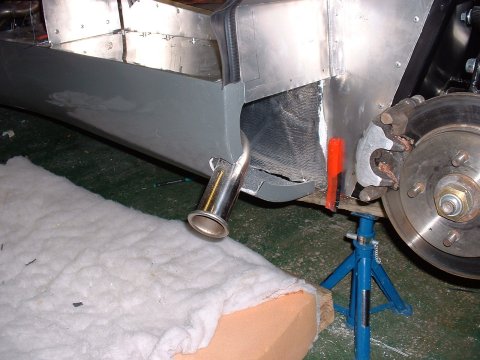
With the exhaust complete, now seemed like a good time to put in all the sidepod bolts, securing them to the rails. Simple job, or so I thought. As it turned out, once all the bolts were in place, the pods flexed up and in enough that the rear tub no longer sat completely flush with them at its front edge. So I had to spend an hour fiddling about to get the sidepods into proper alignment.
There are now rather more holes than I would like - but I'm sure that I will either fill them, or completely forget that they're there...
Securing the rear tub
- March 7 -
I've decided to secure the rear tub in 3 locations - a bolt and washers at the front lower edge (through the lower lip into the sdiepod); a bolt and washers in a similar manner at the rear lower edge; and along the top edge where the bodywork rests on the seat belt mounting holes.
The front and lower bolts will ensure that the tub is restrained sideways as well as up and down, which is important because otherwise there'd be nothing to stop the tub splaying inwards (or outwards)
The top edge proved to be much trickier than I'd thought. My original plan was to weld on some Dzus fastener tabs, and mount the catches onto the tub itself.
However, there turned out to be insufficient room. So I formulated Plan B - by making big washers to go under the seat belt eye bolts, I could use the eye-bolts to hold the tub down firmly.
- March 8 -
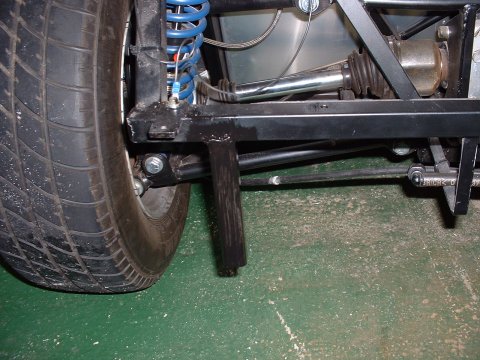
Having secured the rear tub yesterday, I set about "de-drooping" it today - the very rear of the tub has quite a significant overhang beyond the back of the car, and droops under its own weight.
Normally, the Phoenix uses this frame : that attaches to the chassis, and the bodywork bolts into in the flat region where the number plate goes. However, I've obviously got the bodywork a little higher than normal, as the frame doesn't quite reach.
Rather than fabricate a new frame, or undertake significant bodgery, I chose a simpler option - I welded some tabs onto the rearmost part of the chassis, and dropped some links down to the lowest edge of the bodywork. This works well in that it lifts the bodywork up, but it's a little flexible if you lean hard downwards on the bodywork - so it's good enough for now, but I'll need to do a proper frame later (to protect the bodywork against idle scallywags who will no doubt try and sit on the back of the car...)
Bonnet catches
- March 8 -
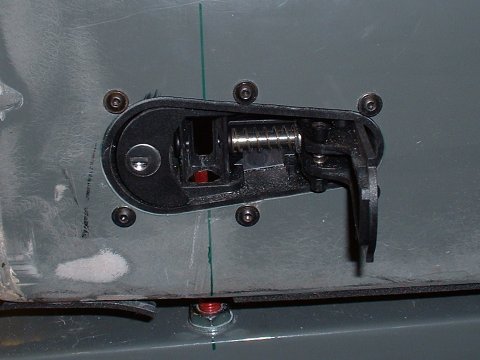
My attention shifts to the front - I recently bought some bonnet catches made by 'Aerocatch'. They're pretty new on the market, and are the first type of bonnet pin catches that are SVA friendly - they've got a cover that's flush with the bodywork, so there's no significant "dangerous roughness"
Bonnet locating pins
- March 9 -
Now that the rear part of the bonnet is firmly secured, it's become obvious that some locating pins are needed at the front, just behind the wheel arches - the bonnet is quite flexible, and it doesn't naturally sit flush with the sidepods.
My first attempt at these locating pins is a simple caphead bolt, but I'm not completely happy with them - they're not tall enough to automatically force the bonnet into place - you have to grab each edge and force it over. A better version is to follow...
BIG HOLES
- March 13 -
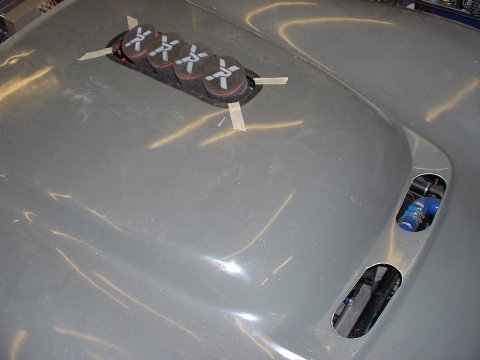
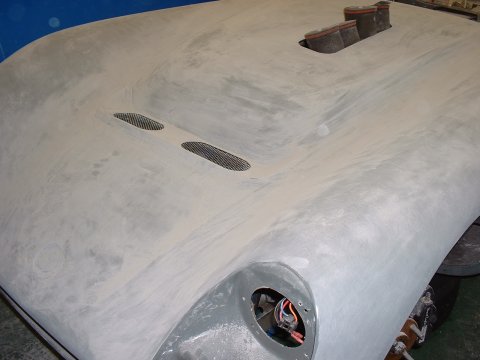
I spent the majority of today making big holes in the bonnet. One for the radiator grill, one for the bonnet grill, and one for the air filters.
Repairing the rear tub
- April 18 -
When DH2 and I pulled the rear tub off earlier in the week, I didn't bother to remove the little aluminium cover plates I'd made for the holes, and it was surprising how little I had to chop off them in order to get the tub off. I think the difference is that when 2 people do it, it's much easier to juggle the bodywork to the right angles until it just scrapes over the cage. When you have to do it on your own, you have to have much bigger holes so that you can do it all standing in one place.
So I decided that I'd make a go of repairing the holes to the point where the bloke down at the bodyshop can finish the job off. I appealed on Cam7 for help, and Dan Bromilow volunteered to pop over
And a jolly good job he did too. I learned all sorts of useful little tips, and next time this kind of job comes up I think I'll be able to tackle it myself.
Turret-tastic
- April 20 -
I'm not sure you can call them turrets if they're upside down - I guess they're sturrets, or something
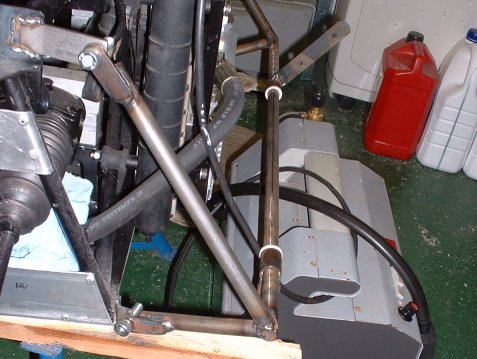
Anyway, to cure the flapping rear bodywork, I've welded on a couple of sturrets, to which the return on the bottom of the rear tub will be bolted. I probably didn't need to use 3mm wall thickness tubing, but I wanted to be sure that the sturrets were as stiff as possible.
Picture shows first coat of Smoothrite drying, although I wouldn't bother to stare at it, William, because it'll never finish drying...
Holes gone
- April 25 -
Today, I thought I'd check out Dan Bromilow's handywork, so I removed the cardboard and tape backing from the aluminium sheet, cut around the hole in the aluminium, and ended up with this:
Once it's all properly sanded down (and no doubt re-filled) by the body shop, then it should be as good as it should have been the first time round.
realigning the bonnet
- November 5 -
When I put the bonnet on, I didn't get the hinge in quite the right place, and it ended up about 1cm too low. The symptom this introduced was to distort the bonnet, which is particularly noticeable where the bonnet is supposed to line up with the rear tub. This is rather hard to explain, so here's a picture of before and after
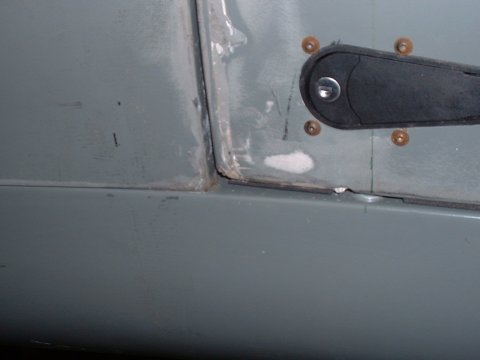
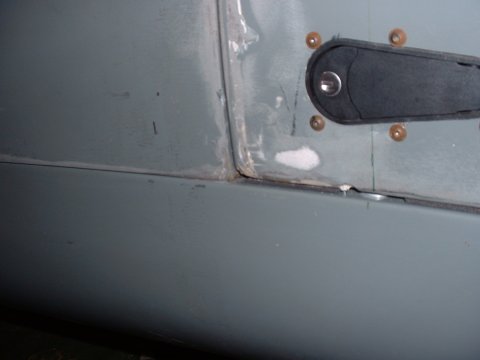
Actually, that's not really before and after. Moving the hinge made no difference at all. What I did find was that if I pressed down hard in the middle of the bonnet, near the rear tub, then the bonnet splayed into the right shape, which is what the pictures actually show. Thanks to William for providing the deadweight of the otherwise useless big diesel battery...
So, the current plan is to use another Aerocatch and use it to pull the center of the bonnet into line. Unfortunately, I can't use the ones I've already got spare, as they are the flush mounting type, and I'm not too confident that they'll be able to do the job without pulling the mounting screws through the (very thin) fibreglass of the bonnet.
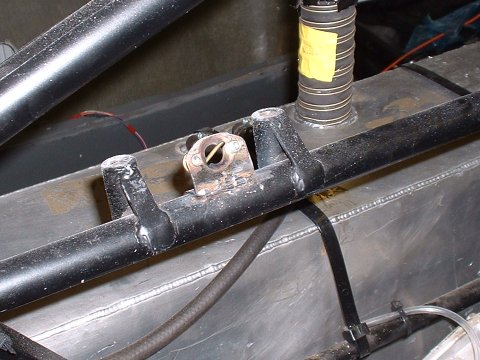
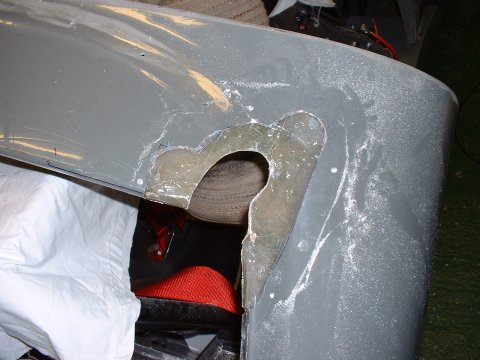
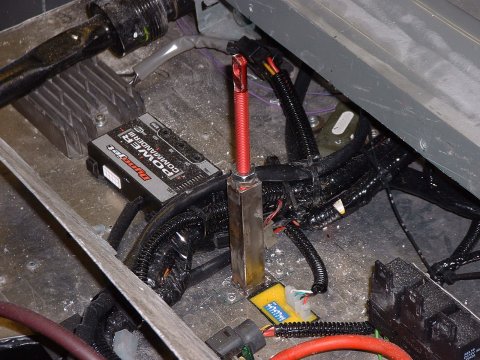
To that end, I've made up a turret to mount the bonnet pin into (it's not long enough to reach otherwise).
- November 19 -
Started and finished off the task of fitting the central Aerocatch today. It's successful, insofar as it pulls the bonnet into shape - but there's a bit of distortion around the catch itself. Can't win 'em all, I guess. Here's the turret
improving access behind the scuttle
- November 27 -
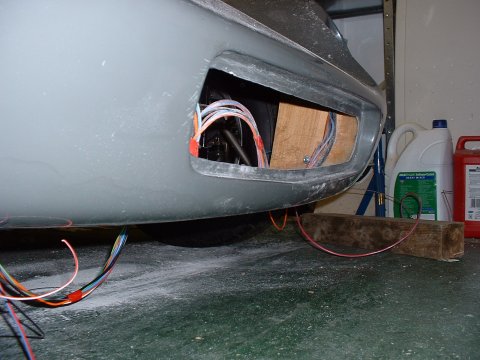
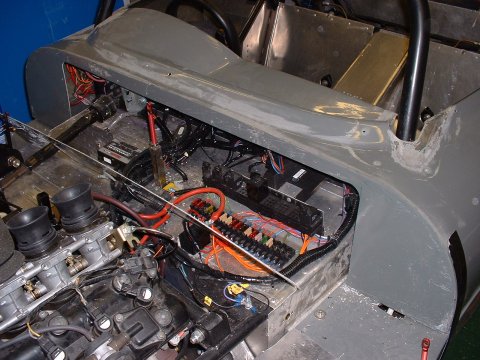
I had a premonition that one day in the future, I shall find myself stuck at the roadside, needing to get access behind the scuttle to fix a problem with the electrics. However, the only way to do this, at the moment, is to remove the entire rear tub, which mostly prohibits a roadsdie repair.
So today, I set about making the front of the scuttle removeable. Originally, I was just going to chop a panel out, rivet an aluminium flange around the hole, and reattach the panel. But whilst it was all in pieces, I realised that I now had some flexibility to make the scuttle fit better than it had before, so I abandoned the original plan, and have set about making an aluminium panel to completely replace the panel I've cut out.
filling and sanding and filling and ...
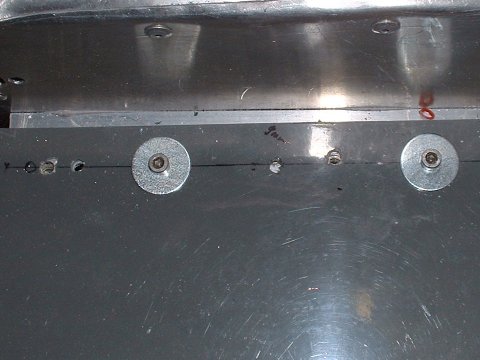
- March 5 -
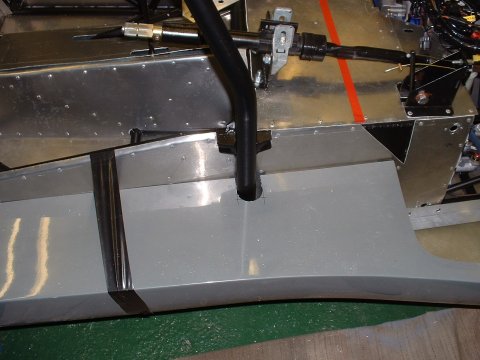
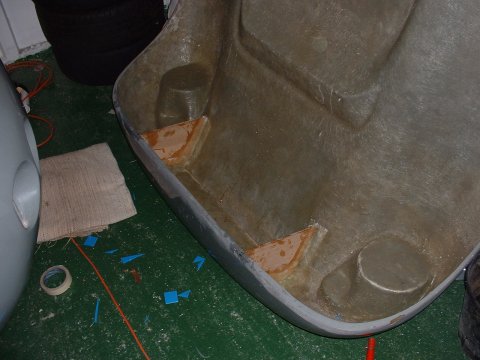
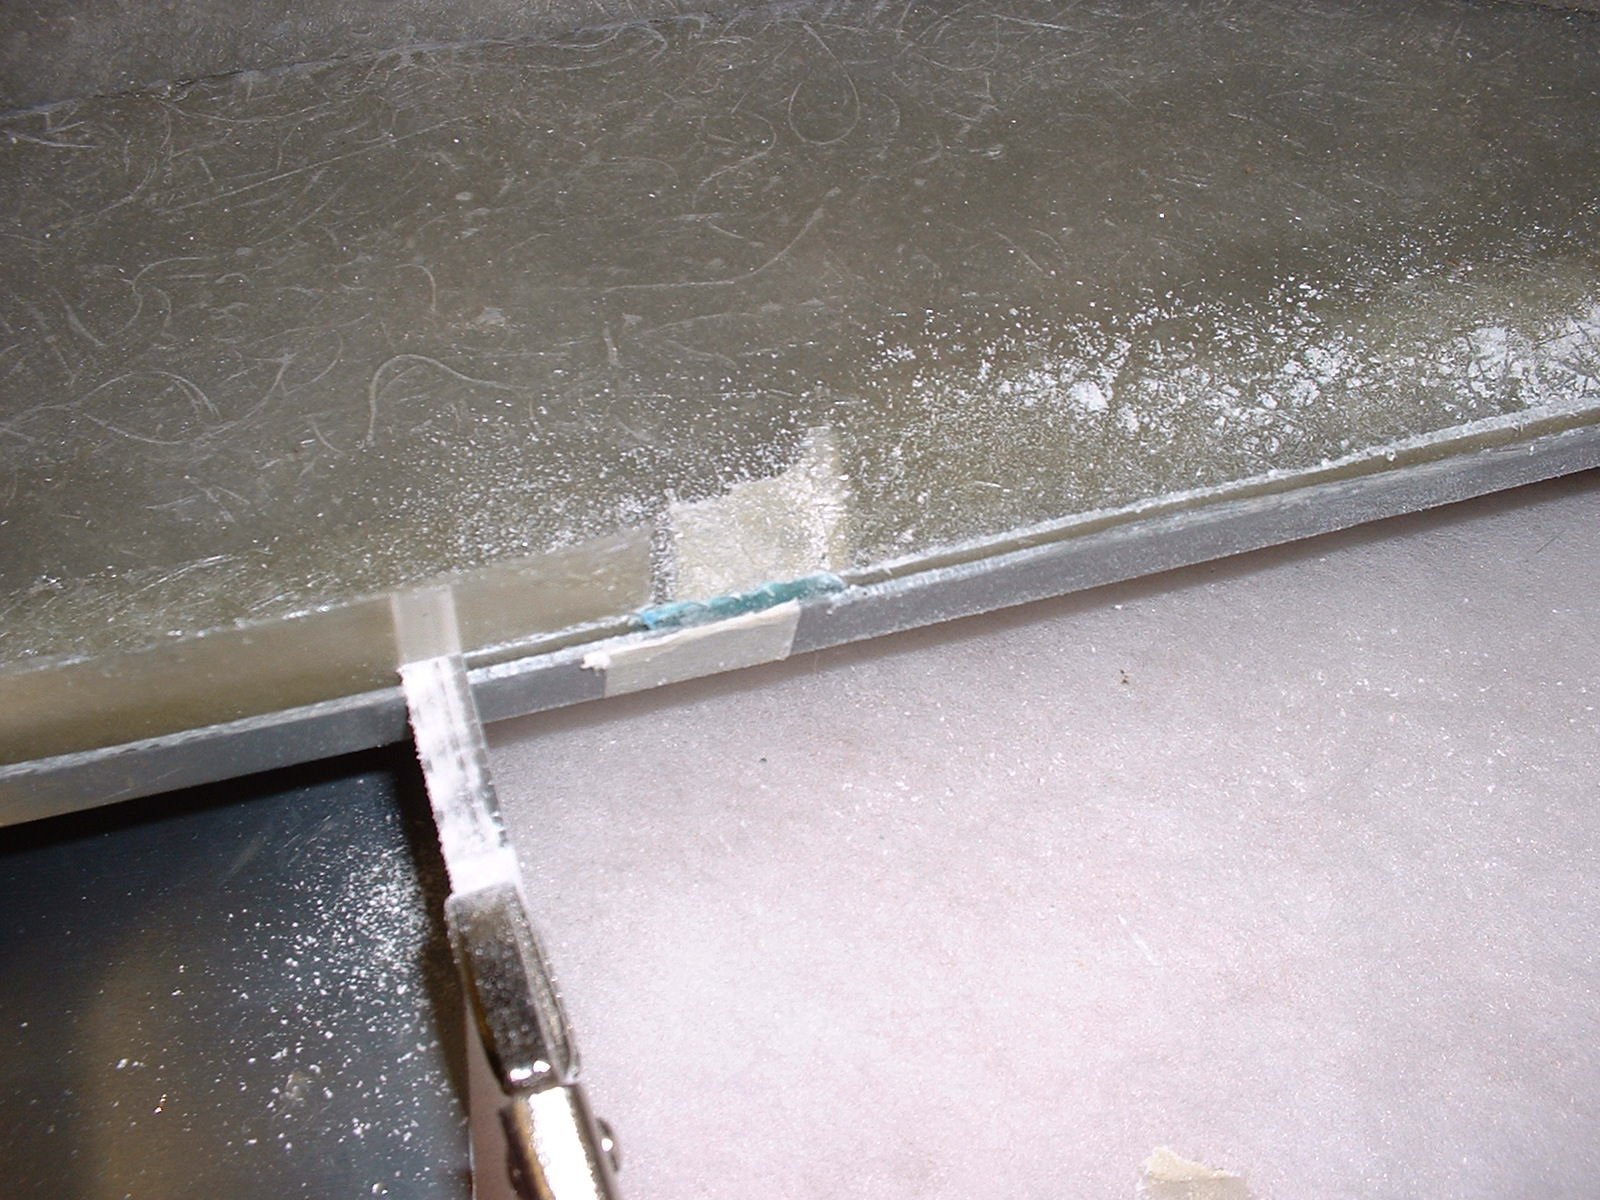
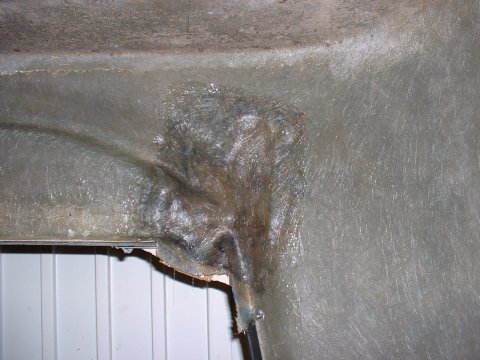
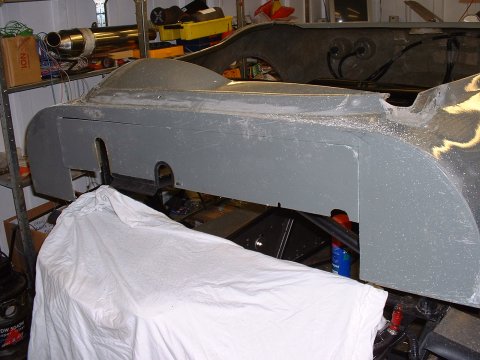
Today I sanded down the bodywork in preparation for painting. Over the past couple of weeks I've been filling and sanding various bits. Here's a picture of where the cage goes through the rear tub on the nearside. Primer grey is the original gel coat, the pinky grey is the repair that Dan Bromilow helped me with (replacing the GFRP where I'd cut too much away, the yellowy bit is where sanding has gone down through the gel coat as I've been making the surface flat, and the white stuff that looks like paint is the filler
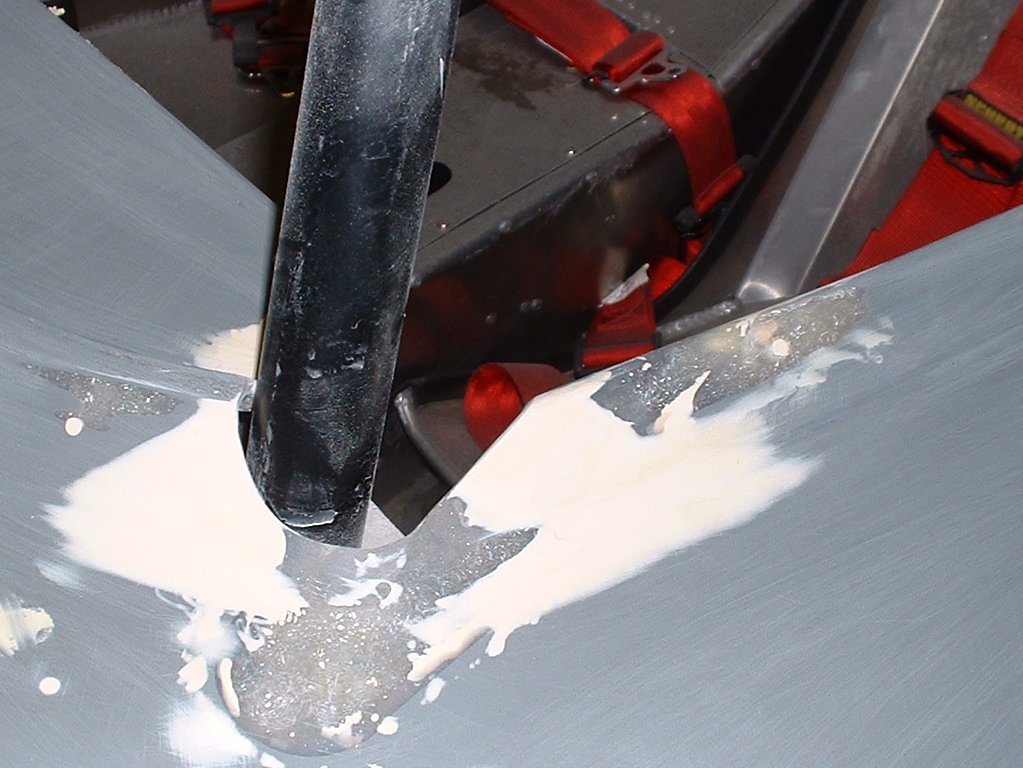
Of course, sanding everything revealed a few more defects that need filling (mostly air bubbles in the surface gel coat that have collapsed). Overall though, the flatness of everything has been good, so I'm hoping that I can get away with just a bit of high build primer in soime key areas, and do a final sand with 240 grit sometime in the week, work permitting.
Sanding all finished
- March 17 -
Last night and this morning I finished off the last of the sanding, which was of the sidepods. If all goes to plan, Steve will come over at lunchtime today and we'll take the bodywork for painting at Densley Charles Coachworks on Ditton Walk. Hopefully it'll look something like this when it comes back:
It's painted!
- April 1 -
Good news from Densley Charles - the bodywork was ready for collection, round about lunchtime. Thanks to Steve for his reprise as man with van.
I spent the afternoon fitting the sidepods and the bonnet, and putting connectors onto the loom where I'd had to cut it to get the lights out.
On and off again with the rear bodywork...
- April 2 -
I spent this 3 hours this morning reattaching the tub - the only hitch was that having never done a trial fit of the tub with the side impact bar in place, I'd not appreciated that the side impact bar was in the way. So I 'relieved' the bodywork (which is an emotionally detached way of saying attacked the NEWLY PAINTED bodywork with a Dremel...) and it fitted just lovely. I loctited all the relevant bolts, put nylocs on in the other places, riveted the fuel cap in place and generally did everything properly. I then had to spend a bit of time realigning the bonnet to meet the rear tub properly. So far so good.

Then I decided to test that the lights all worked...
Back on with the rear bodywork
- April 4 -
That just about says it. I tested the lights again, before doing all the Loctiting and Nylocing etc etc - still OK!
Suzuki!
- April 6 -
Big day today - I stuck a Suzuki badge in the round detent in the bonnet. The Stuart Taylor Phoenix one is horrendous, and I just couldn't bring myself to use it. So my car is now badged as a Suzuki.
This page last updated on: Sunday, Jul 16 2006
Date
aeroscreen
body
boot
brakes
chassis
cooling
clutch
dashboard
electrics
emissions
engine
exhaust
final drive
fuel system
gear shift
lubrication
mirrors
panelling
propshaft
reverse
seats
steering
suspension
throttle
trim
wheels
garage