home
introduction
build
sva tests
links
latest updates
Some investigation
- June 17 -
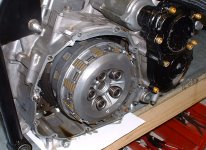 |
JB7 mentioned to me on the Butcher in the Borders tour that GSX R1000 clutch basket failures are not uncommon, and it's usual to upgrade them from the standard cast item, to a billet one - the fingers of the basket are quite thin, and casting thin sections is pretty difficult, leading to weakness in the fingers, with subsequent splaying and failure. I was hoping that as my engine had been sourced from a race bike that it would have this upgrade already, particularly as the clutch cover is an aftermarket one. Removing the clutch cover revealed the flywheel - doh! Wrong end Removing the real clutch cover revealed, what looks to me like a cast basket. Damn! Billet clutches are expensive... |
Another quick visit to STM
- September 23 -
I asked Ian for a look at his clutch conversion kit, having more or less failed to figure out an easy way to make the existing cable actuator work in the confines of the Phoenix chassis. The conversion kit uses a '99 Honda Blackbird slave clutch cylinder, mounted about 10cm away from the engine on a machined aluminium plate. The plate also has holes to accept a couple of long bolts that screw into the GSX-R's existing clutch mechanism mounting points.
This image purloined from the STM site shows it quite well.
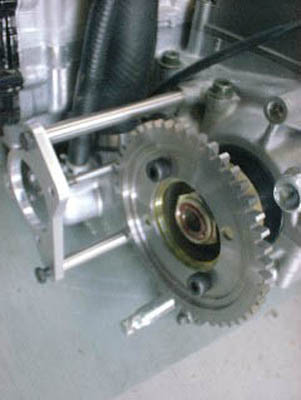
It's a well thought out kit, and an easier option than fiddling about with cables, so I took it.
Fitting the clutch adpator kit
- October 7 -
This was a pretty easy job - the adaptor kit just screws in place. I also made up a little extension out of some 1/2" x 1/2" aluminium bar to provide a third mounting point - one end attaches to the back of the adaptor plate, and the other end to a convenient threaded lug on the crankcase just beside the alternator housing. I ended up making this extension a little shorter than the natural distance, in order to pull the whole assembly away from the reverse's ring gear on the prop shaft - with the prop only lightly bolted in place, rotating it by hand caused the ring gear to rub on one of the adaptor legs.
Then, the slave cylinder (the black object in the centre of the following picture) attaches by three bolts to the apadtor plate. The only complication was that the top of the slave cylinder needs a bit of filing to allow it to clear the top adpator plate bolt.
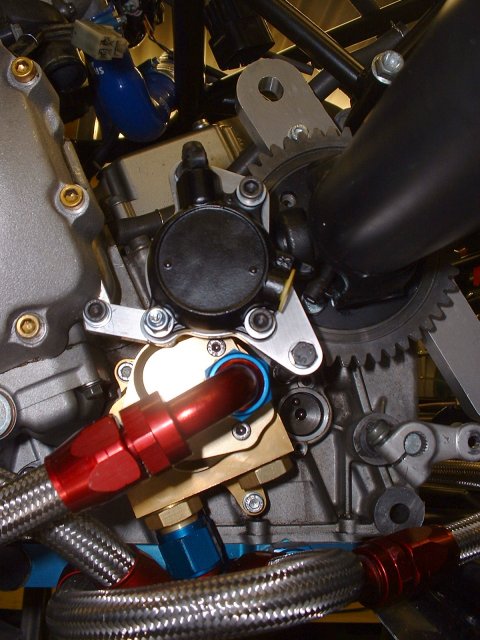
If I were to do this again, I'd get JB7 make up the adaptor plate to include a lug for the third mounting point to the crankcase - it'd make it easier to fit.
Fitting the clutch master cylinder
- October 12 -
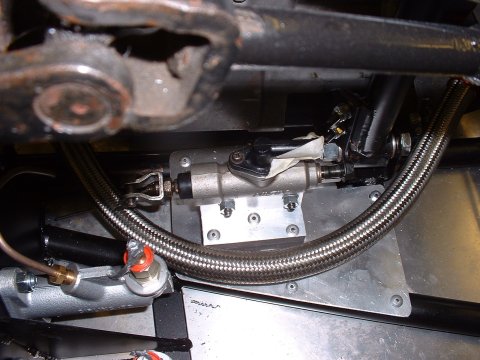
Spent a couple of hours today making up mounts for the clutch master cylinder, which is actually a Honda Blackbird rear brake slave cylinder. This would have been marginally easier to do with the engine out, but it wasn't much of a struggle.
Making the clutch rod
- October 14 -
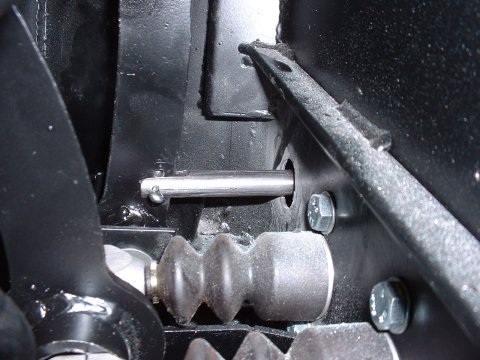
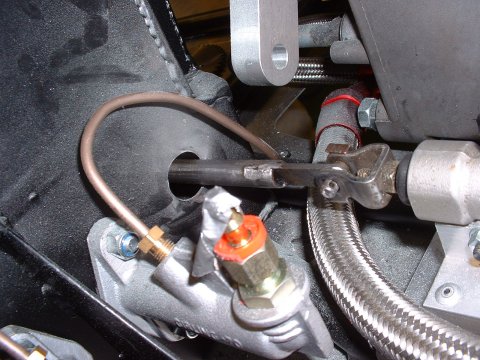
Clutch rod, in this context, being the rod that joins the clutch pedal to the master cylinder. I called Ian for an indication as to how far down the pedal to mount the rod, and he said 'as low as possible gives a nice pedal feel - grind down the clevis pin if you can to get the rod as low as possible'.
The longer the clutch pedal travel (within reason!) the better the control. Full travel on the pedal is only about 4" in the Phoenix, so I decided that I'd set the rod wherever was necessary for full pedal travel to give full piston travel in the master cylinder. Possibly in a race car where hill starts aren't so much of a problem, then you would want shorter pedal travel for snappier gear shifts, which I guess is what Ian was getting at. Just to save myself having to do it later, I drilled plenty of holes to allow me change my mind later 
The rod itself I made from a bit of steel round bar I had lying around, which I slotted at one end for the pedal, and welded a strip into the other end to fit into the bracket on the master cylinder.
Drilling the hole in the pedal box was entertaining - I got it slightly in the wrong place and spent many many 10's of regretful minutes filing it bigger.
Joining the dots
- October 24 -
Another little job out of the way was making up the hose joining the clutch master cylinder to the slave.
a BIT flexible
- December 6-7 -
A bit of a fly in the ointment - now that there is fluid in the system, it's become obvious that the bracket/plate arrangement I'd made to support the clutch master cylinder is hopelessly flexible - you push the pedal, and the whole master cylinder moves, rather than just the bit in the middle. On top of that, there is a vertical offset between where the connecting rod is connected to the pedal and where it connects to the master cylinder. If the master cylinder is clamped own down to stop the mounting plate flexing, the rod takes the next easiest course of action, which is to try and increase the vertical offset. Vertical forces, and equal and opposite reactions and all that. Back to the drawing board...
- December 8 -
OK - no messing about. I welded up some 3/4" steel angle into a T shape, and welded it onto the chassis, as a bracket for the clutch master cylinder. That's not going anywhere. It's lower too, to minimise the vertical offset.
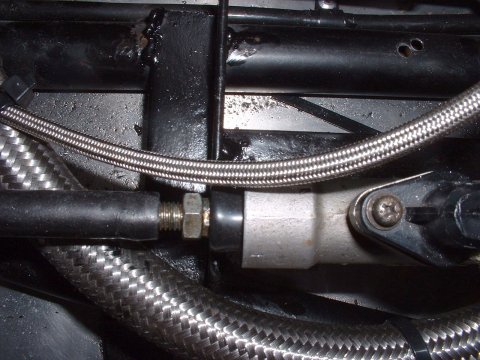
As for the connecting rod - no messing about trying to use the bike original fittings. I took all those off and welded a nut onto the end of the connecting rod, which now just screws onto the end of the threaded actuator rod that goes into the master cylinder. Now there's no way that vertical forces can play their evil game.
With a bit of imagination, you can see the T and the connecting rod/threaded actuator in this picture
A quick run of the engine, and I find that I can, in fact, use the clutch to change gear. Yay!
After the first test run
- December 12 -
Well no wonder I couldn't control the clutch. Full travel on the master cylinder is ~13mm. When I actually ran the engine with the car on axle stands, I found that all its useful work was over in the first 5mm of travel - so my pedal ratio was out by a factor of nearly 3! To get a usable clutch, I'll need to drop the connecting rod down to as low as I can. Which is what Ian originally said - I just didn't believe him until now...
Fixing the travel on the clutch
- December 18 -
After an abortive attempt to modify the existing rod to allow me to drop its pivot point, I made up another rod, and dropped the pivot point down to 2mm above the main pedal pivot. This is just about as low as it's possible to get, and the master cylinder travel is now 7mm. It's impossible to tell if that's good enough without another test run.
Brmm brmm
- January 1 -
I took another little drive today, just up and down the road, to test that the clutch was better. I still stalled a couple of times, but when I concentrated properly, then I could pull off. Then, as if by magic, DH2 appeared. He had a go, and pulled off without a problem, several times - so it's obviously just a matter of practice. He did comment that the clutch, whilst controllable, was very light, and lacked feel in comparison with his Megablade. Strangely, although his car uses the same master cylinder as mine, it has a different slave - despite the fact that he has a Blackbird engine he isn't using the Blackbird clutch slave, which I am. Maybe that's why his is better than mine... We discussed fitting a spring, and I resolved to pop into Mackays the next day to try and find a short, stiff spring to try.
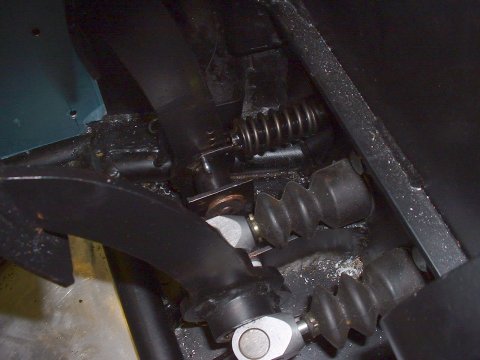
Over lunch, it occured to me that I had a bunch of valve springs off my old Caterham engine - and by the application of further magic from somewhere, they turned out to be a perfect length, diameter and stiffness. The only change I had to make to the existing arrangements was to weld a 1/2" inch washer onto the clutch push rod for the spring to react against.
The clutch now has a good weight to it, and matches the feel of the throttle pedal (which I've also stuck a return spring on, as that felt too light to me as well.)
This page last updated on: Sunday, Jul 16 2006
Date
aeroscreen
body
boot
brakes
chassis
cooling
clutch
dashboard
electrics
emissions
engine
exhaust
final drive
fuel system
gear shift
lubrication
mirrors
panelling
propshaft
reverse
seats
steering
suspension
throttle
trim
wheels
garage