home
introduction
build
sva tests
links
latest updates
Oil System
- February 10 -
STM are fitting their race GSX R-1000's with a small air cooled Mocal oil cooler. Other than that, and the remote mounted oil filter (they've done this tor packaging reasons, rather than anything more exciting) the lubrication systems in the Phoenix are uncomplicated.
STM are fitting their race GSX R-1000's with a small air cooled Mocal oil cooler. Other than that, and the remote mounted oil filter (they've done this tor packaging reasons, rather than anything more exciting) the lubrication systems in the Phoenix are uncomplicated.
Collection time
- April 30 -
The chassis has been modified so that the oil filter doesn't need to be remotely mounted anymore - one of the chassis rails has been shunted over a bit. That saves £70 of piping - which I must remember to get a refund for!
Sump pictures
- August 19 -
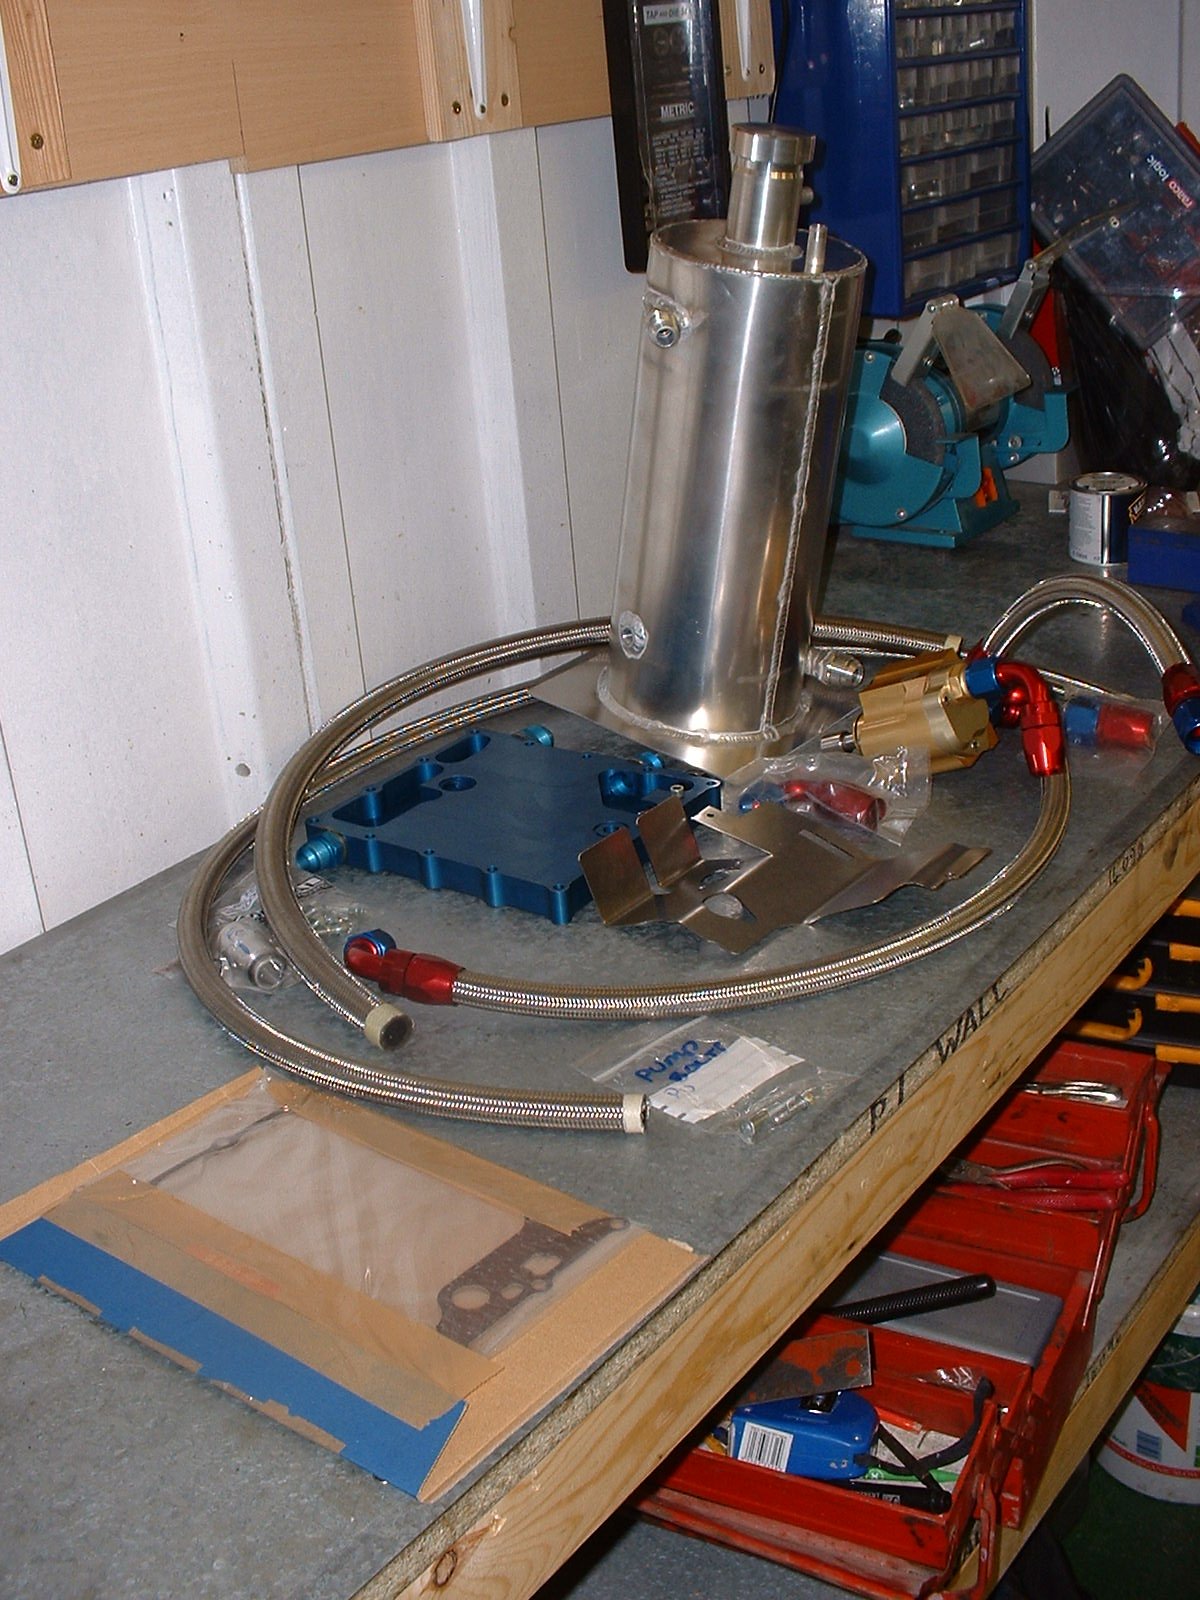
No build progress today, just some pictures of the sump kit from Extreme Engines.
 |
 |
 |
 |
 |
|
 |
 |
Fitting the sump
- August 21 -
Karl (MD of Extreme Engines) said he had done everything he could to make this an easy install, and it certainly was. Everything fitted perfectly, and I didn't even have to figure out which hose went where as he'd already made up and attached the scavenge hoses. The only outstanding work now is to make up the hoses for the tank supply and return, but I can't do that until I've got the engine and the sump tank in the car and I can't do that without the engine cradle.
For the record, the procedure was:
 | Remove the old sump |
 | |
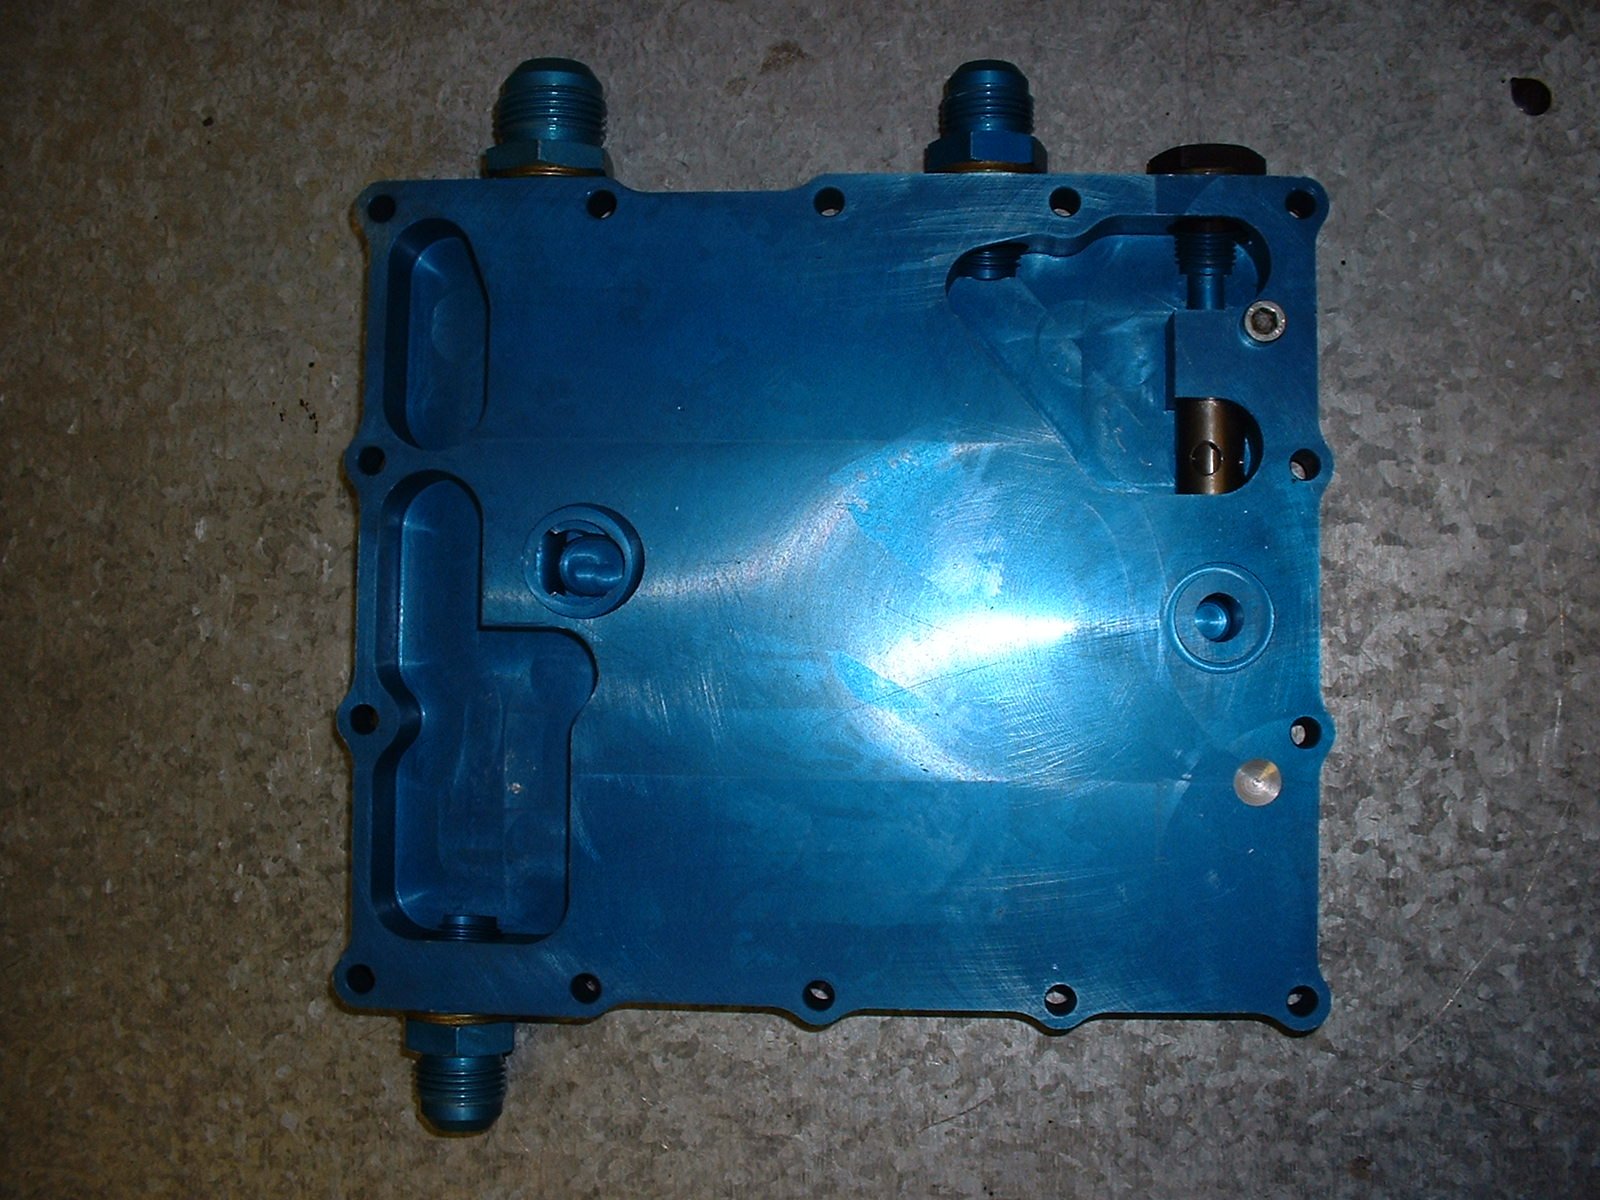
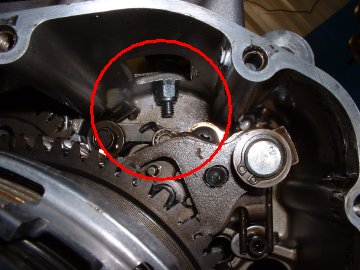
 | Fit the baffle. There was a slight complictation here in that the hole in the engine casing where the shallow wet sump's baffle plate had mounted (red circle above) was a couple of mm off from where the hole was drilled in the new baffle plate, so I had to elongate the hole in the plate a little bit. Karl advised that the hole in the casing should be tapped for an M5 bolt (with a dollop of grease underneath to catch the swarf). As I investigated doing this, I felt around on the underside of the hole and found little bits of swarf from when it had been drilled before (not by me!) and not cleaned up, which didn't please me a lot. |
 | In the end, I couldn't get the tap to take in the hole, so I stuck a Nyloc on the end of the bolt and torqued it up tight. |
 | Baffle plate screwed down, and gasket in place. I scraped off the remains of the old gasket, and cleaned up the surfaces with carb cleaner. The new gasket is a standard one, but cut down to clear the features of the sump. |
 | Sump complete, with pump. The PRV on this sump sits horizontal inside the pan, rather than vertical from the engine casing. An o-ring seals the sump to the old PRV point, so I stuck this in it's groove with a smear of grease. The old oil pickup pipe/sieve (which I don't have, and I presume is therefore sat on a shelf somewhere at STM) is replaced with a straight pipe from the pan up to the engine with an o-ring at each end, and after a bit of fiddling about, I concluded that because of the relative angles of the pan, engine and pipe, the easiest way to get everything to seat when you offer the sump pan up to the engine is to fit the pipe to the pan rather than the engine. The sump pan bolts are torqued up to 8ft.lb, and the job's done. |
Fitting the pump was even easier - take out the 2 bolts holding the water pump in place, remove the water pump, clean everything up, put a smear of grease on the oil pump o-ring, and slide it into place.
Having threadlocked the pump bolts in place, I realised that the only way to get the fitting for the sump's oil feed pipe in place would be take the pump off, but never mind, eh.
Another thing I realised was that the 120° fitting on the pump for the scavenge from the far (right) side of the engine sticks out lower than the sump, so I'll need to take considerably more care than usual when man-handling the engine around the garage.
Finishing off the sump installation
- September 3 -
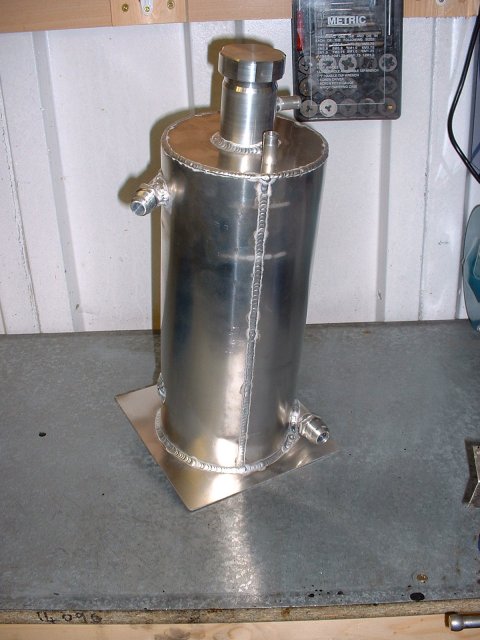
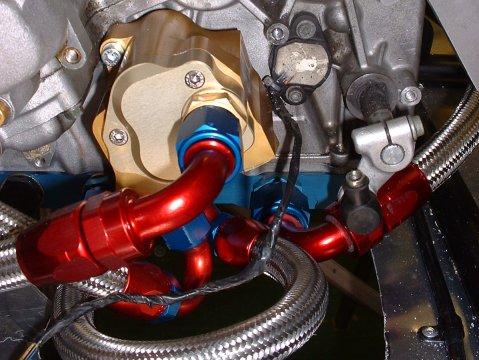
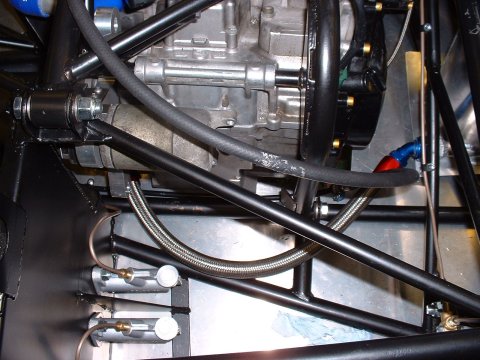
Karl sent through a 120° fitting today, so I made up the low pressure feed pipe and screwed it on. It's the one on the right below. Other than fixing the dry sump tank down to the floor, that's the sump finished. Yay!
Fitting the oil cooler pipes
- September 18 -
Oh joy of joys. Some helpful soul plugged up the oil cooler outlets in the block with chewing gum (presumably to stop crap getting in there, but surely they could have chosen something else?). After some time scraping it all out and getting my hands covered in chewing gum, I came to trial fit the oil cooler hoses only to find that they get in the way of just about every other pipe and hose I've already fitted. Sigh. And they've got annoying swaged ends, meaning that you can't rotate them to where you want them. Double sigh
After some huffing and puffing, and a rethink of the bottom radiator to pump hose, I found a way to get everything to fit. I really need to get the collant tank and dry sump tank fixed in place before I can get it all finalised though.
Wrong O-ring in the sump
- September 18 -
Karl from Extreme Engines rang me last week to ask about the o-rings he'd supplied. Apparantly his machinist had decided to improve the design of the standpipe, but didn't pass the information onto Karl in quite as speedy a fashion as required. Consequently, Karl had provided me with a thin skinny O-ring on the engine end of the stant pipe, where as the modified design requires the original fat red o-ring from the oil strainer fitted to the standard engine (that the stand pipe replaces in the dry sump). I never had the original strainer (presumably it's on a shelf somewhere at STM), so Karl sent me an o-ring that he had of the right size. Dropping the sump off to replace it wasn't the easiest task in the world. with the multiptude of hoses and pipes getting in the way, but it wasn't too tricky either.
Changing the dry sump tank location
- September 21 -
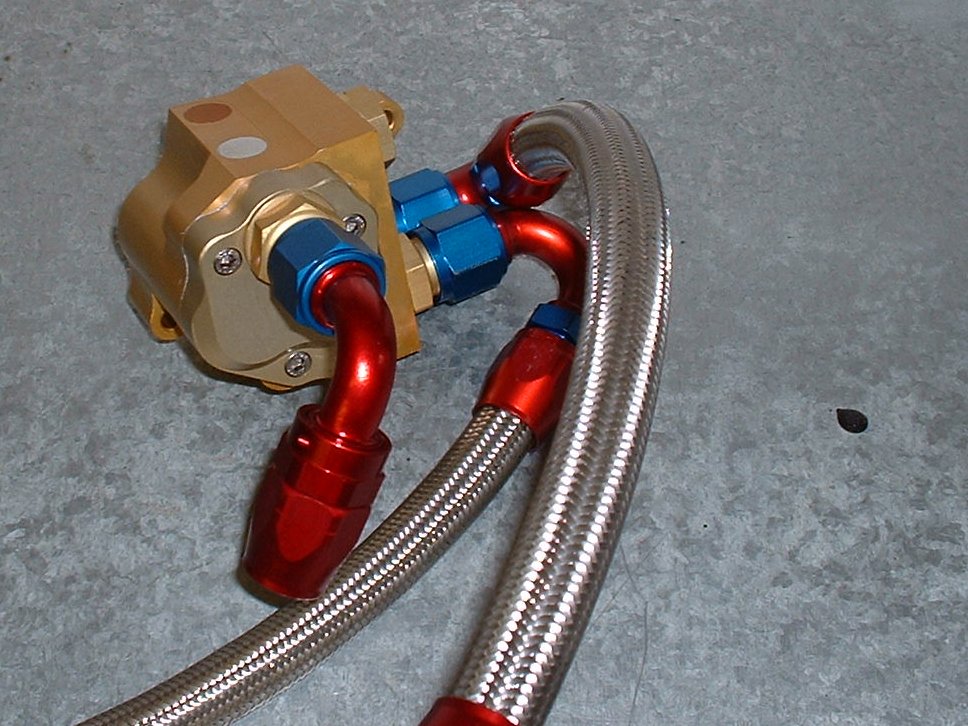
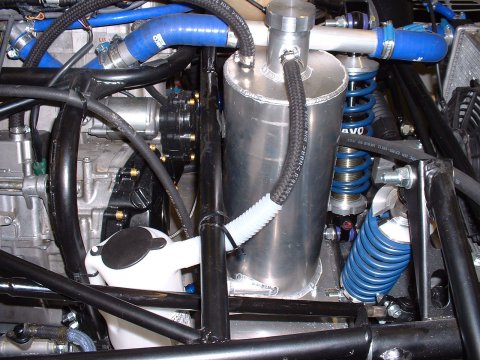
Nothing too dramatic, but as the amount of stuff in the engine bay increases, I realised that the dry sump tank was going to have to shift over just far enough to make the straight connector on the bottom feed unworkable. So, on with a new 45° connector. Gosh, they're expensive  Here it is, on the right. An observation - wherever the original fittings were from, the Goodrich ones from Demon Tweeks are not as nice. It's hard to say exactly what it is about them, but they're not as good.
Fitting the tank
- October 6 -
Next job was to fix the dry sump tank in place. A bit of fettling to get the base plate to clear the suspension bolts, and then I mounted it 4 exhaust bobbins. The final thing I did was to drill a 2" hole in the floor of the car directly under the tankto give easy access to the drain plug.
Fitting the catch tank
- November 13 -
Hardly an exciting job, but in the spirit of keeping the word count up, I hereby report that I fitted the catch tank today. It's only an oil jug from the DT catalogue, but it was a lot cheaper than an aluminium one, and classier than a Coke bottle...
Making Oil Cooler brackets
- November 18 -
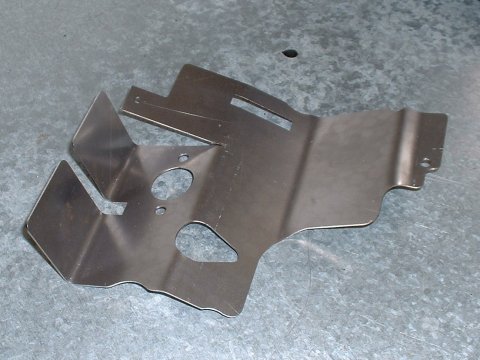
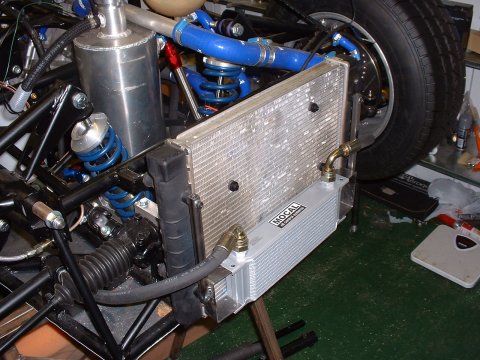
Following the excellent suggestion of Mr DH2, I made up some brackets today that would allow me to mount the oil cooler to some spare mounting lugs on the Polo radiator. This took absolutely ages (no idea why, they're not exactly complicated), but I'm quite pleased with the result - they're shown here unpainted.
I also spent a huge amount of time attempting routing the oil cooler hoses, looking for some sort of route that wouldn't foul the dampers and/or the steering rack boots. Then I spent a huge amount of time tightening up the oil cooler fittings at the engine end. My advice, to you, Phoenix builder following in my footsteps, is to fit them before putting the engine in the car - much easier. And get yourelf a 22mm spanner.
Steve and DH2 have their say
- April 24 -
Steve said that if I were him he'd strap the oil tank against the chassis rail against which it abutts. Just to stop it from flexing the floor (even though I've attached it to the floor with flexible bobbins). So I have.
DH2 wasn't happy with one of the oil cooler pipes, which could chafe where it runs under the oild tank floor. So I've zip-tied some scrap silicone hose to the points where it could rub.
leak hunting
- November 5 -
Some weeks ago, on returning Tim's trailer to him after an emissions test, I noticed that the car had leaked (quite a lot of) oil onto one of ramps. This had happened presumably when the oil had become very hot and thin during the emissions testing.
So I got the engine up to temperature and wriggled around underneath looking for things to tighten up. There seemed to be three culprits : one of the joints on the feed hose from the tank to the sump - that was easy to tighten; One of the joints on the output side of the pump - that one was hard, as there was almost no access. In the end, I ended up making a cranked spanner from three others, and got it as tight as I could. The third was the joint where the feed to the oil cooler (or from; I don't know which is which) meets the block. This was as tight as could be, so I guess the little O-ring inside the joint must be damaged. This is only a tiny leak though, so I'll live with it for now.
I ran the engine back up to temperature, and the pump joints didn't leak anymore. I'm going to keep my eye on them though, as I think they could go tighter if I could get better access. The moral here, in case you'd not figured it out, is to double check all the fittings, nuts, bolts, screws and doodads on the engine before fitting it, even if you're sure you've already done it...
This page last updated on: Sunday, Jul 16 2006
Date
aeroscreen
body
boot
brakes
chassis
cooling
clutch
dashboard
electrics
emissions
engine
exhaust
final drive
fuel system
gear shift
lubrication
mirrors
panelling
propshaft
reverse
seats
steering
suspension
throttle
trim
wheels
garage