home
introduction
build
sva tests
links
latest updates
Choosing the Fuel Tank
- Early January -
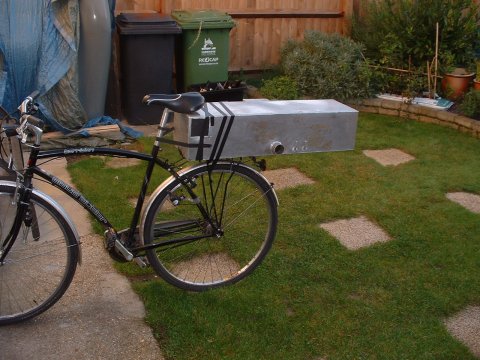
I want to be able to drive to my parent's house in Devon without re-fuelling, which is 240 miles. If I can get the same sort of mpg out of the Phoenix as I got out of the 21, which is to say poor, but not terrible, at 32mpg, then I'm going to need a tank that's at least 7.5 gallons.
At this point, the only other thoughts I have about the fuel system are that I want to avoid the surge problem that DH2 gets with his Megabird going round left-hand bends (he has a surge pot, but it's located in such a way that if the tank is less than half full and he goes left, then the pot, once empty, can't refill)
Collection time
- April 30 -
The tank is in place in the car, but Ian has forgotten to make the modifications for the GSX-R1000 fuel pump. He's going to have to send the tank along later, along with the other bits that aren't quite right.
Then I make a nasty discovery - I thought I'd already paid for the pump, but in fact I haven't. I think Ian thought I was having him on, but I really did think I'd paid for it. Honest!
New Bits
- June 18 -
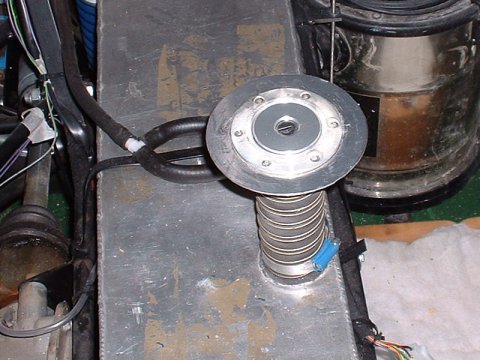
Looking at the ring that Ian has had welded into the bottom of the fuel tank, there's space for an O-ring. So, taking a bit of a flyer, I decided that it's probably for the same O-ring as used on the bike and ordered one. £10. Gulp. Still, I guess it's Viton or some other flouro-elastomer to resist attack by the petrol, so it's not going to be cheap-as-chips, but even so...
Must get round to looking into getting a fuel level sender sometime soon - the one built into the fuel pump gives a indication of 'just about to run out', but I don't yet know at how many litres that will be when in the Phoenix's tank.
Getting parts in
- July 3 -
I spent hours in the evening going over various catalogues looking for components for the fuel system. I settled in the end on using an aluminium hardline for the majority of the run from the tank to the engine, with conventional injection fuel hosing and hose clips to join the ends up. FWIW, aluimium tubing is half the price at Demon Tweeks that it is at Think.
I also ordered a lockable fuel cap, funnel and connection hose, a breather valve and some bits of tubing. One problem I gave up trying to resolve was how to deal with the requirement that the filler neck mustn't be any wider than 23.6mm for SVA, which I assume is to permit the nozzle of a lead free pump in, but not one for leaded petrol. I'm hoping that someone's going to tell me I can braze any appropriate sized hole in place. 23.6mm doesn't conform to any normal sized thing though, so I'm sure this is going to come back to annoy me some time in the near future.
Fitting the main line
- July 24 -
I thought that whilst I was clipping down the brake lines I'd do the main fuel feed as well. I'd borrowed another flaring tool off Steve, so after straightening the tube and cutting it to length, I put a flare in the end (I mean, what else would I have done with a flaring tool?) and ran the tube down the tunnel next to the brake line. A little bit of drilling and clipping later, and it's all neatly in place. I also fitted the flexible hose to the tank end, and cut down some bolts to allow me to bolt the fuel pump into the bottom of the tank. Weirdly, whilst the O-ring has a groove to sit in on the tank, it doesn't have a groove to sit in in the pump itself, but careful perusal of the service and parts manuals reveals that that seems to be the case on the bike as well.
I didn't actually bolt the pump in because the tank is full of residual water from when I tried to clean all the crap out of it a few weeks ago - shards and flecks of aluminium from the mods that were done to the tank, and my subsequent fettling to do the mods properly (grumble, grumble). As I know I have to drill at least one more hole in the tank for the fuel sender (which is a capacitance type, on order from Fozmula), then I'm in no rush to try and clear the current detritus out ot the tank, as it's going to be a major effort.
My final job of the day was to attempt to do something with the breathers on the tank. The tank has 2 baffles, which split it roughly 25/50/25, and I assume that the 2 breather tubes allow air to 2 of the chambers. Why the 3rd smaller chamber doesn't have one, or in fact why the first one does have one is a mystery at this time. There's no point asking Ian as he didn't even think that the tank was baffled when I asked him...
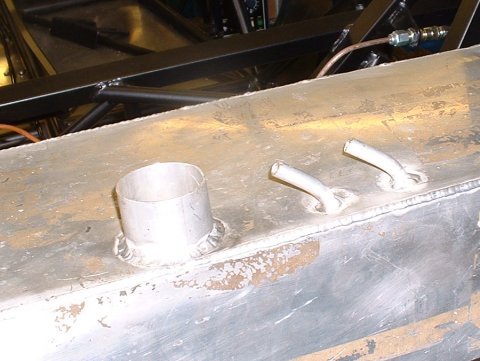
Anyway, the tubes are rather inconveniently large at 10mm O/D, as ultimately I need to connect them to a 6mm breather valve. I fiddled with bits of pipe for a while and decided that my best plan was to find a small enough pipe for the breather valve and ream it out until it could just squeeze over the 10mm T connector.
Seemed just one boring job too far for the day, so I went round to Pete's place for a party 
- August 15 -
The most obvious little task was to take Billiam the Burninator at his word at fit the 6mm rubber hose fuel breather hose onto the 8mm T-adaptor by heating it up in boiling water. Gosh darn it, the kid was right - it fitted!
As the spirit of adventure gripped me, I smacked the breather pipes round with a medium sized persuader into a better position. The ali didn't crack, creak or whinge, so most satisfactory.
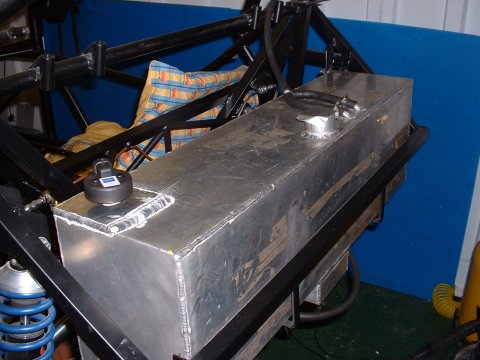
Next job was welding on the little bits of angle that will stop the fuel tank sliding sideways under cornering as 10 gallons of fuel (that's 12.5 gallons to you Yankee Doodles) slam from side to side. I'd earlier in the day welded up a jig that will eventually enable me to grind down the shims for my VHPD engine, so I was full of welding confidence.
Now, I know that being able to weld two things together isn't exactly the rarest of skills, but as this is my first ever weld, y'all gonna get a picture...
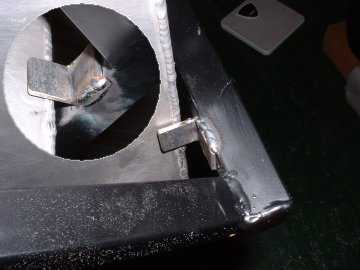
There's no picture of the other side, because it didn't go as well - the wire speed gauge got knocked to maximum by the gas tube thing, and within a microsecond of firing the arc I had a heeuge blob of metal just sitting there. In imagination, it was grinning cheekily back at me.
Fiddlin' about
- September 3 -
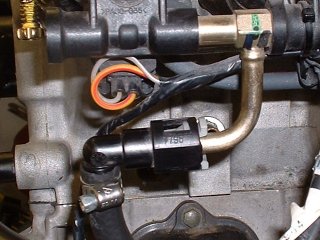
With the engine in place, I was able to cut the fuel hose to length, and fit it. With a bit of effort it was possible to cut the hose off the original fuel rail fitting and re-use that. It doesn't need it, but I put the hose clip on for paranoia's sake.
Fitting the tank
- October 26 -
I tried fitting the fual tank today, but something's not quite right.
- November 3 -
I'd taken the fuel tank to Mackays last week to get a plate welded on for me to screw the fuel sender into (the previous adaptor made for me by JB7 was sacrificed in a horrendous Lumiweld accident). Today I got it back, so I was able to flush all the little bits out of it, and fit the fuel pump and sender.
I also spent a bit of time Lumiwelding a large washer into the base of the tank filler cap, which reduces the hole to the SVA acceptable 23.6mm.
remaining jobs at this time, then, are to secure the tank in place with some humungous cable ties and to fit the filler cap - but I can't do the latter until I've got the bodywork on.
Fuel filler mods
- March 20 -
Next, a previously unexpected modification to the fuel filler. In order to make the rear body work easier to get on and off, I'm going to remove the step where I have to do up and undo the 6 fiddly M4 bolts and nylocs that hold the fuel filler cap on. To this end, I've made up a plate which bolts underneath the filler cap, upon which the bodywork will rest.
Doing the tank properly
- April 17 -
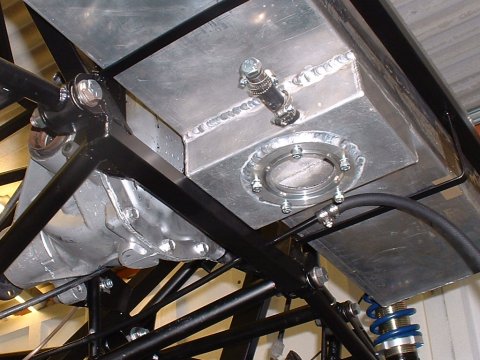
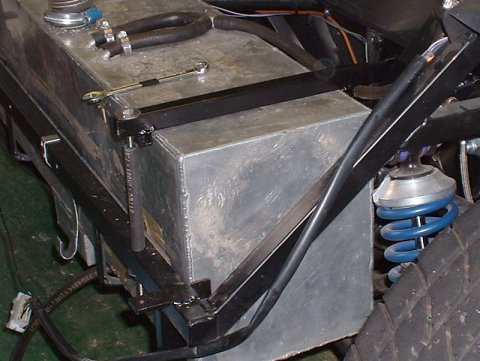
I started work on a proper way of securing the tank today. I've made up a couple of arms that bolt into the chassis at one end. These swing down over the tank, and are secured to the back of the chassis by a length of M6 studding. They've also got a couple of stops welded on their underside, which locate on the edges of the tank - so hopefully, I've eliminated all the up-and-down and front-to-back degrees of freedom - side-to-side freedom was curtailed a long time ago, as that's the only one I thought I was worried about...
Stick it back in
- April 23 -
I'd painted the clamps that hold the tank down a couple of nights ago, and they were ready today for deployment.
I've put some old fuel hose round the thread of the studding, on the off chance that whatever wiring ends up running along the back tube could chafe against it.
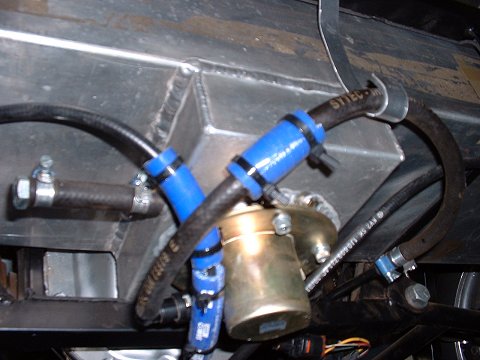
Whilst I was reconnecting the pump supply and fuel hose, I noticed that the handbrake cables can move and rub against the fuel hose, and the fuel hose itself can move enough to rub against the corners of the tank. Not only that, one of the handbrake cables is small enough to find its way up to push on the quick release fitting on the fuel hose. All round, a bit of a disaster waiting to happen. The SVA man must have been day-dreaming when he was looking in this area, and I wouldn't have noticed before because it only came about when I made the hook to stop the fuel hose dangling down below the line of the bodywork... So I cable-tied on scrap sections of silicone hose in the appropriate places (sorry for the picture - camera won't focus in the dark places under the rear of the car)
This page last updated on: Sunday, Jul 16 2006
Date
aeroscreen
body
boot
brakes
chassis
cooling
clutch
dashboard
electrics
emissions
engine
exhaust
final drive
fuel system
gear shift
lubrication
mirrors
panelling
propshaft
reverse
seats
steering
suspension
throttle
trim
wheels
garage