home
introduction
build
sva tests
links
latest updates
Panelling
- February 10 -
The standard Phoenix chasiss is supplied with panels precut to shape. Mine isn't  . Having mostly panelled the first 4 cars, Ian's advice was to get 3 8' x 4' sheets of 16 gauge NS4, and they'd lend me the templates they'd used.
- April 7 -
After a brief discussion on Cam7, I decided that rather than go for 16 gauge all round, I'd do the floor in 14 gauge, just for an extra bit of protection from rocks and other large immutable objects. Mackays delivered the sheets direct today. They are very big - I'm not quite sure how I'm going to fit them AND the chassis in at the same time...
Getting Started
- May 7 -
It occured to me tonight that it'd be nice to know where I'm supposed to be drilling when I start drilling holes in the panels. More specifically, I'd like to make sure that when I drill a hole that it goes square into a chassis rail, rather than into thin air, or scraping down the side of the tube.
Which you'll remember is round, rather than square, which makes the task a little bit harder.
Lots of people have solved this problem before, of course, but I've no idea how they did it. My current favorite idea is to use lickle magnets - clamp the sheet down on the chassis, and then thrown magnets on it - they'll stick to the aluminium only where there is a chassis rail underneath.
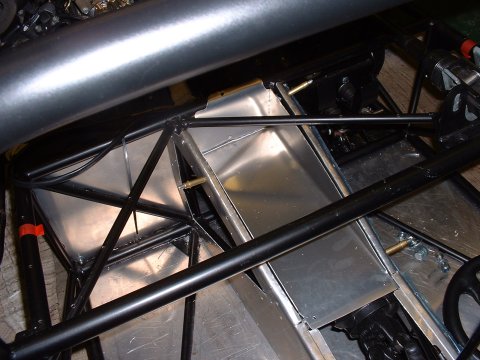
I've got some magnetic stick things from a geometry construction game thing, and this is what I got when I tried with those:
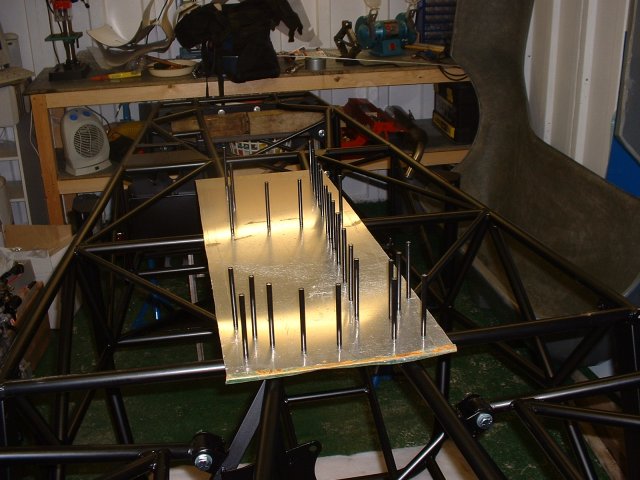
I'm so brilliant, I often wonder why the world needed Einstein.
Panelling the floor
- May 8 -
Went out this morning to buy an automatic centre punch, and some connectors so that I could get the air compressor up and working. Seems to go OK - a bit noisy, and I can't get it it to pressurise to more than 6 bar, whereas it's supposed to go to 8. I must be doing something wrong, but it's not clear from the insructions what that might be.
Just before lunch I started on the floor panel. It turned out to be a much simpler operation than I was anticipating - lay the aluminium out on the chassis, mark off the outsides of the chassis on the sheet from underneath, lay it out on the floor, use a drill powered nibbler to trim to size, and then aviation shears to trim down to the line. One thing I learned is that it's worth leaving a good 1/2" or so when trimming to size. I actually left about 3 to 5 mm, and when I started to trim it with the shears, the offcut curled up on itself and kept getting in the way.
Then I spent an hour or so getting the webcam up and working properly, and setting up an email address that I can use for Messenger and Cam7 when I'm out in the garage. Then I remembered that I was supposed to be building a car...
Next stage was to mark out the positions of the chassis tubes. Most of the major tubes were actually quite easy to do, just by eye, and lifting up the panel where necesary. The smaller diagonal tubes I resorted to the magnets trick.
It seemed to work though - I punched and drilled a set of test holes in the middle of each length of marked line, just deep enough to pit the suface of the underlying chassis tube. When I removed the panel, every pit was in the centre of its tube. So I clamped the sheet back in place, and centre punched the remaining holes at 3" centres. It's become a bit late though to fire up the compressor and start drilling all the holes, so I'll leave that till tomorrow. If I'm a good boy, I'll use the time now to go back out and tidy up the garage.
P.S. Has anyone else noticed that I'm unable to maintain use of a consistent tense throughout these little reports? It's annoying me, and I apologise if it's annoying you as well...
- May 9 -
Today mostly went OK. Drilling all the holes was OK, except that I was going through drill bits way too fast - they weren't getting blunt, but kept snapping. I think the problem was that as the bit broke through the inside of the chassis tube, the swarf would jam into the flute; if I didn't stop quick enough, the bit would snap. I soon developed the technique of stopping! A bit of reverse would clear the swarf and then I could drill the last tiny bit out. I suppose I should have tried using a normal electric drill - the air drill I was using was a 'all-or-nothing' kinda fella.
Holes drilled, I took the panel off and deburred the other side with a countersink drill bit, and cleaned the debris off the chassis - and got a first look at the damage I'd just inflicted on the single most expensive part of the hole car...
Next, on with the sealant. This helps to attach the panel to the chassis, and takes some of the shear load off the rivets, which hopefully means that they won't start making bigger holes for themselves over time. Needless to say (although actually I am going to) I used an air caulking gun for this - not because I needed to, but because I wanted to. It was great - just squeeze and draw a line 
Then the first realization of impending difficulty - I was going to have to get the panel back on fairly exactly, if I didn't want to smear that sealant everywhere. I nearly got it right... Then more difficulty - the holes no longer seemd to line up quite properly, and the sealant made it difficult to adjust the position of the panel. To cut a slightly dull story short, I cajouled, levered and bashed everything around until a satisfactory number of holes lined up, and I used a cordless drill to make the others fit properly where I couldn't tap the rivets in. Weirdly though - mostly the drill just seemed to go straight through, without actually removing any material at all, and then the rivet would fit fine.
But then, the thing which made it all worth while - the air riveter. This tool rocks! I've done a bit of riveting by hand before, and had decided that I'd get an air riveter, and that inevitably led to me needing a compressor, and then all the other air tools, that I didn't actually need, but as I had a compressor...
Ahm, anyway. bang fssssss. bang fsssssss. bang fsssssss. repeat until done - so easy, and very very satisfying. If you think you might be able to make use of one, then gwan gwan gwan get it .
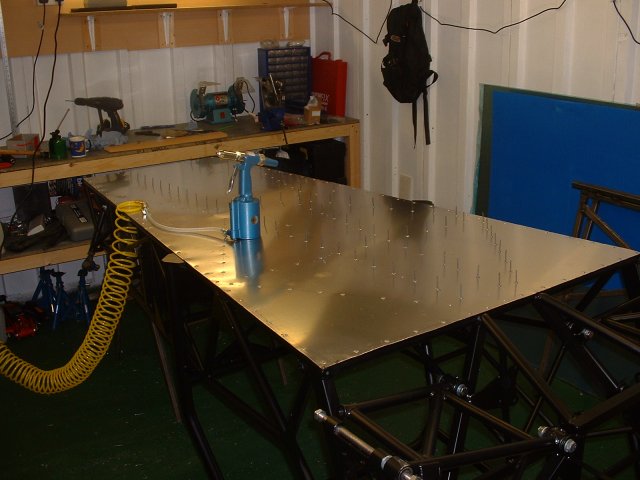
The last thing to do, was to bend the edges of the panel over to curve round the chassis tube
Now, the question is - do I do the side panels on the outside, or the inside? Outside will be much easier, but inside will look neater. I'll sleep on it, I think.
Panelling continues
- May 10 -
Not much happened today - DH2 came round and helped Alex and I turn the chassis the right way up, and put it on Tim's stands. We pondered for a while why the side panel templates are shorter than it seems they should be - we couldn't figure it out, so I'll give Ian a ring tomorrow. I spent a couple of hours marking out a couple of panels to be cut - the templates Ian supplied are close, but not exact, so there's a lot of to and froing to get them right. More to do tomorrow...
- May 11 -
Spoke to Ian on the phone, and he said that they'd tried various different flavours of panelling for the main side panels - the laziest option and the one he preferred is to not panel the sections of chassis forward of the footwells at all. Seems fair enough to me - it'll make precious little difference to chassis stiffness, and will much improve access to the engine compartment.
- May 14 -
Marked out all the panels ready for cutting tomorrow. Except for the scuttle, which I don't understand the shape of, so I'll leave it until I need it; and the upper rear bulkhead, as I want to make a little boot above the fuel tank, so putting a bulkhead in the way would be tantamount to foolishness.
- May 15 -
|
Today started well - I did the footwell panel, and aside from the scratches in the powder coat where I had to keep squeezing the panel in, it went well. Then I wasted an hour trying to make the passenger rear bulkhead panel. After ascertaining that putting 2 returns into a panel without a proper metal bending machine is very difficult, I tried to borrow Steve's. But it weighs in at 200kg, and in the absence of several strong co-helpers, I had to formulate Plan C. So I jettisoned the panel I'd been working on, and made another that only needed one return. 15 minutes later, it was finished. You live and learn. Before it got too late in the evening to be using a very successful but noisy combination of nibbler, jigsaw and shears, I had time to cut and dry-fit the other rear bulkhead panel, and the passenger side panel. Tomorrow I hope to cut and dry-fit the rest, and get them all drilled and ready to rivet in place. For the time being, I shall resist actually permanently fitting them until I actually need to. What became very apparent once the panels were in place was the asymmetry of the tunnel - the driver has to be quite svelte, but the passenger has a bit more room. I wonder where the handbrake goes - there isn't much room in the tunnel! |
|
- May 16-25 -
Getting bored now. Over these few days I've cut all the panels and deburred the edges with an assortment of files. I know that you're about as interested in this as I am, but I'm trying to keep an accurate track of the build time as I go, so when I do something, I write about it...
I also have been on the se7ens.net Butcher in the Borders Tour - 4 days in the Lake District and Scottish Borders in a variety of se7enesque cars, blatting about and having fun. Having spent a day each in a K-series Caterham, a V8 Dax, a Zetec Dax, a Blackbird Fury and a VX Lotus Europa, I know I've made the right choice picking a BEC - I enjoyed the ride in that the most by far.
Suitably motivated, I make my way back to the garage...
- May 26 -
Today, as I started drilling the panels to fit, I realised that after 26 hours in the garage, I'm at just about the stage that most people start their build. I'm on schedule in terms of time taken, but 2 weeks behind in terms of time elapsed. Today's stint saw the driver's side panels all drilled.
I spoke to Ian to try and get hold of the bits he still has that I need, but he was mid way through doing his V.A.T. return, so not much joy there. I've got quite a few more hours panelling to do anyway, so no rush really.
I note with mild envy that Tim's Fury is nearly finished
Panelling continues
- May 27 -
sigh More panelling. More broken drill bits. Just the footwell and forward passenger panel left to do...
Panelling finishes!
- May 29 -
Well, nearly, anyway. All holes are drilled and deburred. Phew!
Panelling the engine bay
- September 19 -
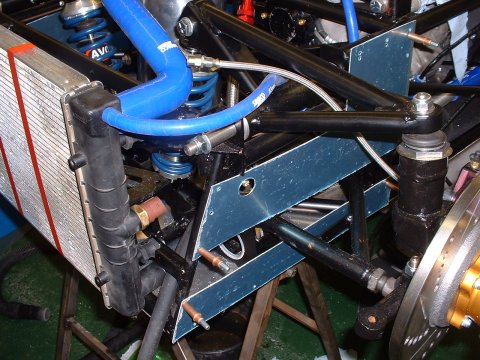
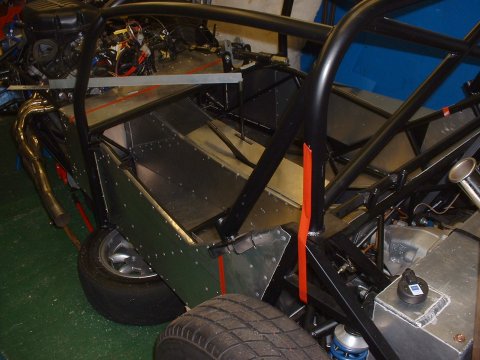
I've been fretting for some time now, about the engine bay panelling. There must be a reason why Caterham panel their engine bays, even to the point of making future maintenance more difficult. The most useful things I can think of are that it contributes to the front end stiffness of the car, and that it stops the wheels filling up the engine bay with stones and water.
Having spent quite a few hours faffing about with cooling hoses, I am convinced that permanent panels would be a bad idea - there's no access to the cooling, oil cooler or sump pipes with the passenger side engine bay in place, for example. So, I've decided to fit a small permanent panel at the very front of the car, and a removable one, and use something like Dzus fasteners to hold it in place.
The front panels look a bit like this - by the time you've left holes for the steering rack, brake pipes, and wishbones, there's little point trying to make a complete panel, so I made it up from 2 sections.
Fettling the front panels
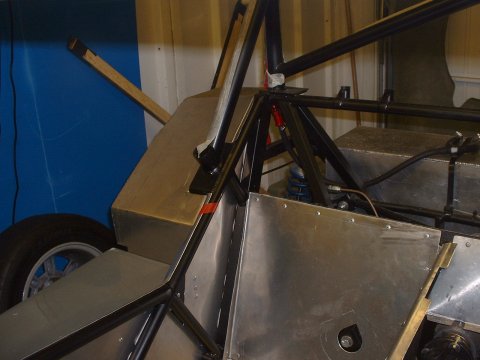
- October 7 -
With the steering rack in place, it was clear that the front panels needed a bit of fettling to allow clearance for the rack gaitors. So fettle them I did.
- October 8 -
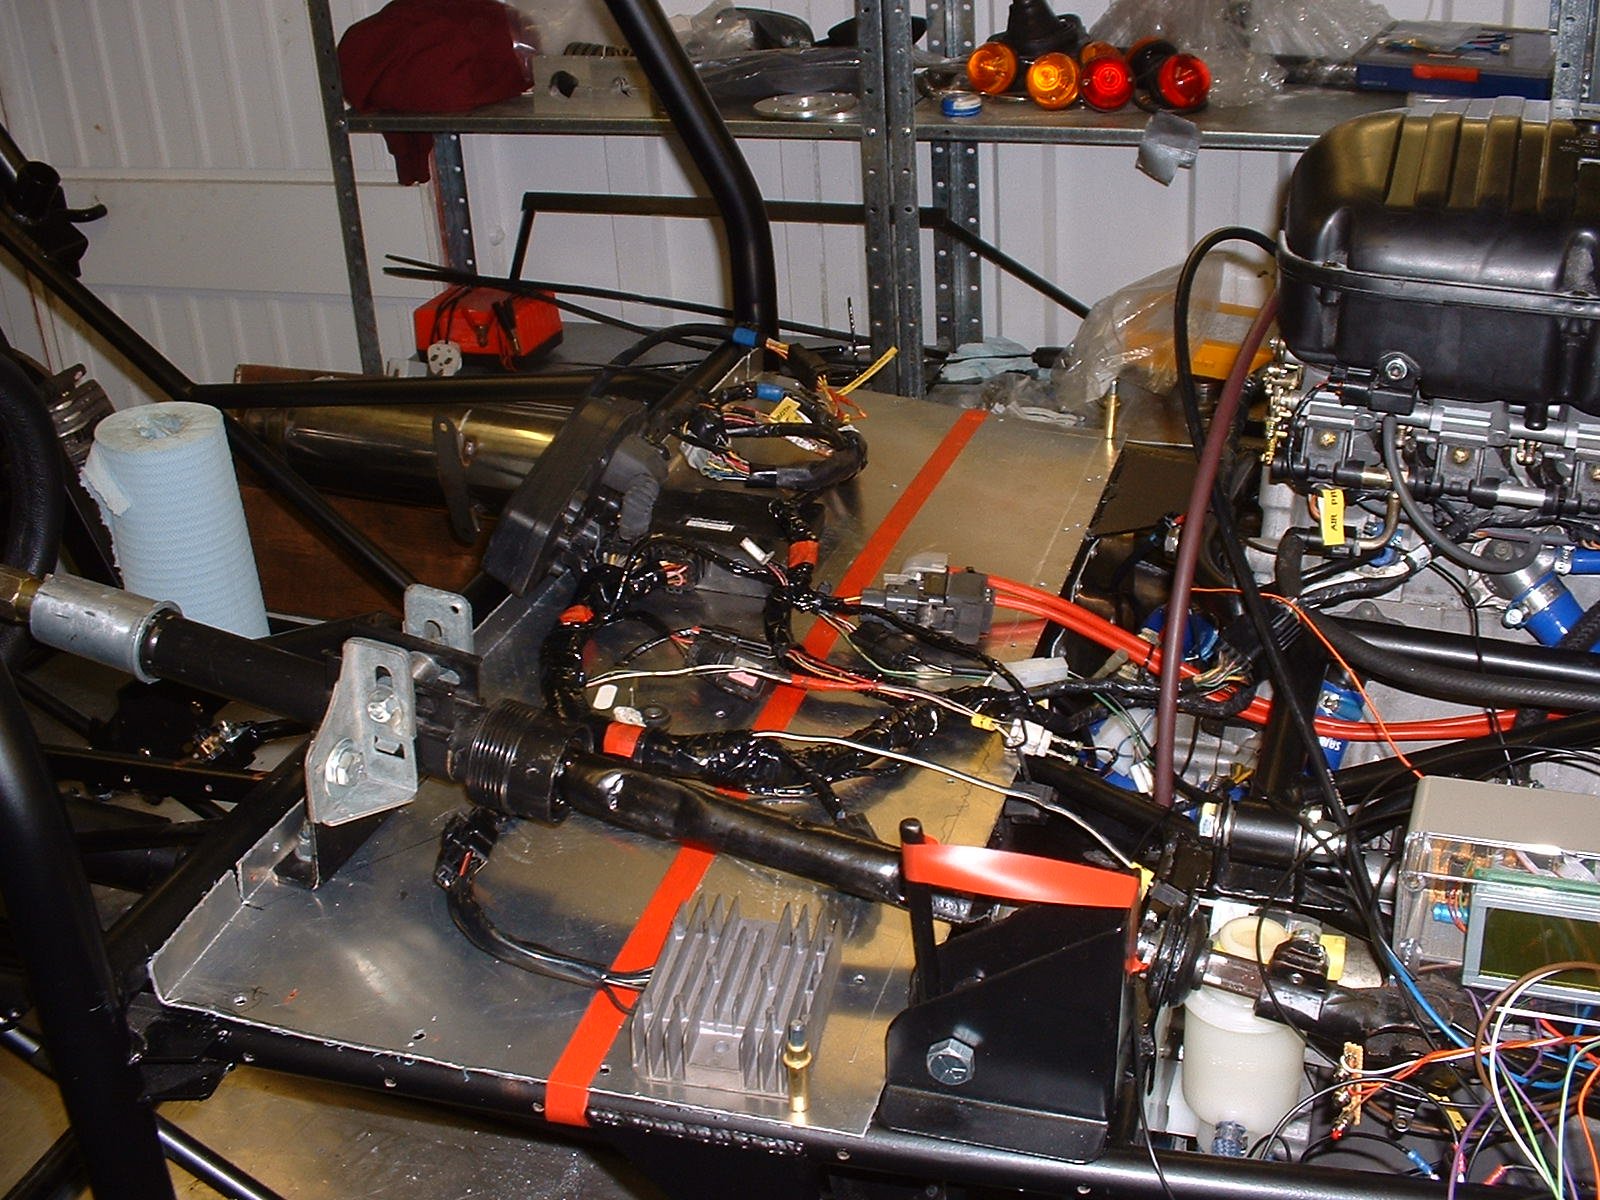
Last night I did myself a little dependency chart, to help me figure out the best thing to do next - this turned out to be to finish off the engine bay panels.
It takes a surprising amount of time to fit Dzus fasteners (4 hours total to cut the 2 panels to size and fit 8 fasteners), and I'm grateful to Steve for advising me to practice on a bit of scrap first, as it definitely requires a couple of 'oh, right, yes, now I see how that works' moments.
Making the under-scuttle panel
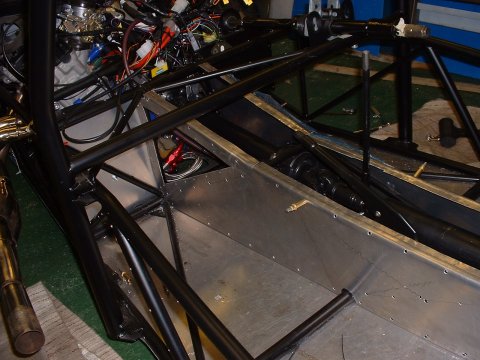
- November 28 -
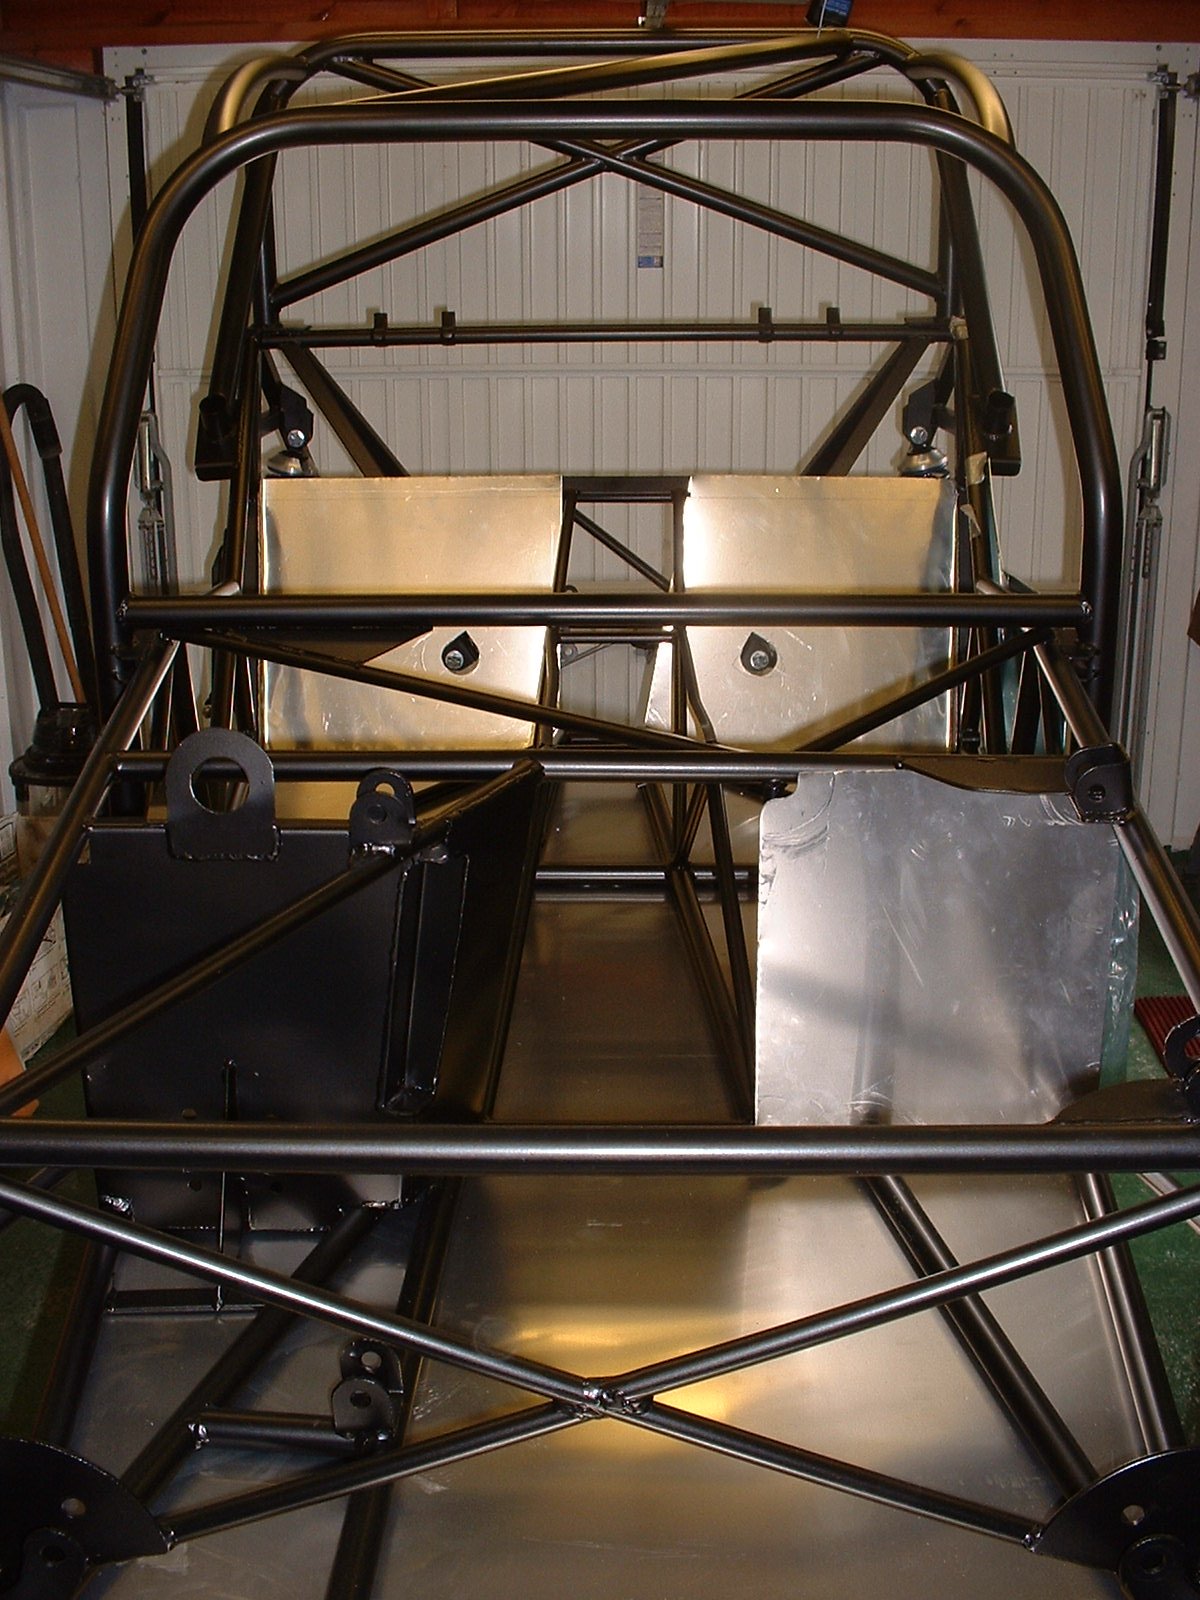
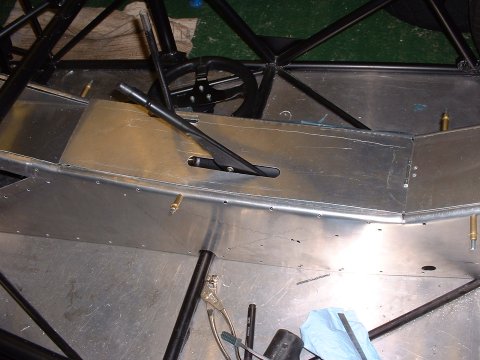
In order to have somewhere to put the various electric bits before I can have a little test run on the road, I spent today making the panel that supports the scuttle. The picture doesn't show it, but it's a really axkward shape in that it's not flat. A couple of saw cuts in strategic places helped it to sit a bit better.
The red line in the picture is roughly where the scuttle will rest. I want to put most of the unservicable bits behind this, and have the fuses, relays and other useful bits in front of it.
Pedal box cover
- December 29 -
Spent a couple of hours making up the cover for the front part of the pedal box, where it's not covered by the under-scuttle panel. I can't remember why I chose not to make the under-scuttle panel bit enough to cover the pedals, but I'm glad I didn't - it's quite a complicated fit. The new panel's not quite right though, so I'll use it as a template to make a better one tomorrow.

Panel fettling
- December 31 -
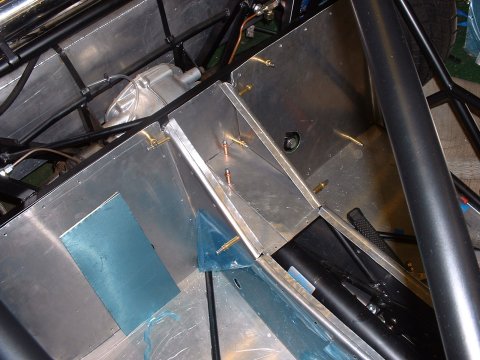
I've spent so much time reaching through the passenger footwell to get at the rear end of the engine and all the stuff there, that I figured I should put an access panel in the tunnel - if I don't I'm sure to wish that I had.
So I did... The panel that fills the hole has a joggled edge, and will sit flush with the rest of the panel. I'm going to rivet it in - rivets are easy enough to drill out should I need to get access to the engine.
Making a hole for the exhaust
- January 1 -
Oops - I forgot to put a hole in the engine panel on the exhaust side for the exhaust to poke through. With the help of a cardboard template, that was soon sorted.
Fitting the tunnel panels
- January 2 -
Well, things must be getting serious - I spent today working on the tunnel panels. I'd cut the side panels to shape quite some time ago, but now the time has come to trim them to the exact size they need to be, and bend the tops over so that I can fit a top panel. The picture also shows the work in progress to make the back end of the tunnel into some useful storage space. I guess you might call it a glove box, as I'll probably keep gloves in there at some point...

More on the glove box
- January 3 -
The whole day, and this is all I got done...
The little blue rectangle is the lid for the glove box - I haven't figured out a way to attach it yet so that it sits flush and doesn't rattle.
And a front glove box too, Sir?
- January 8 -
Spent a couple hours today trying to figure out a way to neatly panel the top of the tunnel at the front end. There's a diagonal chassis tube that's in exactly the wrong place for a flat panel, and not matter what I tried, I couldn't figure out a way to get a panel in there in such a way as to completely close off the engine bay, and yet still be removable for access to the back of the engine.
In the end, I realised that I would have to drop the front end of the panel down a bit, and put a return at the very forward edge to bring it up to the chassis rail. This chain of thought lead me to GloveBox2(TM).
It won't have a lid, but will be covered by the under scuttle panel, so will be a useful little cubby hole for things to get lost in.
GloveBox1 gets a lid
- January 9 -
With the careful addition of some B&Q kitchen cabinet magents, and a hinge, I finished off the primary glove box. I just need to figure out some sort of way of opening it. After SVA, I would think...

Don't be surprised if it appears with a double hinge in some future picture - the single one is a bit loose.
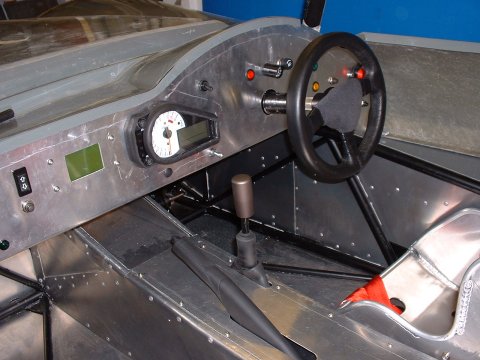
Main tunnel gets a lid
- January 22 -
Just a couple of hours today, but I managed to get the main tunnel cover cut and finished. To my considerable surprise, it easily and neatly threads over the gear stick and handbrake without any difficulty at all. Just needs drilling for rivets now.
Attaching the panels
- January 28 -
Today, I really wanted to get the panels attached, so that I could then start bolting the bodywork on tomorrow. First I spent a little time polishing off the jobs that are easier without the panels in the way: drilling holes to locate the magnets for the glovebox lid; a clutch foot rest; and fitting the removable clutch pedal pin.
Then on the panels. This was pretty straight forward, except that once you start riveting the panels down, then some of the remaining holes move out of alignment slightly, which means that those holes need to be drilled out to slightly widen them. Some of the holes (those on the far side of the car from my little dehumidifier) had also rusted a bit, which reduced their diameter - they had to be redrilled as well.
- January 29 -
Yesterday I managed to get all the panels on that require bonding. This morning I finished off the panelling by attaching the under-scuttle panel and the very front panels. The engine bay panels Dzused nicely into place, but I had to drill some holes in them to accomodate the new rivets in the underlying panels.
Then I started to think about the sidepods, and hit a bit of a snag. My super duper removable panels would be behind the sidepods (yes I should have seen this coming, but nobody told me. Why I even write this stuff up beats me if you're all going to just sit there saying nothing...) Not only that, but the sidepods really need to attach to something solid, not a flimsy panel only held on at its corners. And ON TOP OF THAT, back on the main side panel of the car, the rivets along the bottom edge are all in the way of the 1.5" right angle aluminium that I'm going to be using to support the sidepods. If only I'd known 9 MONTHS AGO to make the floor stick out by 1.5" then I'd have had a built in pod support. Now I'm going to either have to drill holes in the angles to clear the rivets, or drill all the rivets out and fix the angle on using the drilled out holes.
You, the reader, have been tested - and found wanting. Try harder.
I gave up in a huff at this point.
Mudguards
- February 12 -
I figure the SVA man won't be that happy if the cockpit is open to the rear wheels, so I've made some mudguards
Now, I have to figure out how to attach them permanently to both the side of the car, and the sidepod, which is, if you'll remember, detachable.
Fitting the mudguards
- March 14 -
I permanently attached the rear mudgards today, along with the rubber trim that will hopefully stop (too much) water coming up onto the top of the sidepods.

boot panel
- March 19 -
The afternoon was spent making up the panel to blank off the boot space behind the seats and above the fuel tank. My ultimate plan is to open this area up for storage, but for the SVA it's easier just to blank it off.

Tunnel stuff
- April 3 -
First off was to fit the glove box floor - easy.
Next came fitting the tunnel cover - not so easy. I'd decided to do this using M4 button head bolts into rivnuts in the flanges at the top of the tunnel side panels. No problem, except that rivnuts are very intolerant of a misalignment, and I spent a large amount of time fitting and removing the panel a bolt at a time and gently filing out each hole in the panel until the bolt could fit through it exactly perpendicular into the rivnut below.
- April 5 -
Finished off the tunnel today by making up a gear stick cover (by chopping down a rubber cover I'd found on a diesel Sierra in a scrapyard some months ago) and by cajoling, cutting and squeezing a Mk4 Golf handbrake cover (from eBay) over the Sierra handbrake.
This page last updated on: Sunday, Jul 16 2006
Date
aeroscreen
body
boot
brakes
chassis
cooling
clutch
dashboard
electrics
emissions
engine
exhaust
final drive
fuel system
gear shift
lubrication
mirrors
panelling
propshaft
reverse
seats
steering
suspension
throttle
trim
wheels
garage