home
introduction
build
sva tests
links
latest updates
Template
- February 13 -
Time to make a dashboard! Here's a picture of the template I've made up.
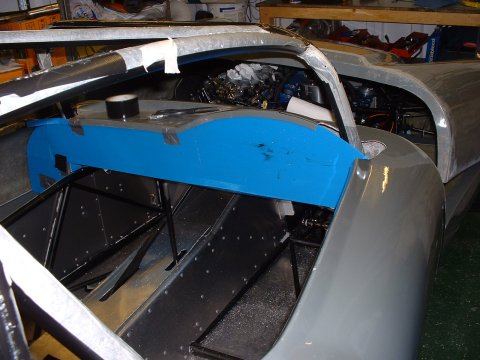
One of the tricky things about the dashboard is that for SVA, the lower edge has to rounded to a radius of 'not less than 19mm'. DH2's Westfield, and I guess therefore all the others are in flagrant violation of this little detail, but we'll let that lie. In my case, the roll cage has a horizontal 1.5" member that runs from one side of the car to the other, about 2" forward of the dashboard panel, so I've out a bend in the bottom of the panel to meet that.
Making the dash
- February 28 -
At the end of yesterday, I realised that there are only so many wires you can run around to the dash area without there being an actual dash to attach them too. It gets real complicated. So I made the aluminium version of the dash from the template I'd made up before.
I drilled all the holes using a step drill. It's quite a handy thing, but seemed to have a habit of wandering off centre a bit, as not all my holes ended exactly in line with each other. But the ease of drilling large holes of different sizes without having to change the bit was a big plus.
- March 1 -
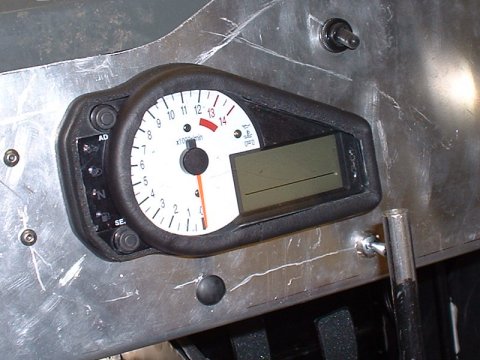
A bit more work on the dash this evening, marking out and making the rough cuts for the bike clocks and CB Tech dash to fit into/behind. I've decided to mount the bike clocks by splitting the case into its 2 halves and sandwiching the dash panel in between them, which is very neat and hides the cut edge of the panel. Unfortunately, about 1/2 of the clocks unit is outside the region excluded from the SVA man's "dangerous roughness" checks, so I'm going to have to think of something else for the SVA test itself.
As for the CB Tech dash - it's still the prototype unit, so it's quite large and unsuitable for public display. So, I cut a hole through which its display can be viewed, and taped the unit on behind the hole. At some near future time I'll fix it more permanently in place.
- March 3 -
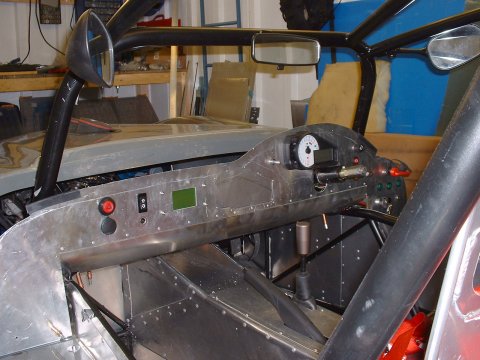
Another hour on the dash this morning saw all the holes completed, and the switches and bits and bobs in place.
Fixing down
- March 10 -
In a strop enhancing move of idiocy, I riveted the lower edge of the dash down onto the sidepods. I'll have to drill the rivets out of course - what's the point having removable sidepods if they're attached to an immovable object? Duh.
Stopping the wibble wobble
- March 23 -
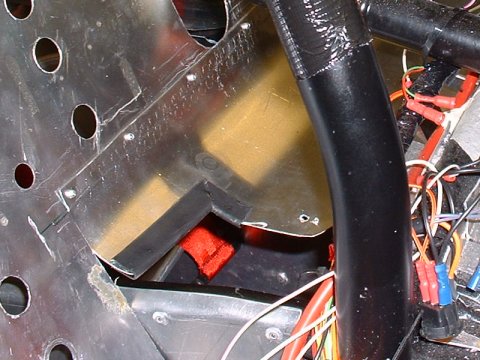
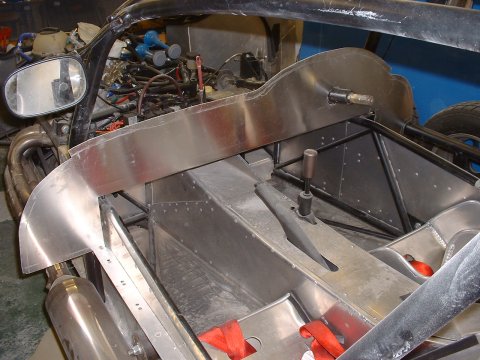
Spent this evenign making up some little aluminium angle based tabs to rivet into the tube that runs along near the bottom of the dash, so that I can rivet the dash into them later on.
I took a picture - it didn't come out very well. Soz.
No more wibble wobble
- March 25 -
Finished! - the dash is quite firm now - I hope there's still enough flex in it to allow it to slot into the gap at the top, underneath the tub. I've also learned from my previous lesson, and I've used button heads to attach the dash to the sidepods instead of rivets.
Whilst I was 'in the area', I made a blanking plate for the hole where the clocks will have should have won't be. My current plan is to just bolt the clocks on somewhere (anywhere!) behind the wheel, in such a place that I (actually Mr SVA man) can see the speedo and telltales. I can't try this out though until I've got the seats mounted properly, so that I can see what I can see.
Clocks in, clocks out, ...
- April 2 -
In another stroke of inspiration, I figured that I'd try sticking foam round the edge of the clocks to see if I could make them SVA friendly, as everything else I tried was pretty unsatisfactory. The foam seemed to take quite well, so I put the clocks back in their rightful place, and we'll see what the SVA man makes of it.
Rip it all out...
- April 17 -
I disconnected all the switches and gauges, drilled out the rivets, took out the bolts, and Mr Dash was once again free to roam. A little while later, I'd made a new hole for the clocks to sit in (behind the wheel, in the zone excluded from radius checks). I'll no longer be able to read the rev counter, but I can see the speed and the indicator and main beam tell-tales, and that's all the SVA man will care about.
I also extended the hole for the steering column upwards, so that I can raise the column, which will maximise the visibilty of the speedo.
I'll have to find a new home for the brake warning light and the headlight switch, but that shouldn't be difficult. More difficult is the LED warning cluster. Since it doesn't do anything useful at the moment (being always on) then I'll probably just leave it off.
Stick it back in
- April 23 -
First job of the day was to make the rounded bottom edge for the dash. I'd bought a 0.8mm thick piece of aluminium sheet for this, so that I could more easily bend it. I also bought a 1.5" tube, so that I could make the bend over it, just to help it all look nice.
0.8mm turned out to be a bit too thick for a smooth, even bend, but it still came out OK
Then I had to find some way to attach the bottom the dash to the chassis. The SVA tester's name was used as a profanity many times as I drilled upside down in the cramped confined spaces of the footwell, trying to hit a hidden 5/8" tube through a floppy piece of aliuminium.
Then was some time consuming moving of switches, which involved plenty of extending the loom.
And finally moving the steering column up to make sure that the speedo is visisble.
I'd mentally allocated 3 to 4 hours for this - not sure why. Pretty delusional.
New dash
- March 21 -
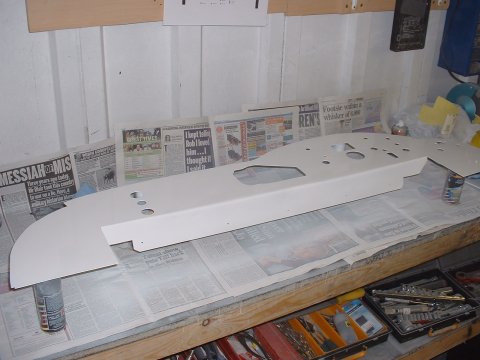
Whilst the bodywork is off being painted, it's a good time to redo the dashboard, and put everything where it's supposed to be. I've also decided to remove a whole bunch of things that I thought would be useful, but were actually just clutter - such as the ignition light, coolant pump switch, fuel pump switch, etc.
First step, clearly, is to make up a new blank, and here it is
I've taken a bit of a leap of faith and assumed that I can just use the old one as a template, and it'll magically line up with the bodywork when the time comes. Of course it's not that simple, as I've gone back to using the original mounting points instead of the ones that I had to use for the SVA friendly dash. Watch this space...
- March 22 -
Today I drilled, filed, jigsawed and emery clothed the various holes needed in the dash for the instruments and switches. I also spent a considerable amount of time cycling round Cambridge looking for a shop that sells sticky back plastic, as I have decided, wisely or not, that the dash is going to look fantastic in white, and I figured that sticky back plastic was the easiest way to achieve that goal.
But I guess no-one in Cambridge watches Blue Peter, because there was none to be had. So I bought primer and paint instead.
New Dash
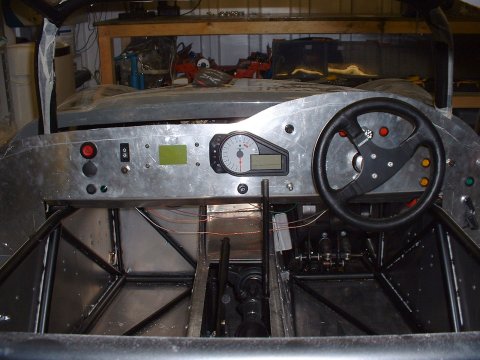
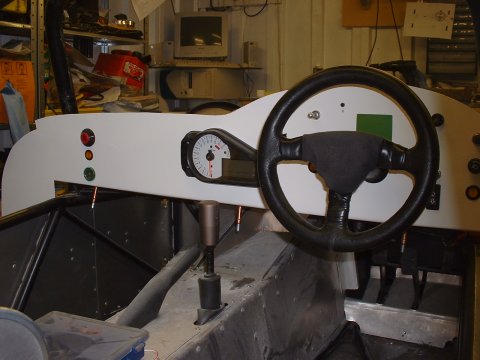
- March 26 -
Over this weekend I fitted out the dash and attached it with Clekos to the chassis. Of course, it looks fantastic, as this photo doesn't show very well
- March 27 -
Not such a productive evening. On Saturday, I'd found that I'd put the hole for the CBTech dash too close to the hole for the steering column, and had to make it bigger, leaving an unsightly hole. So today I made a little rubber insert to fill the hole. I also made a little bracket under the scuttle panel to hold the remote garage plipper. If only everybody worked this hard.
This page last updated on: Sunday, Jul 16 2006
Date
aeroscreen
body
boot
brakes
chassis
cooling
clutch
dashboard
electrics
emissions
engine
exhaust
final drive
fuel system
gear shift
lubrication
mirrors
panelling
propshaft
reverse
seats
steering
suspension
throttle
trim
wheels
garage