home
introduction
build
sva tests
links
latest updates
Cooling
- February 10 -
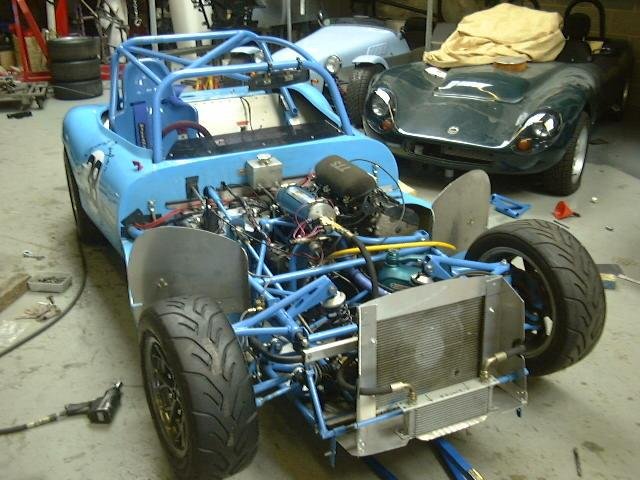
The cooling on the race car is standard fare - a Polo radiator and whatever hosing is necessary to do the job for the engine coolant. I liked the silicone hosing that I got for the 21, so I'll get more of the same for the Phoenix, except that I intend to do as many of the runs as possible from aluminium tube, rather than silicone, as it's lighter, cheaper and looks good too.
Collection time
- April 30 -
No cooler or pipes yet - they are still experimenting with the best layout, so they're going to wait until they're sure they've got a good arrangement before getting my pipes made up. Ian's car has got some ducting on the front now, to force air up through the cooler, and some shrouding to force air into the radiator as well.
Figuring out the cooling hose routing
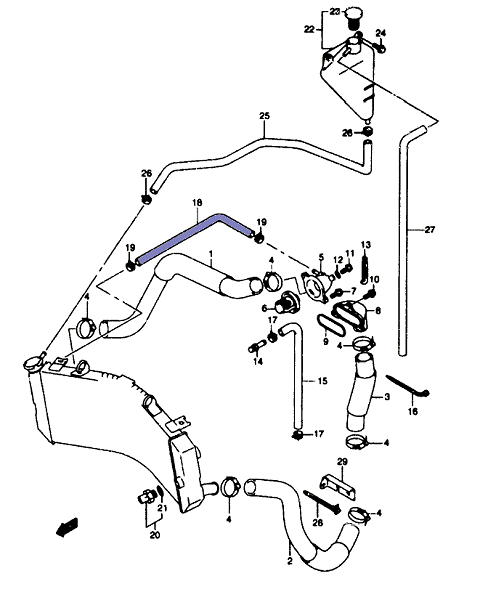
- September 3 -
The GSX-R 1000 cooling system from the service manual looks like this:

So nothing unexpected, but the diagram omits a (small diameter) feed that goes from the top of the thermostat housing and off to some unknown place. The top of the radiator has 2 small feeds, one of which must be to the reservoir, which would seem to suggest that the other feed is the one from the top of the thermostat. But why would there be 2 feeds from the thermostat to the radiator? Is the small one a bleed that ensures that some coolant is always flowing past the thermostat? If this was a K-series in an Elise, that would be a splendid idea, to eliminate the infamous thermostat bounce problem, but in this engine the thermostat is on the hot side of the engine, not the cold, so it shouldn't be an issue. Ideas anyone?
To complicate matters, the Polo rad I'll be using only has one small feed to the GSX-R's 2, and I have no idea how many inlets and outlets the GSX-R reservoir tank has, nor how many my tank will have, once I get around to finding one.
So, for the time being, my plan is this. Thermostat goes to top of radiator. Bottom of radiator goes to electric water pump. Pump goes to block. The bypass feed from the cylinder head is going to feed into the top of the reservoir tank, and the reservoir tank will feed into the top of the radiator. The little thermostat feed is also going to the top of the reservoir tank, tee-ing into the bypass feed.
This arrangement uses the minimum number of adaptors and joins, but increases the pipe run of the bypass from about 10" of narrow gauge pipe to something more like 3ft of narrow gauge pipe, and 4ft of fat pipe. So I want someone to discourage me really, as I'm not convinced that the little Corrado VR6 water pump is going to deal with that very well.
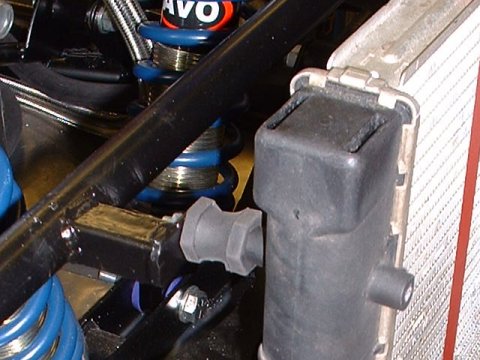
Mounting the radiator
- September 4 -
Whatever, the hoses turn out to be, I'll need to mount the radiator, so I got on with this.
The top mounts I made from a spare bit of aluminium tubing, cut and bent as needed, and one of the lower mounts I made from a scrap of steel left over from my welding practice. It's all nice and firm, although I note from the picture that the lower mount adaptor hasn't quite sat properly. The nuts are just washers, by the way, until I find myself a little section of tube to make a spacer from.
I can't figure out a way to do the final mount in a way that would make any difference to the integrity of the setup (it's in a bit of no man's land), so I'll leave it for now to see if inspiration strikes me.
Figuring out the cooling hose routing
- September 5 -
A-hah! I found a parts diagram in the parts catalogue
The little blighter I've been worried about is the purple one. It's described as "Water Bypass No.2" I wonder what it's bypassing? Inside the thermostat housing, the feed is tapped off the same place as the main radiator feed. The main feed goes to the bottom of the radiator, and the bypass goes to the top.
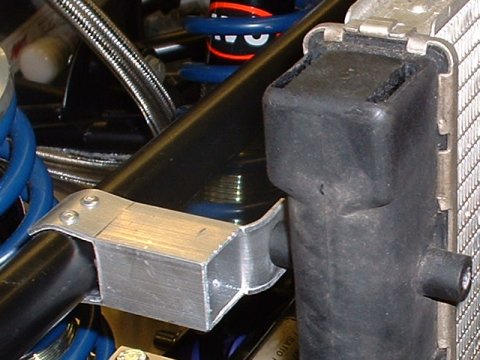
Proper radiator mounts
- September 11 -
This afternoon I did proper welded-on brackets for the radiator instead of the pop-riveted aluminium ones. I took the opportunity to space the radiator out slightly from the chassis, on small exhaust bobbins, which gives me room to mount the fan behind the radiator instead of in front. This has the primary advantage, for me, that I can mount the oil cooler in front of, and close to the radiator, but it also, apparently, presents less of an obstruction to airflow through the radiator when the fan isn't spinning.
More hose fiddling
- September 18 -
I received my Davies Craig electric water pump yesterday. bought off an ad on the Westfield Boardroom (thanks Paul  ), so I spent a couple of hours fitting it, and associated hoses. In the end, the best place to fit it, for good pipe runs, was to mount it vertically on the passenger footwell panel, on some small metric exhaust bobbins.
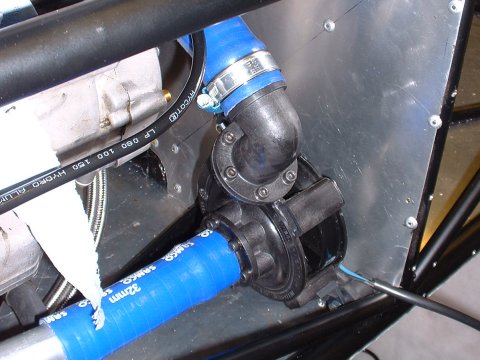
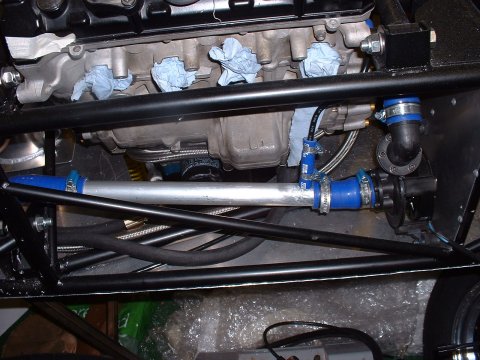
I also spent a little while making up the bits I'd need for the T-piece where the thermostat bypass (#1) comes into the bottom hose before the pump.
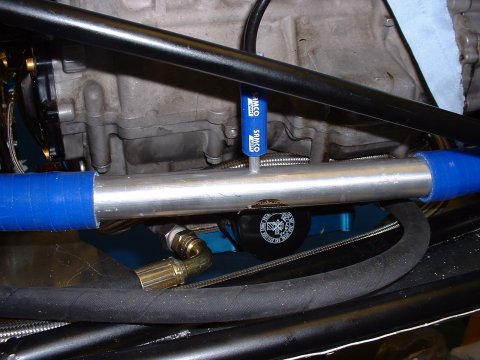
It was roughly at that time that I figured I could actually make the whole bypass pipe from the flexible 8mm aluminium tube I had left over from making the fuel pipe.
So I did! Took a couple of goes to get it right, but I'm pleased with the result. I borrowed Steve's brake flaring tool again to put some bulges in the end, and it all looks jolly spiffing. You'll have to take my word for it, as I haven't got any good pictures of it.
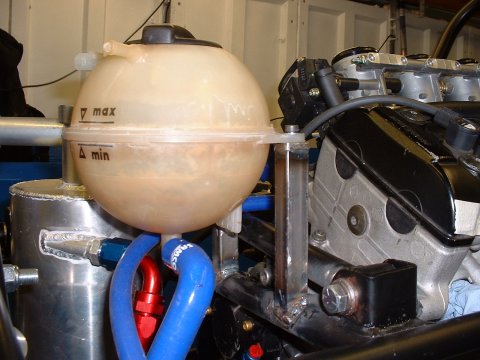
I sort of got bored after that, and before I can much more on the hoses I need to wait until mid week when my coolant tank (a Passat one, bought off eBay) arrives, so I decided to move onto something else. Oooh - one useful tip though. Silicone hose is really really hard to chop to length square, even if you wrap masking tape round it to give you a line to cut to. But if you put a scrap of aluminium tube up the middle of the hose to cut against, then it's really easy. I used a cheap bread knife - the serrated kind - gave a nice clean, quick cut. A Stanley blade is hopeless.
By the way, if anyone knows somewhere where I can get my 32mm aluminium hose joiners swaged (to put a hose retaining bead around each end) then drop me a line. Frost do a nice machine, but it's a bit pricey
Welding woe
- September 25 -
I spent an unreasonable amount of time today making up some turrets on which to mount my Passat cooling tank (£4 off eBay ) Making the turrets themselves was OK, but welding them onto the chassis was a good deal of trouble. The welds initially looked OK, but when I realised that one of the turrets wasn't quite straight and hit it with a large hammer, it just fell off. The other one followed suit.
I blamed the welding machine, but in retrospect it seems rather more likely that they didn't take because I made no effort to clean the metal before welding it...
Lumiweld!
- September 29 -
Earlier in the week I ordered a Lumiweld kit from Frost - it's an aluminium brazing kit, and I wanted to try it to make up the 2 T-pieces I need in the cooling system - a 32-8-32mm one where the thermostat bypass comes into the bottom hose, and a 32-16-32mm where the coolant expansion tank feeds into the same hose. The instructions for the kit are fairly involved, but after a practice run it all fell in place, so I got on with brazing up the 2 T-pieces. Let's hope the joins are strong enough - they seem to be airtight, but it's impossible to know at this point whether or not they'll be subject to any vibration loads when the car is actually running, which may be enough to cause them to fall apart.
Less welding woe
- October 6 -
Having ground all the useless weld metal off the turrets and chassis, I had another go at the cooling tank turrets today - success! One of them took a couple of goes, but I think that's because I wasn't aiming the wire right, and so not enough heat was making into the chassis tube. Anyway, they're done now - they're not pretty welds, but they're strong.
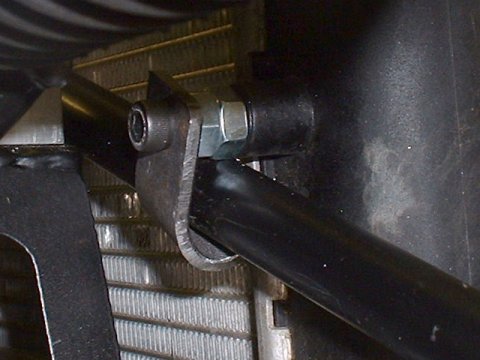
Fitting a drain point
- October 9 -
Inspired by the hole in the floor to allow me to drain the oil tank, I thought it would be a good idea to do something similar for the coolant system - especially as I remember this being a really time consuming job on the 21, which had no way to drain the system apart from pulling off a radiator hose.
So, in the space behind the radiator, in the lower hose, I fitted a hose adaptor. You'd normally screw a temperature sensor into one of these (and I have another one for exactly that purpose on the high pressure side of the pump), but I'm just going to fit a blanking plug into it.
And here's me wondering where all my money is going!
Exhausting work
- October 13 -
Tim asked, very diplomatically, last night how exactly I was going to fit the exhaust pipes and the #1 coolant bypass in the same physical space. I said I'd think of something. 'Something' turns out to be moving the #1 bypass by about 12" to the right...
I tried doing the lumiwelding properly this time - I tinned the surface, abraded it back, and then tried to build up a fillet underneath the tinned layer. Unfortunately gravity took over, and a very large quantity of molten lumiweld flowed under the skin, and formed a sort of saggy bulging blister some considerable distance from the place I wanted it. I have taken this as a sign to not bother doing it properly in the future.
This page last updated on: Sunday, Jul 16 2006
Date
aeroscreen
body
boot
brakes
chassis
cooling
clutch
dashboard
electrics
emissions
engine
exhaust
final drive
fuel system
gear shift
lubrication
mirrors
panelling
propshaft
reverse
seats
steering
suspension
throttle
trim
wheels
garage